
User guide


Hardware options installation 71
5.
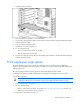
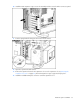
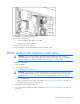
Install the expansion board.
6. Close the expansion slot latch to secure the board.
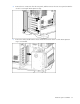
7. Connect any required internal cables to the expansion board. Refer to the documentation that ships
with the expansion board.
8. Close the expansion board retainer.
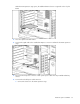
9. Install the access panel (on page 28).
10. Do one of the following:
o Close or install the tower bezel, as needed.
o Slide the server back into the rack.
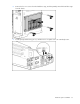
11. Connect any required external cables to the expansion board. Refer to the documentation that ships
with the expansion board.
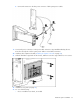
PCI-X expansion cage option
The PCI-X expansion cage option converts one PCI Express slot into two PCI-X slots for additional
expansion board capability. The PCI-X expansion cage does not support expansion boards with internal
cabling requirements.
This option provides health monitoring of the riser fans which appear as fans 5 and 6.
In addition, both expansion boards installed in the PCI-X expansion cage appear as slots 1 and 2.
To install the component:
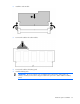
CAUTION: To prevent damage to the server or expansion boards, power down the server
and remove all AC power cords before removing or installing the PCI-X expansion cage.
1. Power down the server (on page 25).
2. Do one of the following:
o Open or remove the tower bezel, as needed ("Open or remove the tower bezel" on page 26).
o Remove the server from the rack (on page 26).
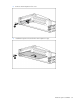
3. Remove the access panel (on page 27).