
Specifications


Unpacking the Appliance
21Continuous Access Storage Appliance Installation and Maintenance Guide
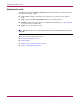
What to do next
After you unpack the appliance:
1. Connect all cables on the appliance.
2. Power on the appliance.
3. Set the current date and local time on the nodes (and switches, if applicable). (See “Setting
the current date and local time” on page 31.)
4. Set the network properties using the CASA Setup Utility. (See “Setting network
properties” on page 42.)
5. Initialize the user database to authenticate the user interface and the command line
interface (CLI). (See “Initializing the user database” on page 48.)
6. Configure the hosts and storage arrays that you connect to the appliance. (See
“Configuring Hosts and Storage Arrays” on page 53.)
7. Implement path failover, if applicable. (See Implementing Path Failover on page 69.)
8. Complete the wiring between the appliance and the hosts and storage arrays. (See
“Connecting the Appliance to Hosts and Storage Arrays” on page 81.)