
Specifications
Troubleshooting Resources 4–53
4. Decline the auto-configure option to allow testing of a specific disk drive.
5. Decline the default settings.
NOTE: To ensure that DILX accesses the entire disk space, enter 120 minutes or more in the
next step. The default setting is 10 minutes.
6. Enter the number of minutes desired for running the DILX Basic Function test.
7. Enter the number of minutes between the display of performance summaries.
8. Choose to include performance statistics in the summary.
9. Choose to display both hard and soft errors.
10. Choose to display the hex dump.
11. Accept the hard-error limit default.
12. Accept the soft-error limit default.
13. Accept the queue depth default.
14. Choose option 1 to run a Basic Function test.
15. Enable phase 1, the write test.
16. Accept the default percentage of requests that DILX issues as read requests during
phase 2, the random I/O test.
DILX issues the balance as write requests.
17. Choose ALL for the data patterns that DILX issues for write requests.
18. Perform the initial write pass.
19. Allow DILX to compare the read and write data.
20. Accept the default percentage of reads and writes that DILX compares.
21. Enter the unit number of the specific disk drive to tested.
For example: to test D107, enter the number 107.
22. If testing more than one disk drive, enter the appropriate unit numbers when prompted.
Otherwise, enter “n” to start the test.
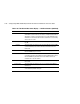
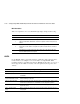
NOTE: Use the command sequences shown in Table 4–20 to control the write test.