
Specifications

Troubleshooting Resources 4–3
Typical Installation Troubleshooting
Checklist
The following checklist provides a general procedure for diagnosing the controller and its
supporting modules. By following this checklist, many of the problems that occur in a
typical installation will be identified. After identifying a problem, use Table 4–1 to
confirm the diagnosis and fix the problem.
If an initial diagnosis points to several possible causes, use tools in the “Utilities and
Exercisers” section described later in this chapter to further refine the diagnosis. If a
problem cannot be diagnosed using the checklist and tools, call Compaq customer service
for additional support.
To troubleshoot the controller and its supporting modules:
1. Check the power to the cabinet and its components.
■ Are power cords connected properly?
■ Is power within specifications?
2. Check the component cables.
■ Are bus cables to the controllers connected properly?
■ Are ECB cables connected properly?
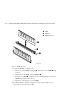
3. Check each program card to make sure it is fully seated.
4. Check the OCP and devices for LED codes.
See “Flashing OCP Pattern Display Reporting,” page 4-19, and “Solid OCP Pattern
Display Reporting,” page 4-21, to interpret the LED codes.
5. Connect a local terminal to the controller and check its configuration with the
following command:
SHOW THIS_CONTROLLER FULL
Make sure that the ACS version loaded is correct and that pertinent patches are
installed. Also, check the status of the cache module and its ECB.
In a dual redundant configuration, check the “other controller” with the following
command:
SHOW OTHER_CONTROLLER FULL
6. Using FMU, check for “last failure” or “memory-system failure” entries.