
Installation guide


Installing on Windows NT/2000
2.2 Installing WEBES
Rev. 1/9/01–A
Web-Based Enterprise Service Installation Guide 2–7
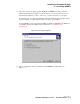
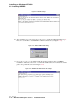
If you log on too quickly, the system RPC service will not have finished starting, as
shown:
Setup failed to launch installation engine:
The RPC server is unavailable.
If you see this message, run the installation kit .exe file again to continue.
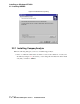
7. The WEBES welcome message appears. Click OK.
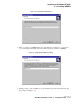
8. The WEBES license agreement appears. Read the agreement and click Yes.
9. The installation notifies you if DSNlink is not installed on your system and asks if you
wish to abort the installation in order to install DSNlink. Select YES to proceed or NO to
abort the installation.
DSNlink provides System Initiated Call Logging (SICL) notification to your service
provider. Notification also can occur when you install WEBES as part of the Compaq
Remote Support Service (CRSS) package. There are dialogs later in this installation that
make the WEBES/CRSS combination operate correctly.
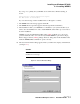
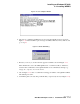
10. The customer information dialog appears. Enter your name and company, and click Next
(see Figure 2–3).
Caution
Do not leave fields blank during WEBES installation. Blank fields may result in
installation error messages.
Figure 2–3 Customer Information Dialog