Compaq DAT AutoLoader Reference Guide Third Edition (January 2000) Part Number 326817-003 Compaq Computer Corporation
Notice The information in this publication is subject to change without notice. COMPAQ COMPUTER CORPORATION SHALL NOT BE LIABLE FOR TECHNICAL OR EDITORIAL ERRORS OR OMISSIONS CONTAINED HEREIN, NOR FOR INCIDENTAL OR CONSEQUENTIAL DAMAGES RESULTING FROM THE FURNISHING, PERFORMANCE, OR USE OF THIS MATERIAL.
Contents About This Guide Text Conventions.......................................................................................................vii Symbols in Text....................................................................................................... viii Symbols on Equipment............................................................................................ viii Rack Stability .........................................................................................................
iv Chapter 2 Installation DAT AutoLoader Installation .................................................................................. 2-1 Software and Tool Requirements...................................................................... 2-1 Setting the SCSI ID........................................................................................... 2-3 Switch Settings......................................................................................................... 2-3 Preparing the Computer ..
v Chapter 5 Cleaning Importance of Routine Cleaning.............................................................................. 5-1 Errors Resulting from Cleaning Neglect.................................................................. 5-2 Importance of Compaq-Approved Tape Cassettes .................................................. 5-3 DAT AutoLoader Cleaning Recommendations....................................................... 5-3 Procedure for Cleaning the Heads in Stacker Mode ....................
vi Appendix C Specifications Dimensions and Weight .......................................................................................... C-1 Temperature and Humidity Range .......................................................................... C-2 Power Requirements ............................................................................................... C-2 Air-Cooling Requirement .......................................................................................
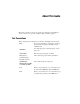
About This Guide This guide is designed to be used as step-by-step instructions for installation and as a reference for operation, troubleshooting, and future upgrades. Text Conventions This document uses the following conventions to distinguish elements of text: Keys Keys appear in boldface. A plus sign (+) between two keys indicates that they should be pressed simultaneously. USER INPUT User input appears in a different typeface and in uppercase. FILENAMES File names appear in uppercase italics.
viii Compaq DAT AutoLoader Reference Guide Symbols in Text These symbols may be found in the text of this guide. They have the following meanings. WARNING: Text set off in this manner indicates that failure to follow directions in the warning could result in bodily harm or loss of life. CAUTION: Text set off in this manner indicates that failure to follow directions could result in damage to equipment or loss of information.
About This Guide Any surface or area of the equipment marked with these symbols indicates the presence of a hot surface or hot component. If this surface is contacted, the potential for injury exists. WARNING: To reduce the risk of injury from a hot component, allow the surface to cool before touching. Power supplies or systems marked with these symbols indicate the equipment is supplied by multiple sources of power.
x Compaq DAT AutoLoader Reference Guide Getting Help If you have a problem and have exhausted the information in this guide, you can get further information and other help in the following locations. Compaq Technical Support In North America, call the Compaq Technical Phone Support Center at 1-800-OK-COMPAQ. This service is available 24 hours a day, 7 days a week. For continuous quality improvement, calls may be recorded or monitored.
Chapter 1 Overview Introduction to the DAT AutoLoader The Compaq 20/40 Gigabyte (GB) DAT 8-Cassette AutoLoader combines a changer mechanism with a DDS-4 cassette drive mechanism. The DAT AutoLoader houses up to eight DDS cassettes in a removable magazine, which enables you to back up weeks and months of data automatically. High-speed file retrieval and cassette swapping typically allow access to any file in an average of 95 seconds.
1-2 Compaq DAT AutoLoader Reference Guide Features The Compaq 20/40 GB DAT 8-Cassette AutoLoader offers the following features: ■ Any DDS-1, DDS-DC, DDS-2 DDS-3 or DDS-4 cassette can be read or written to, whether data compression is switched on or off. ■ The drive is capable of additional sophisticated techniques of error-correction for dealing with cassettes, which are not up to specification. ■ When using DDS-4 media, the drive reads and writes the DDS-4 format with a much higher capacity.
Overview The SCSI Interface The Compaq 20/40 GB DAT 8-Cassette AutoLoader uses SCSI-2 as the interface to connect the host system. IMPORTANT: In the information that follows, the term SCSI implies SCSI-2. The SCSI implementation provides the DAT AutoLoader with a standard set of features and functions.
1-4 Compaq DAT AutoLoader Reference Guide Projected Duty Cycle The projected duty cycle of the Compaq 20/40 GB DAT 8-Cassette AutoLoader is an important consideration in determining the amount of time required for backup of a given system, as well as how often it is necessary to clean the tape drive’s read/write heads. For example, a nightly, unattended complete 18-GB backup is well within the capacity of one 20/40 GB DAT drive.
Overview The DAT AutoLoader uses jumper pins and/or dip switches for settings. Some hardware settings may be overridden by way of software. Consult your backup application software documentation for the data compression enabling and disabling procedure. For information on jumper pin settings for data compression, see “Configuring the AutoLoader” in Chapter 2.
1-6 Compaq DAT AutoLoader Reference Guide DDS Logo Media To identify computer-grade DDS media easily, look for the DDS logos (See Figure 1-2), including ! DDS-1, " DDS-2, # DDS-3, and $DDS-4. These indicate that the media meets the DDS specifications laid down by the ECMA, ISO/IEC and ANSI standards. 1 2 3 4 Figure 1-2. DDS Logo Media The Media Recognition System (MRS) enables drives to identify DDS-grade media.
Overview Write-Protecting a Cassette IMPORTANT: The cassette log, which contains a history of usage of the cassette, is updated during the unload procedure. If the cassette is write-protected, the cassette log will not be updated and will be inaccurate. Cassettes can be write-protected by ! sliding the tab on the rear of the cassette to the left so that the hole is open (See Figure 1-3). In this state, data can be read from the cassette but not written to it.
1-8 Compaq DAT AutoLoader Reference Guide ■ Computer performance — The lower the performance of the computer, the more likely that streaming cannot be maintained and that an increase in the number of passes over given areas of a cassette will occur. ■ Backup Software — The backup software may frequently access certain areas of a cassette, or there may be a high system overhead that can cause streaming to stop. Both of these factors increase the number of cassette passes in a given area.
Chapter 2 Installation DAT AutoLoader Installation This chapter describes the procedure to install a Compaq 20/40 GB DAT 8-Cassette AutoLoader in a Compaq computer. In addition, at the end of the chapter there are instructions for connecting the tabletop DAT AutoLoader to a Compaq computer. Installation involves the following steps: 1. Configuring the DAT AutoLoader 2. Preparing the computer 3. Installing the DAT AutoLoader 4. Reassembling the computer 5.
2-2 Compaq DAT AutoLoader Reference Guide ■ Compaq SmartStart and Support Software CD ■ Configuring the AutoLoader The default hardware settings are set for a Compaq system (see Figure 2-1). The settings in the DAT AutoLoader can be changed if required by a particular system. Figure 2-1.
Installation Setting the SCSI ID Each SCSI device on the same SCSI bus must have a unique SCSI ID. Use the jumper block located on the back of the DAT AutoLoader to set the SCSI ID. For SCSI ID jumper settings see Table 2-2. Table 2-2 SCSI Jumper Pins SCSI ID Bit 2 Bit 1 Bit 0 0 0 0 0 1 0 0 1 2 0 1 0 3 0 1 1 4 1 0 0 5 1 0 1 6 1 1 0 7* 1 1 1 Note: SCSI ID 7 is reserved for the SCSI controller.
2-4 Compaq DAT AutoLoader Reference Guide Figure 2-2. AutoLoader configuration switches Table 2-3 Switch Settings Switch Number Description Default 1 Reserved OFF 2 Reserved OFF 3 Reserved OFF 4 Reserved OFF 5 Terminator Power OFF 6 Reserved OFF 7 DC Control-1 OFF 8 DC Control-2 OFF Note: Switch 1 must remain in the OFF position.
Installation Default setting compression at power-on enable the host to control compression. Table 2-4 Data Compression Definitions DC Control-1 DC Control-2 Definition OFF OFF Compression disabled at power-on. The host is allowed to control compression. OFF ON Compression disabled at power-on. The host is not allowed to control compression. ON OFF Compression enabled at power-on. The host is allowed to control compression. ON ON Compression enabled at power-on.
2-6 Compaq DAT AutoLoader Reference Guide Preparing the Computer CAUTION: Electrostatic discharge (ESD) can damage electronic components. Be sure you are properly grounded before beginning this procedure. See Appendix B, “Electrostatic Discharge” for further information. To prepare the computer: 1. Perform a normal system shutdown. 2. Turn OFF the computer and all peripheral devices. 3. Disconnect the AC main power cord from the outlet, then from the computer and from all peripheral devices. 4.
Installation 2. Connect the SCSI signal cable and the power cable (supplied). (See Figure 2-5.) 3. Carefully slide the DAT AutoLoader the remainder of the way in, adjusting the connecting cables if needed to allow the AutoLoader to be fully inserted. 4. Insert two screws in the front plate using a Torx-15 screwdriver. To install the Autoloader without drive rails: 1. Remove all screws from drive rails using a Torx-15 screwdriver. 2. Slide the AutoLoader partially into an available removable media bay.
2-8 Compaq DAT AutoLoader Reference Guide Figure 2-5. Connecting signal and power cables Reassembling the Computer To reassemble the computer: 1. Replace the access panel. 2. Reconnect the peripheral devices to the computer. WARNING: To reduce the risk of electric shock or damage to your equipment, do not disable the power cord grounding feature. This equipment is designed for connection to a grounded (earthed) power outlet. The grounding plug is an important safety feature. 3.
Installation Connecting the Tabletop AutoLoader For the tabletop DAT AutoLoader, follow the procedures below to connect to a Compaq computer: 1. Set the SCSI ID using the switch at the rear of the DAT AutoLoader (See Figure 2-6). The SCSI ID switch can be adjusted by using a pencil or similar object to click the “+” and “-” buttons. The SCSI ID default is 6. 1 Figure 2-6. External AutoLoader SCSI and options switches 2.
2-10 Compaq DAT AutoLoader Reference Guide NOTE: The Compaq-provided LVD/SE terminator will be lit solid red in the single-ended mode. The color red does not indicate an error. (See Figure 2-7.) 1 Figure 2-7. Terminator IMPORTANT: To “daisy chain” another DAT AutoLoader, remove the external terminator. Connect the SCSI cable between the AutoLoaders and then connect the terminator to the unused connector on the second AutoLoader. 5. Connect the power cord.
Chapter 3 Installing Software Drivers The following operating environments support the AIT tape drives: ■ Microsoft Windows NT ■ Novell NetWare ■ Compaq Tru64 UNIX ■ OpenVMS ■ SCO OpenServer ■ SCO UnixWare ■ SunSoft Solaris ■ Banyan VINES Device Drivers Drivers are located on the Support Software Diskettes and on the Compaq SmartStart and Support Software CD.
3-2 Compaq DAT AutoLoader Reference Guide Microsoft Windows NT Drivers for the SCSI controllers and tape drive hardware are located on Support Software Diskettes and on the Compaq SmartStart and Support Software CD. The Support Software ships with each computer or can be downloaded from the Compaq website. The software tape device driver is located either with your tape backup software or with the operating system.
Installing Software Drivers Novell NetWare Drivers for the SCSI controller and tape drive hardware are located on Support Software Diskettes and on the Compaq SmartStart and Support Software CD. The Support Software ships with each computer or can be downloaded from the Compaq website. The software tape device driver is located either with your tape backup software or with the operating system.
3-4 Compaq DAT AutoLoader Reference Guide The SCSI.RDM file on the NSSD diskette gives complete instructions on how to load these drivers and troubleshoot any problems. Compaq Tru64 UNIX Drivers for the SCSI controller and tape drive hardware are located on Support Software Diskettes and on the Compaq SmartStart and Support Software CD. The Support Software ships with each computer or can be downloaded from the Compaq website. Software support is version 4.0F or later.
Installing Software Drivers Drivers for the SCSI controllers and tape drive hardware are located on the Support Software Diskettes and on the Compaq SmartStart and Support Software CD. The Support Software ships with each computer or can be downloaded from the Compaq website. The software tape device driver is located either with your tape backup software or with the operating system.
3-6 Compaq DAT AutoLoader Reference Guide 3. Remove the default tape device from controller 0, ID 2. 4. Add the new tape drive to the configuration. 5. Relink the kernel and reboot the computer to multi-user mode. 6. Run the hwconfig command to ensure the new tape configuration is correct. The information appears in a line such as: %tape - - - type= S ha=0 id=2 lun=0 ht= ... In the above example, “id=2” indicates that the SCSI ID is 2.
Installing Software Drivers EFS for SCO UnixWare is available on the Compaq Support Software CD and on Compaq SmartStart. The Compaq EFS for SCO UNIX is installed and configured automatically during a SmartStart installation. Compaq SmartStart and Support Software ships with each computer or can be downloaded from the Compaq website. SunSoft Solaris The table below provides information on identifying appropriate drivers for SCSI controllers.
3-8 Compaq DAT AutoLoader Reference Guide Banyan VINES The table below provides information on identifying appropriate drivers for Compaq SCSI controllers. Table 3-6 Banyan VINES Controller ■ 32-Bit Fast SCSI-2 Controllers ■ 32-Bit Fast-Wide SCSI-2 Controllers ■ Wide-Ultra SCSI Controllers ■ LVD Wide SCSI Controllers Software Driver Information Refer to the documentation from Banyan regarding the “Compaq Fast SCSI-2 / 53C710 EISA SCSI” driver.
Chapter 4 Operation This chapter describes the following operations of the Compaq DAT AutoLoader: ■ Introduction to magazines and cassettes ■ Loading the magazine with cassettes ■ Loading the magazine into the AutoLoader ■ Ejecting magazines and cassettes ■ Modes of operation ■ Identifying the front panel ■ LCD message categories ■ LCD menu screens Introduction to Magazines and Cassettes When purchasing DDS cassettes: ■ Always use cassettes labeled “DDS Media Recognition System” in the d
4-2 Compaq DAT AutoLoader Reference Guide Labeling Cassettes and the Magazine Each cassette and the magazine should be labeled prior to use. To label a cassette follow the manufacturer’s instruction included with each cassette. To label the magazine, place the label on 1 space provided (see Figure 4-1). Figure 4-1. Magazine identification To prevent jams: ■ Insert cassettes all the way into the magazine. ■ Ensure the label corners are affixed firmly on the cassettes and magazine ➊.
Operation IMPORTANT: If the magazine is loaded any other configuration the AutoLoader will not recognize all the cassettes. Eight-Cassette Configuration Compaq recommends using this configuration. Place cassettes in all eight positions. Eight data cassettes can be used or seven data cassettes and one cleaning cassette (placed in position 8 only) can be used. Figure 4-2. Magazine with tape positions 6 8 1 5 4 2 3 Figure 4-3.
Compaq DAT AutoLoader Reference Guide Seven-Cassette Configuration Cassettes are inserted in all positions except position 8. 5 4 1 2 Rear 6 Front 7 3 Figure 4-4. Seven cassette positions Single-Cassette Configuration 8 Rear For this operation the cassette must be inserted in position 8. It can be either a data cassette or a cleaning cassette. Front 4-4 Figure 4-5.
Operation To Load the Magazine With Cassettes For backup and restore place labeled cassettes into the magazine as described below: Figure 4-6. Inserting cassettes 3, 2, and 1 into the magazine (Slot 3) 1. Insert the cassettes into the magazine positions in the following order: 3, 2, and 1 (in slot 3). See Figure 4-6. NOTE: Insert the DDS4 logo side up with the logo end going in first. Figure 4-7. Inserting cassettes 4,5,6 and 7 into the magazine (Slot 1) 2.
4-6 Compaq DAT AutoLoader Reference Guide 3. For an eight-cassette configuration, insert a cassette in position 8. CAUTION: The cassettes must be loaded in the order they were originally placed during backup. Loading the Magazine into the AutoLoader Insert the magazine into the front opening on the AutoLoader in the direction of the arrow. The AutoLoader pulls the magazine in the rest of the way. Figure 4-8.
Operation Figure 4-9. Slide stopper 2. To remove cassettes in positions 1 through 5 use the access slots on the bottom of the magazine to slide the cassettes out the front of the magazine. 3. Turn the magazine opening slots up. Gently tap the unit until the cassettes in positions 6 and 7 drop to the bottom slots. 4. Repeat steps 1 and 2. 5. Press the magazine stopper down to pull the cassette from position 8.
4-8 Compaq DAT AutoLoader Reference Guide If the host sends an UNLOAD command (LOAD/UNLOAD with the LOAD bit set to 0), the same procedure is completed, but the magazine is not ejected at the end. If you press the Eject button during the 30 seconds when the DAT AutoLoader checks magazine positions following insertion of a magazine, the magazine is ejected immediately, even if Medium Removal Prevention is in force.
Operation Because the forced ejection may interrupt any operation, it is possible that the drive will not write EOD (End of Data) before the cassette is ejected. This will cause loss of data, and result in a cassette with an invalid format. However, it should still be possible to read such a cassette up to the point where the ejection interrupted the writing. 4. If no cassette is loaded in the drive, the DAT AutoLoader assumes that you want to eject the magazine.
4-10 Compaq DAT AutoLoader Reference Guide Front Panel Figure 4-10.
Operation Liquid Crystal Display (LCD) The LCD display provides information about the DAT AutoLoader. NOTE: The exact display shown can never occur; all the sections are shown at the same time to show their location. Figure 4-11.
4-12 Compaq DAT AutoLoader Reference Guide LCD Messages Front panel LCD messages are provided in list Table 4-1. Table 4-1 LCD Messages - Alphabetical Listing LCD Message Message Type Meaning Cassette Stuck In Drive Error A cassette is stuck in the drive. Cleaning in Process Status A cleaning cassette has been loaded into the drive mechanism and is cleaning the heads. The cleaning cassette will be automatically returned to the magazine when the cleaning cycle is complete.
Operation Table 4-1 LCD Messages - Alphabetical Listing continued LCD Message Message Type Meaning Erase Tape x Status The drive is erasing data from the cassette x where x represents the cassette number. Illegal Cassette Config Error This is an error message. A cassette was inserted in the magazine incorrectly. The magazine will be ejected with the incorrect cassette in position 7 or 8.
4-14 Compaq DAT AutoLoader Reference Guide Table 4-1 LCD Messages - Alphabetical Listing continued LCD Message Message Type Meaning Move Medium x => Mag Error Moves cassette x from the drive to the magazine, where x represents the cassette number. No Magazine Status There is no magazine in the AutoLoader. The DAT AutoLoader is ready for a magazine to be inserted. Read Tape x Status Cassette x is being read. x represents the number of the cassette.
Operation Table 4-1 LCD Messages - Alphabetical Listing continued LCD Message Message Type Meaning Space Tape x Status The drive is moving the cassette x media to a specific location on the media. x represents the cassette number. TSL10000 Self-Test Complete Status The DAT AutoLoader has performed its power-on self-test. Unload Tape x Status A cassette is being ejected from the drive and returned to the magazine. x represents the cassette number.
4-16 Compaq DAT AutoLoader Reference Guide LCD Menu Screens To enter the menu mode, press and hold the select button for 5 seconds. The AutoLoader will exit the menu mode if no button is pressed within a 5-second period. Table 4-2 LCD Menu Screens Menu Screen Features >Version Auto Load Unload Contrast Orientation Language The main menu screen. Pressing the Select button advances the arrow to the next item on the menu: Prdrives. TSL10000 SCSI ID#5 Ver.
Operation Table 4-2 LCD Menu Screens continued Menu Screen Orientation >Horizontal R-side down L-side down Language >English French German Spanish The orientation screen allows a different display orientation to be selected when the drive is mounted on a different axis. Pressing the Select button will advance the arrow to the next item on the menu. Pressing the Enter button will select that orientation. This is the language screen.
Chapter 5 Cleaning Reliable backup of your system is the product of at least four components: ■ A reliable tape drive ■ Quality tape cassettes ■ Regular backup schedule with backup media stored offsite ■ Routine tape drive maintenance The Compaq 20/40 GB DAT 8-Cassette AutoLoader is designed to operate reliably under worst case conditions; however, it requires simple routine maintenance to operate efficiently.
5-2 Compaq DAT AutoLoader Reference Guide drive is not cleaned regularly, however, up to 4 cleaning cycles may be necessary to fully clean the drive. Compaq recommends a routine cleaning schedule every 100 hours of use. In addition, the drive should be cleaned whenever the front panel LCD indicates. Not all tape drives require the same frequency of cleaning to keep them operating efficiently.
Cleaning Importance of Compaq-Approved Tape Cassettes Compaq-approved tape cassettes are thoroughly tested to meet high-quality standards. Before Compaq recommends a tape cassette, the quality and reliability of the magnetic media and the cassette are evaluated. Do not use unapproved tape cassettes because they may not be compatible with Compaq tape drives. See Chapter 1 for a list of Compaq-approved tape cassettes.
5-4 Compaq DAT AutoLoader Reference Guide Procedure for Cleaning the Heads in Stacker Mode 1. Place the cleaning cassette into one of the magazine positions (for example, position 8) and insert the magazine into the DAT AutoLoader. 2. Use the Select button to select the magazine position in which you placed the cleaning cassette. 3. Press the Enter button to load the cleaning cassette into the drive. The DAT AutoLoader will then automatically perform a cleaning cycle. 4.
Chapter 6 Troubleshooting If a problem occurs with the Compaq 20/40 GB DAT 8-Cassette AutoLoader, the first step is to try and establish whether the problem lies with the cassette, the DAT AutoLoader, the host computer and connections, or the way the system is being operated. Quick Checklist Listed below are some hardware and software related items that potentially could cause DAT AutoLoader failures.
6-2 Compaq DAT AutoLoader Reference Guide ■ Determine whether the Autoloader is the cause of the problem: ! The DAT AutoLoader heads have been cleaned within the last eight hours of use. ! Verify the DAT AutoLoader switches and jumpers have been set correctly. ! The power and signal cables are connected correctly and the controller is seated properly. ! If multiple SCSI devices are used, be sure that each device has a unique SCSI ID. ! The DAT AutoLoader passes the Compaq Diagnostics test.
Troubleshooting Installation Troubleshooting Follow the procedures in this section if the tape drive has not been operational since it was installed in the computer. Turn on the computer and insert the tape. Table 6-1 Installation Troubleshooting Problem Tape light on the tape drive does not turn on Tape light on the tape drive turns on but drive does not respond to commands System Configuration Utility does not recognize the tape drive Try This ■ Make sure the tape drive power cable is connected.
6-4 Compaq DAT AutoLoader Reference Guide Troubleshooting After Installation Follow the procedures in this section if the DAT AutoLoader has stopped operating: 1. Run the Diagnostics utility. 2. Clean the DAT AutoLoader heads, card, and magazine loaders. 3. Replace the tape cassette. 4. If multiple DAT AutoLoaders or tape drives are used, ensure that each tape drive has a unique SCSI ID. (Default=6) 5. Your DAT AutoLoader should be shipped from the factory with all terminators removed.
Troubleshooting For Microsoft Windows NT Systems NOTE: The following procedures apply only for Microsoft Windows NT 4.0 and above. 1. Confirm that the SCSI controller software driver has been installed and started. a. Use the Windows NT Setup program or SCSI Adapters applet on the Control Panel to determine if the driver is installed. b. Use the Devices or SCSI Adapters applet on the Control Panel to determine if the driver is started. c. If necessary, reinstall the driver. 2.
6-6 Compaq DAT AutoLoader Reference Guide For IBM OS/2 Systems The correct tape driver must be installed for the DAT AutoLoader to work with OS/2. Try the following: 1. Install the tape software again. 2. Make sure that a tape driver statement was added to the CONFIG.SYS file during the tape software installation procedure. If the tape driver statement is missing, edit the CONFIG.SYS file to add the statement. Refer to the tape software documentation for more information.
Troubleshooting Correcting Intermittent Failures If the DAT AutoLoader works only intermittently: 1. Clean the tape drive’s heads. 2. Run the Compaq Diagnostics Utility and the tape drive Diagnostics Utility. Follow the steps listed in the Installation section of this chapter for the Compaq and tape diagnostics programs. 3. If the tape backup procedure starts correctly but then stops with an error: a. Use test to check firmware revision level. b.
Appendix A Regulatory Compliance Notices Regulatory Compliance Identification Numbers For the purpose of regulatory compliance certifications and identification, your DAT AutoLoader is assigned a Compaq Series Number. The Compaq Series number for this product is: Series EO 2005 DDS4 External EOD 007 DDS4 Internal. The DAT AutoLoader Series Number can be found on the product label, along with the required approval markings and information.
A-2 Compaq DAT AutoLoader Reference Guide devices in both classes to bear a label indicating the interference potential of the device as well as additional operating instructions for the user. The rating label on the device shows which class (A or B) the equipment falls into. Class B devices have an FCC logo or FCC ID on the label. Class A devices do not have an FCC ID on the label. Once the class of the device is determined, refer to the following corresponding statement.
Regulatory Compliance Notices Declaration of Conformity for Products Marked with the FCC logo – United States Only This device complies with Part 15 of the FCC Rules. Operation is subject to the following two conditions: (1) this device may not cause harmful interference, and (2) this device must accept any interference received, including interference that may cause undesired operation. For questions regarding your product, contact: Compaq Computer Corporation P. O.
A-4 Compaq DAT AutoLoader Reference Guide Canadian Notice (Avis Canadien) Class B Equipment This Class B digital apparatus meets all requirements of the Canadian Interference-Causing Equipment Regulations. Cet appareil numérique de la classe B respecte toutes les exigences du Règlement sur le matériel brouilleur du Canada.
Regulatory Compliance Notices Japanese Notice Taiwanese Notice Compaq Confidential – Need to Know Required Writer: Debbie McRill Project: Compaq DAT AutoLoader Reference Guide Comments: Part Number: 326817-003 File Name: h-appa Regulatory Compliance Notices.
Appendix B Electrostatic Discharge To prevent damaging the system, be aware of the precautions you need to follow when setting up the system or handling parts. A discharge of static electricity from a finger or other conductor may damage system boards or other static-sensitive devices. This type of damage may reduce the life expectancy of the device. To prevent electrostatic damage, observe the following precautions: ■ Avoid hand contact by transporting and storing products in static-safe containers.
B-2 Compaq DAT AutoLoader Reference Guide Grounding Methods There are several methods for grounding. Use one or more of the following methods when handling or installing electrostatic-sensitive parts: ■ Use a wrist strap connected by a ground cord to a grounded workstation or computer chassis. Wrist straps are flexible straps with a minimum of 1 megohm ± 10 percent resistance in the ground cords. To provide proper ground, wear the strap snug against the skin.
Appendix C Specifications Dimensions and Weight Table C-1 Dimensions and Weight Dimension Internal AutoLoader Tabletop AutoLoader Height 82.5 mm 3.50 in 109.5 mm 4.31 in Width 146 mm 5.75 in 211 mm 8.31 in Depth 241.6 mm 9.51 in 295.5 mm 11.63 in Weight 2.4 kg 5.28 lbs 5 kg 11 lbs Compaq Confidential – Need to Know Required Writer: Debbie McRill Project: Compaq DAT AutoLoader Reference Guide Comments: Part Number: 326817-003 File Name: j-appc Specifications.
C-2 Compaq DAT AutoLoader Reference Guide Temperature and Humidity Range Table C-2 Temperature and Humidity Actions Temperature Humidity Operating 5°C to 40°C (∆T < 10ºC/h) 20 to 80% RH, non-condensing Maximum wet bulb temperature = 26ºC Non-Operating (mech.) -40°C to 70°C (∆T < 20ºC/h) 5 to 95% RH (∆T < 30ºC/h) Non-Operating (tape) -40°C to 45°C (∆T < 20ºC/h) 20 to 80% RH (∆T < 30ºC/h) NOTE: Do not cover fan. The tape drive can malfunction if the internal temperature rises too high.
Specifications Suspended Particulate Table C-5 Suspended Particulate Action Operating Feature 3 Less than 150 microgram/m Based sampling period 24 hours Compaq Confidential – Need to Know Required Writer: Debbie McRill Project: Compaq DAT AutoLoader Reference Guide Comments: Part Number: 326817-003 File Name: j-appc Specifications.
Index A C Advanced SCSI Programming Interface (ASPI) 3-3 driver 3-3 air-cooling requirement C-2 ANSI 1-5 ARCserve from Compaq 3-3 ASPI support 3-3 AutoLoader operation troubleshooting 6-4 avoiding jams 4-2 cables signal 2-9 Canadian Notice (Avis Canadien) A-4 cassettes Compaq approved 1-5 compatibility 1-5 configurations in a magazine 4-2 DDS formats 1-2, 1-5, 4-1 DDS Logo Media 1-6 DDS Logo Media, illustrated 1-6 eight cassette positions, illustrated 4-4 forcing ejection 4-8 formats 1-5 identification
2 Compaq DAT AutoLoader Reference Guide seven cassette positions, illustrated 4-4 single cassette position, illustrated 4-4 standards 1-5 tape log 1-7 troubleshooting 6-1, 6-2 write-protecting 1-7 CE Marking A-4 cleaning cycle 5-3 errors from neglect 5-2 importance of approved tapes 5-3 importance of routine 5-1 procedures in random mode 5-4 procedures in stacker mode 5-4 random mode 5-4 recommendations 5-3 recommended schedule 5-2 stacker mode 5-4 whitepapers on 5-1 cleaning the DAT AutoLoader and freque
Index environmental conditions 1-7 EOD 4-9 ESD See electrostatic discharge European Union Notice A-4 Extended Feature Supplement See EFS Compq authorized resellers, telephone numbers x technical support telephone numbers x http://www.compaq.
4 Compaq DAT AutoLoader Reference Guide LCD menu screens 4-16 Auto Load 4-16 Contrast Adjustment 4-16 Language 4-17 Orientation 4-17 TSL9000 SCSI ID#5 Ver.
Index proper handling B-1 storing B-1 transporting B-1 power requirements C-2 problems See troubleshooting R random mode 4-9, 5-4 cleaning 5-4 read or write errors 5-2 recommendations cleaning 5-3 regulatory compliance identification number A-1 removing cassettes from the magazine 4-6 RJ-45 receptacle viii S SCO OpenServer 3-1, 3-4 software driver information 3-5 troubleshooting 6-5 SCO UnixWare 3-1, 3-6 drivers for hardware 3-6 drivers for SCSI controller 3-6 drivers for software 3-6 SCSI commands ENABL
6 Compaq DAT AutoLoader Reference Guide MRS 6-1 Novell NetWare 6-4 operating problems 6-6 quick checklist 6-1 SCO OpenServer 6-5 software 6-2 Windows NT 6-5 T tabletop AutoLoader installation 2-9 SCSI ID 2-9 tape drive switch configuration 2-3 defaults 2-3 illustrated 2-4 TapeAlert 1-2 technical support x telephone numbers x temperature range C-2 text conventions vii tool requirements 2-1 tools conductive field service type B-2 troubleshooting after installation 6-4 cassettes 6-1, 6-2 hardware 6-1 IBM OS