
User guide

6-16 Compaq Smart Array 431 Controller User Guide
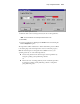
1.
Select Array A.
2.
Click the Expand button.
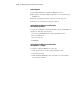
3.
Select the unassigned 4.3-GB drive.
4.
Click Assign Drive(s) to Array.
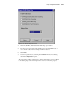
5.
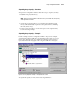
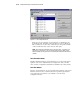
Click the Next button at the bottom of the screen. A screen similar to the
following figure is displayed.
Figure 6-12. Expansion wizards – Logical Drive screen
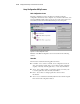
6.
Click the Create Logical Drive button.
7.
Set the fault tolerance, array accelerator, stripe size, and size for Logical
Drive 2.
8.
Click the Done button.
9.
Click the Done button again.
10.
At the main screen, select Controller, Save Configuration from the menu
bar. This saves the new settings for Logical Drive 2 and starts the
capacity expansion process.
NOTE: Logical Drive 2 will not be accessible until the capacity expansion process has
completed on Logical Drive 1.