
User's Manual


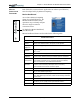


Table Of Contents
- User Guide
- About This User Guide
- Chapter 1 Getting Started with Motion M1200 and M1300 Tablet PCs
- Chapter 2 Motion M1200 and M1300 Tablet PC Hardware
- Chapter 3 Motion M1200 and M1300 Tablet PC Software
- Chapter 4 Using Your Motion M1200 and M1300 Tablet PCs
- Initializing Microsoft Windows XP
- Starting and Stopping Your Tablet PC
- Opening the Motion Dashboard
- Saving Power Using Stand By or Hibernate
- Operating the Motion M-Series Digitizer Pen
- Hints for Optimizing Your Display Window
- Making Best Use of the Tablet PC Input Panel
- Hints for Working with the Input Panel
- Eliminating Paper with Windows Journal
- Creating Forms and Editing Them in Windows Journal
- Have Sticky Notes Handy for Jotting Down Information
- Changing Screen Orientation
- Customizing Buttons
- Adjusting Brightness for Different Lighting Scenarios
- Identifying the Right AC Power Adapter
- Keeping Tabs on Your Battery Power
- Creating New Power Schemes for Special Situations
- Charging the Battery
- Changing the Battery
- Adding Memory to Improve System Performance and Increase Battery Life
- Selecting Correct Cables for Operating Optical Disk Drives
- Installing Optical Disk Drives
- Cloning and Extending Your Display for Additional Viewing
- Setting Up a Wireless Connection
- Setting Up Speech Recognition for Dictation
- Using Speech Recognition for Commands
- Changing Screen Resolution for Using an External Monitor
- Creating a Screen- Resolution Scheme for an External Monitor or Similar Device
- Multimedia Applications
- Setting Up Tablet PC Security
- Clearing Tablet PC Security
- Caring for Your Tablet PC and Its Accessories
- Traveling With Your Tablet PC
- Appendix A Regulatory Compliance Notices
- Appendix B Troubleshooting and Support
- Appendix C Safety
- Appendix D Motion M1200 and M1300 Specifications
- Appendix E Limited Warranties

Chapter 4
Using Your Motion M1200 and M1300 Tablet PCs
Motion Computing M1200 and M1300 Tablet PC User Guide 24
Windows Initialization Procedure
IMPORTANT: You do NOT need Internet access to initialize Windows. When the
Windows initialization procedure prompts you for this information, you can either
select “Skip” or select the option that lets you set up Internet access later.
1. Before you start your Tablet PC, connect any USB keyboard to a
USB port on the Tablet PC. This lets you enter information through
the keyboard or keyboard touch pad. (The Pen does not function until
you complete the Windows initialization.)
2. (Optional) Connect your Tablet PC to AC power. (This ensures con-
tinuous power during this initialization procedure and in case the bat-
tery is low.)
3. Briefly slide the Power switch to start the Tablet PC. After a few
minutes, the “Welcome to Microsoft Windows” screen appears.
4. Move the cursor with the keyboard touch pad and select Next. The
End User License Agreement for Microsoft Windows XP appears.
NOTE: You can also use the Tab key, arrow keys, Enter keys, and space bar on
the keyboard to select and enter data. This installation only describes using the
keyboard touch pad.
5. To accept the End User License Agreement and continue the installa-
tion, select “Yes, I Accept.” Then select Next.
6. Type in the name of your computer (Tablet PC name). Choose the
name provided by your network administrator or, if one isn’t avail-
able, a name of your choice.
7. (Optional) Type in a description of your computer. Select Next.
8. (Optional) Enter the Administrator password (from your network
administrator) or specify a password for yourself as Administrator. If
you don’t have an Administrator password, just select Next.
9. (Optional) Type in the domain name (from your network Administra-
tor). If you don’t have a domain name, select “No,” then Next.
10.(Optional; you do not need Internet access to initialize Windows)
Check the option for how this computer will connect to the Internet.
Select Skip to set up Internet access later.
11.Select “Yes to Ready to activate Microsoft Windows XP.”
12.(Optional) Ready to register with Microsoft. Skip this screen if you
don’t want to register now. If you choose to register, you will need
Internet access. Select “No, not at this time.”
13.You may get a message either that your computer is not connected to
the Internet or asking if you want to set up Internet access. You do
not have to set up Internet access to initialize Windows. Select Skip.
14.Type in your name in the “Your name” field. If others will be using
the Tablet PC, type in their names also (up to five total). These mes-
sages appear:
Thank you! Congratulations, you’re ready to go!
15.Select Finish. These messages appear: