
Installation guide
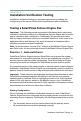
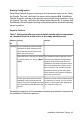


ResultsActivityMachine
ID
Data is present.Verify data is present.
Successful completion of this procedure leaves the SolarWinds Failover Engine
pair in the state necessary to perform the second part of the Installation
Verification process, detailed in Exercise 2 - Data Verification.
Back-out Procedure (Auto-switchover)
Important: Do not perform this back-out procedure if you intend to continue
the Installation Verification process.
If for any reason you find it necessary to back out of this exercise, you can stop
at any point and return the pair to the state it was in at the beginning of this
exercise by performing the following steps:
1. Shut down SolarWinds Failover Engine and protected services on all servers.
2. Complete the following on both servers:
a.
Open the Configure Server wizard.
b.
Select the Machine tab.
c.
Select the Primary server as active.
d. Click Finish.
3.
On the secondary server, right-click the taskbar icon and select Start
SolarWinds Failover Engine .
4. Verify that the secondary server is passive (S/–).
5.
On the primary server, right-click the taskbar icon and select Start SolarWinds
Failover Engine .
6. After SolarWinds Failover Engine starts, login to the SolarWinds Failover
Manager.
7. Verify that applications have started and replication to the passive server
has resumed.
Exercise 2 - Data Verification
The Data Verification exercise validates that data is synchronized between the
servers resulting in current data on the active server following the
Auto-switchover exercise performed previously. The objective is to take a
working active server (the secondary server) and synchronize it with the passive
(primary server). This exercise also demonstrates that all the correct services
stopped when the primary server became passive.
Installation Verification Testing - 43
SolarWinds Failover Engine - Installation Guide