
Installation guide

2. Download the SolarWinds Failover Engine .exe to a suitable location on
the secondary server and change the file extension from .exe to .zip .
3. Extract the contents of the SolarWinds Failover Engine .zip file into a
temporary folder.
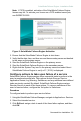
4. Navigate to Start > Run and type CMD to open a command window.
5. Navigate to the to the location of the temporary folder.
6. Run the command: start /wait setup –f:<parameter file>
-BACKUPPassword:<backup password> -ni
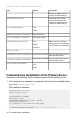
Command Line Installation of a Physical Secondary
Server
Installation of the secondary server is similar to installation of the primary server
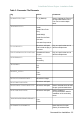
1. Create a .txt file containing the following configuration parameters: This
is an example of a parameter file (it must be modified before you use it).
<file_name.txt>
InstallSecParas.txt
INSTALLTYPE:Install
SERVERROLE:SECONDARY
BACKUPSOURCEPATH:\\<192.168.15.111\nf backup>
BACKUPUSER:Administrator
Note: The parameters enclosed in <> must be enclosed in double quotes
(") if they contain spaces, dashes or other potentially confusing characters.
2. Download the SolarWinds Failover Engine .exe to a suitable location on
the secondary server and change the file extension from .exe to .zip .
3. Extract the contents of the SolarWinds Failover Engine .zip file into a
temporary folder.
4. Navigate to Start > Run and type CMD to open a command window.
5. Navigate to the to the location of the temporary folder.
6. Run the command: start /wait setup –f:<parameter file>
-BACKUPPassword:<backup password> -ni
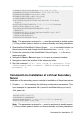
Post Installation Configuration
1. Upon completion of installation, SolarWinds Failover Engine prompts you
to activate the SolarWinds Failover Engine license. Enter the Activation key
and click Next.
28 - Command Line Installation
Installation Guide - SolarWinds Failover Engine