
User`s manual


Congratulations on your Coleman® solar product purchase. This product is designed to the highest technical
specifications and standards. It will supply years of maintenance free use. Please read these instructions
thoroughly prior to installation, then store in a safe place for future reference. If at any time you are unclear
about this product, or require further assistance please do not hesitate to contact our trained professionals
operating the customer support line 1-888-478-6435 or email to info@sunforceproducts.com
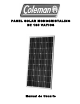
130 Watt Monocrystalline Solar Panel
Specifications and Included Items
Power Rating: Up to 130 Watts/ 7.6 Amps
Includes:
20ft Wire
Solar Panel
Mounting Screws (24)
Brackets (6)
Rubber Spacers (6)
Voltage Tester
Warning:
• Avoid Electrical Hazards when installing, wiring, operating, and maintaining your Solar Module. The solar
module included generates DC electricity when exposed to sunlight or other light sources.
• For use in 12-Volt systems only.
• Observe proper polarity throughout entire power cable wiring route.
• Work Safely. Do not wear jewelry when working with electrical or mechanical equipment. Use protective
eyewear when working with batteries or drills. Use extreme caution when on ladders or on a roof.
• Follow all Safety Precautions of the battery manufacturer. Some batteries can release flammable hydrogen
gas. Do not produce sparks when working in locations where flammable gases or vapors exist. Shield skin
and eyes from battery acid. Wash thoroughly with water if skin or clothing comes into contact with acid or
any corrosive matter, which may have accumulated on the battery. Keep the terminals and casing clean.
• Use a Charge Controller for wattages above 15 Watts.
• Do not attempt to charge non-rechargeable batteries.
• Always connect charge controller to battery first.
• When disconnecting, always disconnect battery last.
Features
• Shade tolerance
• Powerful crystalline solar technology
• Rugged Aluminum Frame
• Covered by an industry leading Twenty five year warranty
• Weatherproof
• Pre-drilled installation holes
• Professional Grade Mounting Hardware
MOUNTING THE SOLAR PANEL:
1. Choose an appropriate location that provides the most direct sunlight and can support the solar panel, and
is free from shade. Be aware of surrounding objects. Although an object seems far from the mounting
location it may still obscure the sun from the panel. The ideal year round position for a solar panel in the
Northern Hemisphere is facing due south tilted at an angle equal to your latitude. For most North American
locations any angle between 30 and 50 degrees is suitable. Note: Mounting a solar panel vertically will
optimize low winter sun position but is not beneficial in the summer months.
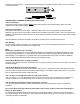
2. Using the mounting brackets and screws included, first attach the bracket to the solar panel. Place the
rubber ring between the panel and the bracket. The rubber ring allows for air flow between the panel and the
mounting surface, maximizing the efficiency of the panel. Note: If mounting to a roof of a vehicle, it may be
necessary to drill holes in the roof. These holes should be resealed once the panel is installed. Clear silicon