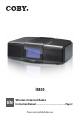
IR850 EN Wireless Internet Radio Instruction Manual...........................................
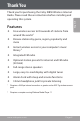
Table of Contents Thank You.........................................................................5 Features....................................................................................................5 Warnings..................................................................................................6 English Package Contents.........................................................7 Getting Started.............................................................8 Requirements..................
My Added Stations............................................................................ 25 Viewing Station/Podcast Information....................................... 25 Station Updates.................................................................................. 26 Preset Station Memory.................................................................... 26 Storing a Preset Station........................................................ 26 Selecting a Preset station.................................
Table of Contents English System Settings.......................................................... 42 Network setup ................................................................................... 42 Language ............................................................................................. 42 Factory reset........................................................................................ 43 Software Updates..............................................................................
Thank You English Thank you for purchasing the Coby IR850 Wireless Internet Radio. Please read these instructions before installing and operating this system.
Thank You Warnings If this Internet Radio has been moved from a cold place to a warm place (e.g., from a cold car to a warm room), do not plug it in for 2-3 hours. Moisture may have condensed inside the radio, which can cause internal damage to the system. To avoid damage, please unpack your Internet Radio and allow it to stand at room temperature for 2-3 hours before use. Always ensure that the main plug is easily accessible. Do not open the radio or remove any fixed covers.
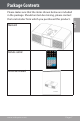
Package Contents English Please make sure that the items shown below are included in the package. Should an item be missing, please contact the local retailer from which you purchased this product. Main unit Remote control Instruction manual www.cobyusa.
Getting Started Requirements English Before you use your Internet Radio, you will need the following: A broadband Internet connection. A wireless access point (Wi-Fi) connected to your broadband Internet, preferably via a router. If your wireless network is secured with Wired Equivalent Privacy (WEP) or Wi-Fi Protected Access (WPA) encryption, you will need to enter the security key on the Internet Radio to connect it to the network. WPA encryption is recommended for better network security.
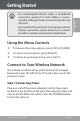
For uninterrupted Internet radio, a broadband connection speed of at least 64kbps is recommended, although slower connection speeds may still work. If you need further assistance to set up your wireless internet connection, please contact your internet provider or wireless access point manufacturer. Using the Menu Controls To browse the menu options, press [UP] or [DOWN]. To select a menu option, press [SELECT]. To return to a previous menu, press [LEFT].
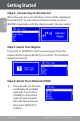
Getting Started Step 2: Connecting to the Internet English When the unit turns on, the Main menu will be displayed. Press [SELECT] to enter Internet Radio mode (or press [MODE] repeatedly until the display reads ‘Internet radio’). Step 3: Select Your Region Press [UP] or [DOWN] to choose your region from the menu and then press [SELECT] to confirm. The network wizard will launch. Step 4: Select Your Network (SSID) The unit will scan the area and display all available networks.
The name of your network (SSID) is determined by the SSID setting of your wireless access point. If the name of your network does not appear in the list, select to have the unit try to find your network again. If you have configured your wireless access point to hide the SSID name, you will need to enter your network settings manually. Choose from the menu and press [SELECT] to confirm.
Getting Started Select the ‘OK’ icon when you have finished entering your password, or select ‘CANCEL’ to exit without making any changes. English The unit will finish connecting to the network and return to the Internet Radio menu. WEP/WPA passwords are case-sensitive. The radio will automatically save your WEP or WPA security key. You will not need to re-enter a WEP/ WPA key unless the radio’s function is selected.
Move the radio to a location where the wireless signal is stronger (e.g., closer to your wireless access point). Make sure that your password has been entered correctly. To retrieve your access code or to get solutions to frequently asked questions, move the display highlight to the menu and press [SELECT] to confirm. www.cobyusa.
Controls at a Glance Front View English 1 2 3 Description 1. Power/Standby button 2. Display screen 3. Headphone Jack Key [POWER] Bottom View 1 2 1. FM antenna socket 2.
Controls at a Glance English Top View 9 1 2 10 3 4 11 5 6 7 8 Control Description 1. INFO button 2. Music Player Controls Key [INFO] [PREV] [PLAY] [NEXT] 3. PRESET button www.cobyusa.
Controls at a Glance Control Description 4. Menu Control buttons Key English [UP] [DOWN] [LEFT] [RIGHT] [SELECT] 5. Menu button [MENU] 6. Volume + button [VOL +] 7. Volume – button 8. Snooze button [SNOOZE] 9. Alarm button [ALARM] 10. Scan button [SCAN] 11.
Controls at a Glance Control Internet Radio FM Radio Media Streaming [POWER] Press to turn the radio on/off. [ALARM] Press to set Alarms. [SNOOZE] When alarm is sounding, press to delay the alarm. At all other times, press to set SLEEP function. [VOL –] Press to decrease volume. [VOL +] Press to increase volume. [MODE] Press to toggle between Internet Radio, FM Radio, and Media Streaming modes. [MENU] Press to enter the Main menu. Menu Control buttons Press [UP] to scroll up.
Controls at a Glance Control Internet Radio FM Radio Media Streaming English [SCAN] No function. Scan for stations. No function. [PRESET] Press and hold to save Preset station 1-10; Press to load Preset station 1-10. No function [INFO] Press to display station information. No function. [PREV] No function. Skip to previous track. [PLAY] No function. Start/pause playback. [NEXT] No function. Skip to next track.
Controls at a Glance English Remote Control 1. Mode 7. Alarm 2. Power/Standby 8. Snooze/Sleep 3. Volume + 9. Info 4. Volume – 10. Menu 5. Pause, Play, Previous, Next 11. Left, Right, Up, Down, Select 6. Preset buttons [1-10] www.cobyusa.
Controls at a Glance About the Remote Control Battery English The remote control is powered by 1 x “CR2025” battery. Before using the remote, be sure to remove the plastic protective tab from the battery compartment. To replace the battery: Squeeze the tab of the battery compartment to the right [1] while drawing the compartment out [2].
Internet Radio Mode English Press [MODE] repeatedly until “Internet Radio” is displayed on the screen. From the Internet Radio menu: • Select to see a list of your most recently listened-to stations. • Select to access the Station List menu. You can browse for internet radio stations, podcasts and more from the Station List menu. www.cobyusa.
Internet Radio Mode Choosing a Station Listen to internet radio streams from all over the world. English From the Station List menu, select and then press [SELECT] to confirm There are five options available for station selection: • Location: Find and listen to a station by geographic location (e.g., Asia, Europe, North America, etc.) • Genre: Find and listen to a station by content category (e.g., Alternative, Blues, Business News, Classical, etc.
Internet Radio Mode Choosing a Podcast From the Station List menu, select and press [SELECT] to confirm. There are three options available for podcast selection: • Location: Find and listen to podcasts by geographic location (e.g., Asia, Europe, North America, etc.) • Genre: Find and listen to podcasts by content category (e.g., Alternative, Blues, Business News, Classical, etc.) • Search podcasts: Find and listen to a podcast by name. www.cobyusa.
Internet Radio Mode My Favorites English Listen to your favorite station or podcast programming. To use this function, you must first add stations or podcasts to the My Favorites list. Browsing the My Favorites list From the Station List menu, select and press [SELECT] to confirm. 1. Select or and then press [SELECT] to confirm. 2. Find your favorite Podcast or Station in the list and press [SELECT] to listen to it.
Internet Radio Mode Listen to stations added from the Frontier Silicon website (www.wifiradio-frontier.com). A registered account and device is required. Please refer to the Appendix or visit the website and follow the instructions there to register. After you have added stations on the Frontier Silicon website, go to the Station list menu: 1. Select and press [SELECT] to confirm. 2. Find an added station in the list and press [SELECT] to listen to it.
Internet Radio Mode English • Playback Buffer of Station Displays playback buffer strength of current station. • Date of Station Displays the date; this information is provided by the broadcaster to ensure accuracy. Station Updates Occasionally, the radio display will indicate that the system is receiving an updated station list. This function is performed automatically and periodically, ensuring that your Radio always has the latest station directory on-board.
Internet Radio Mode With the menu system Press and hold [PRESET]. The Preset menu will appear. 2. Press [UP] or [DOWN] to choose an available field. Press [SELECT] to confirm; the radio will return to its normal working condition, and a preset icon will appear on the display. English 1. Selecting a Preset station You can select a preset station with the remote control or through the menu system.
Internet Radio Mode With the Menu System Press [PRESET]. The Preset menu will appear. 2. Press [UP] or [DOWN] to choose the desired preset and then press [SELECT] to confirm. English 1.
FM Radio Mode Switch the radio on and press [MODE] until is displayed. The first time that FM RADIO mode is selected, the radio will tune to the beginning of the FM frequency range (87.50MHz). Otherwise, the last FM station you were listening to will be selected. • Press [UP] or [DOWN] to increase or decrease the frequency by 0.05MHz per step. • To ‘SEEK’ active stations automatically, press and hold [UP] or [DOWN]. You can also press [SCAN] to auto tune to active stations.
FM Radio Mode Access the FM Radio Menu Press [LEFT] at any time to access the FM Radio menu. English Scan Setting Automatically scan for and store available radio stations to preset memory. • Select to only save radio stations with a strong signal. • Select to save all available radio stations. This auto scan feature will overwrite all previously stored preset stations.
FM Radio Mode Audio Setting English Set the radio reception mode to Stereo or Mono. • Select to set the radio reception mode to Mono. Selecting Mono may improve the reception stability of weak radio station broadcasts. • Select to set the radio reception mode to Stereo. Preset Station Memory Storing a Preset Station Your radio can store 10 Internet and 10 FM stations.
FM Radio Mode With the menu system Press and hold [PRESET]. The Preset menu will appear. 2. Press [UP] or [DOWN] to choose an available field. Press [SELECT] to confirm; the radio will return to its normal working condition, and a preset icon will appear on the display. English 1. Selecting a Preset station You can select a preset station with the remote control or through the menu system.
FM Radio Mode With the Menu System Press [PRESET]. The Preset menu will appear. 2. Press [UP] or [DOWN] to choose the desired preset and then press [SELECT] to confirm. English 1. www.cobyusa.
Music Player Mode Music Player mode allows you to enjoy music from your computer wirelessly over a network. English To use the Music Player streaming media functions, you will need to set up media sharing on a computer. Please set up media sharing first (refer to the Appendix for guidance), then follow the instructions below to use the Music Player shared media functions. Music Player Menu To enter Music Player mode, press [MODE] repeatedly until “Music Player” is displayed on the screen.
Music Player Mode 1. From the Music Player menu, select . 2. Use the up/down direction keys to highlight the desired selection. Press [SELECT] to confirm and play your music. Play shared folders 1. From the Music Player menu, select . 2. Use the up/down direction keys to highlight the desired selection. Press [SELECT] to confirm and play the folder. PC settings 1. From the Music Player menu, select . 2.
Setting the Clock Manual Time/Date Setting Press [MENU] to access the Main menu, then select . 2. Select
Setting the Clock To have the unit automatically update the time from an internet server: 1. Press [MENU] to access the Main menu, then select . 2. Select
Setting the Clock Other Clock Options Press [MENU] to access the Main menu, then select . 2. Select
Setting the Clock Setting the Alarms Before setting the alarm, be sure that your clock settings are correct. 1. Press [ALARM] to access the Alarm menu. 2. Select to adjust the Alarm 1 options, or select to adjust the Alarm 2 options. The instructions given below apply to both Alarm 1 or Alarm 2. • Select to set the alarm on or off. • Select
Setting the Clock English 3. • Select to set how often the alarm will sound (daily, once, weekends, or weekdays). • Select to set how loud the alarm will sound. Select after you have finished adjusting all of the alarm options. An alarm icon will be displayed on screen if Alarm 1 or Alarm 2 has been enabled. If Alarm 1 or Alarm 2 has been set, the alarm time will be displayed along with the time in Standby mode.
Setting the Clock Set a sleep timer to turn the unit off automatically after 0 to 60 minutes. To access the sleep function, press [SNOOZE] on the main unit or [SNOOZE/SLEEP] on the remote control. These buttons will not access the sleep function when the alarm is sounding. • To set the sleep timer, press [SNOOZE] on the main unit or [SNOOZE/SLEEP] on the remote control repeatedly to set a sleep period between 0 – 60 minutes. Stop pressing the button when the desired sleep period is displayed.
System Settings Network setup English You can change the network settings if you need to connect to another wireless network (e.g., if you relocate the unit to another room or building. The radio will scan for connection to another wireless network, or you may configure the network parameters manually. 1. For Network Setup, enter the menu as follows: MAIN MENU > SYSTEM SETUP > Network. Press [SELECT] to confirm. 2. Press [UP] or [DOWN] to highlight your desired selection. Press [SELECT] to confirm.
System Settings Factory reset 1. To perform factory reset, enter the menu as follows: MAIN MENU > SYSTEM SETUP > Factory Reset. Press [SELECT] to confirm. 2. Move the highlight to YES, then press [SELECT] to confirm. 3. Press [SELECT] to confirm. If you do not wish to continue, move the highlight to NO and press [SELECT]. The factory reset will not be performed, and the radio will return to its previous operating condition.
System Settings Software Updates English Connect to the update server to check for new software versions. 1. Enter the menu as follows: MAIN MENU > SYSTEM SETUP > Software update. Press [SELECT] to confirm. 2. Move the highlight to ‘Auto- check setting’. Press [SELECT] to confirm. The radio will now auto-check for software updates periodically. 3. When the previous screen displays, move the highlight to ‘Check now’ and press [SELECT] to confirm. Your radio software is now up-to-date.
System Settings SW Version and Radio ID Enter the menu as follows: MAIN MENU > SYSTEM SETUP > Info. Press [SELECT] to confirm. You may need to note this information when dealing with technical support issues. www.cobyusa.com Page 45 English View software version and Radio ID info.
Appendix Set Up Media Sharing with Windows Media Player 11 English After you download and install Windows Media Player 11 for Windows XP and connect your radio to the network, you will need to set up media sharing so that the radio can access your music library. The following steps describe how to set up media sharing in Windows Media Player 11. 1. In Windows Media Player 11, click the small arrow below the Library tab, and then click Media Sharing. 2.
3. Check the “Share my media to” box, then select your radio model from the list. Click ‘Allow’. The selected device will now show a green tick. Click ‘Apply’ to confirm. If your radio does not appear in the list of devices, perform the following steps: 1. From the “Media Player” menu of your internet radio, select “UPNP Servers”. A list of available computers will appear. 2. Select your computer. Your device will now appear in the list. www.cobyusa.
Appendix If you want to confirm that this is your radio, right click on the device and select ‘Properties’. Your Radio’s MAC address will be shown.
Appendix Using the Radio with a MAC will require Windows File Sharing. MAC OS X versions 10.2 and later have Windows File Sharing built in; if your operating system is MAC OS version 9 or earlier, you will require extra software to perform this function. Set up Windows File Sharing on a MAC 1. From the ‘Dock’, click on ‘System Preferences’. From the ‘System Preferences’ window, under the ‘Internet & Network’ section, click on ‘Sharing’. 2.
Appendix Directory Setup English 1. From the ‘Dock’, click on ‘Finder’. From ‘Finder’, click on ‘Applications, and then ‘Utilities’. 2. Click on ‘More Info’ for ‘Directory Access’ and ensure that the ‘Read/Write’ option is enabled. Double-click on ‘Directory Access’ and enable the following: AppleTalk LDAPv3 SLP SMB/CIFS 3. For ‘SMB/CIFS’, click on ‘Configure’ and select an appropriate workgroup. 4. Copy and paste the mp3 files to ‘Documents’ in the ‘Finder’ window. 5.
Appendix After installing and configuring your Radio and Windows Media Player 11, you are now ready to play music via a wireless connection. The following steps describe how to play music with your Radio. 1. Select “UPNP Servers” in the “Media Player” menu. 2. Select the computer you wish to play the music files from. 3.
Appendix Frontier Silicon Internet Radio Portal English Visit the Frontier Silicon web portal at www.wifiradiofrontier.com to browse global stations and personalize your favorites. You can also add additional stations to your radio through the website. You will need to create an account and register your device to use the web portal. 1. Get the unique access code. Each IR850 unit has a unique access code ID. 2. From the Internet Radio menu, select: STATION LIST > HELP > Get access code.
3. Fill out the registration form with the access code from step 1, as well as an email address, a new password, and the internet radio model you are using (e.g., Coby IR850). 4. When the form is complete, click the “Register” button to create your account. www.cobyusa.
Troubleshooting English If you have a problem with this device, please read the troubleshooting guide below and check our website at www.cobyusa.com for Frequently Asked Questions (FAQs) and firmware updates. If these resources do not resolve the problem, please contact Technical Support. Address Coby Electronics Technical Support 56-65 Rust Street Maspeth, NY 11378 Email techsupport@cobyusa.com Web www.cobyusa.
Troubleshooting 1. Confirm that a Wi-Fi connected PC can access the Internet (i.e., can browse the web) using the same network. 2. Check that a DHCP server is available, or that you have configured a static IP address on the radio. You can configure a static IP address on the radio by entering System setup -> Network -> Manual setting-> Wireless, then selecting ‘DHCP disable’. 3. Check that your access point does not restrict connections to particular MAC addresses.
Troubleshooting English • The station has reached the maximum allowed number of simultaneous listeners. • The station is no longer broadcasting. • The link on the radio is out of date. • The Internet connection between the server (often located in a different country) and the radio is slow. To confirm station status, try using a PC to access the station via the broadcaster’s web site. If you can play back the station with a PC, use the form at http://www.wifiRadio-frontier.
Power Requirements AC 100-240V, 50-60HZ (please use provided adapter ) Frequency Range (FM) 87.5-108MHz Rated Output Power 15W x 2 (RMS) Speaker Impedance 4Ω Headphone Jack 3.5mm stereo, 32Ω Dimension 11.93” x 3.74” x 7.44” (WHD) English Specifications Specifications and manual are subject to change without notice. www.cobyusa.
Safety Notices English The lightning flash with arrowhead symbol within an equilateral triangle is intended to alert the user to the presence of uninsulated “dangerous voltage” within the product’s enclosure that may be of sufficient magnitude to constitute a risk of electric shock. The exclamation point within an equilateral triangle is intended to alert the user to the presence of important operation and servicing instructions in the literature accompanying the appliance.
Safety Notices FCC Statement: This device complies with Part 15 of the FCC Rules. Operation is subject to the following two conditions: (1) This device may not cause harmful interference, and (2) This device must accept any interference received, including interference that may cause undesired operation. Note: This equipment has been tested and found to comply with the limits for Class B digital devices, pursuant to Part 15 of the FCC rules.
Safety Notices Important Safety Instructions English 1. Read Instructions: All the safety and operating instructions should be read before the product is operated. 2. Retain Instructions: The safety and operating instructions should be retained for future reference. 3. Heed Warnings: All warnings on the product and in the operating instructions should be adhered to. 4. Follow Instructions: All operating and usage instructions should be followed. 5.
Safety Notices 13. Object and Liquid Entry: Never push objects of any kind into this product through openings as they may touch dangerous voltage points or shout-out parts that could result in a fire or electric shock. Never spill liquid of any kind on the product. 14. Servicing: Do not attempt to service this product yourself as opening or removing covers may expose you to dangerous voltage or other hazards. Refer all servicing to qualified service personnel. 15.
English Page 62 Coby Electronics Corporation
English www.cobyusa.
Coby Electronics Corporation 1991 Marcus Ave, Suite 301 Lake Success, NY 11042 www.cobyusa.com www.ecoby.com Coby is a registered trademark of Coby Electronics Corporation. Printed in China. Print v1.