Owner’s Manual TWO-WAY RADIO MODEL LI 3900 DX C Nothing Comes Close to a Cobra® Printed in China Part No.
Introduction Making Life Easier and Safer Staying in touch with your family and friends is convenient and easy when using your microTALK® radio. Some of the many uses you will discover include: Communicating with others while hiking, biking, and working; keeping track of family and friends at a crowded public event; checking with travel companions in another car; talking with neighbors; arranging meeting spots with others while shopping at the mall. Belt Clip Secure your microTALK® radio while on the go.
Introduction Product Features Introduction Wrist Strap Connector Features Belt Clip Battery Compartment Antenna Hi•Low Power Button Talk Button Battery Door Latch External Speaker/ Microphone/ Charge Jack On/Off Power Button Call Button Backlit LCD Display Channel Up/ Down Button Mode Button Volume Button Light/ Max Range Button Lock/Enter Button Product Features Backlit LCD Display • 22 Channels DCS Icon Seven shared with FRS/GMRS, seven FRS only, eight Lock Icon Keystroke Tones Icon GMRS o
Introduction Operation Customer Assistance Warranty Caring for Your microTALK® Radio • Your microTALK® radio will give you years of trouble-free service if cared for properly. Handle the radio gently. Keep the radio away from dust. Never put the radio in water or in a damp place. Avoid exposure to extreme temperatures. Remove Belt Clip Pull Up Latch Insert Battery Pack Rechargeable Battery Pack and Desktop Charger • To install or replace battery pack: 1.
Introduction Using Your Radio For charging microTALK® radio(s) in desktop Insert Radio(s) charger: 1. Insert radio(s) into desktop charger as shown. 2. Insert round connector of 120 volt adapter into jack on back of charger. 3. Plug 120 volt adapter into electrical outlet. If charging light is not on, check position of radio. Radio should be upright. The charge indicator light will stay on as long as the radio is in the charging well and the battery pack is charging.
Operation Channel Buttons Channel Number Using Your Radio Channels To select a channel: – With the radio on, select any of the 22 channels by pressing the Channel Up or Channel Down button. Introduction • Hi•Low Button Hi Power Icon Both radios must be tuned to the same channel to communicate. Channels 1 through 7 are shared by FRS and GMRS. Channels 8 through 14 are FRS only. Channels 15 through 22 are GMRS only.
Operation Using Your Radio Introduction Auto Squelch/Maximum Range • Your microTALK® radio is equipped with Auto Squelch, which automatically shuts off weak transmissions and unwanted noise due to terrain and conditions. This slightly reduces the Maximum Range at which signals can be heard. You can turn off auto squelch to allow all signals to be received and extend the maximum range of your radio.
Operation Mode Functions Scrolling through Mode Functions • By scrolling through the Mode Functions, you will be able to ® select or turn on/off preferred features of your microTALK radio.
Operation Mode Functions Set DCS Privacy Codes Mode Button DCS Privacy Code Channel Buttons Introduction • To select a DCS privacy code: 1. After selecting a channel, press the Mode button until the DCS icon appears and the small numbers flash on the display (01 through 83). NOTE If CTCSS is turned on at the channel selected, the display will flash the DCS icon and “OFF.” To switch from CTCSS to DCS, press the Channel Up or Channel Down button while the display is flashing “OFF.
Operation Mode Functions 10 Memory Locations • Your microTALK® radio has 10 Memory Locations for storing your most frequently used channels and channel/privacy code combinations. These Memory Locations can be selected individually or can be scanned. (See page 20 for memory location scan.) To program a memory location: Mode Button 1. Press the Mode button until the Memory icon and the memory location flash on the display. 2.
Operation Mode Button Memory Icon Channel Buttons Mode Functions To recall a stored memory channel location: 1. Press the Mode button until the Memory icon and the memory location number flash on the display. 2. Press the Channel Up or Channel Down button to select a memory location (0 through 9). If a location has been programmed before, its associated channel/privacy code will be shown on the display. Introduction Mode Button Memory Icon Channel Buttons 3.
Operation Mode Functions Channel Scan Your microTALK® radio can automatically scan channels. To scan channels: Mode Button 1. Press the Mode button until the Scan icon and the channel numbers flash on the display. Scanning Channels 2. Press the Channel Up or Channel Down button to begin scanning channels. The radio ignores specific privacy codes while scanning channels. Channel Buttons 16 English The Scan icon will continue to be displayed when scan is on.
Operation Mode Functions Privacy Code Scan • Your microTALK® radio can automatically scan the Privacy Codes (either CTCSS 01 through 38 or DCS 01 through 83) within one channel. Only one set of privacy codes (CTCSS or DCS) can be scanned at a time. To scan privacy codes: Select Channel 1. While in Standby mode, press the Channel Up or Channel Down button to choose the channel on which you wish to scan privacy codes. Mode Button 2.
Operation Mode Functions Memory Location Scan Your microTALK® radio can automatically scan up to 10 programmed Memory Locations. If there are one or fewer memory locations programmed in your radio, the scan memory locations option will not be available. To program at least two memory locations, see program memory locations on page 12. Mode Button Scanning Locations Channel Buttons 20 English To scan memory locations: 1.
Operation Mode Functions Introduction VibrAlert® and Call Alert • Your microTALK® radio can alert you to incoming signals by sounding an audible call tone, by vibrating silently or both. To change call settings: VibrAlert + Ring Mode Button 1. Press the Mode button until the Call Setting icon flashes on the display. The current setting (“01” VibrAlert Only Channel Buttons vibrate + ring, “02” vibrate only or “03” ring only) is displayed. 2.
Operation Mode Functions and General Specifications Keystroke Tones • With Keystroke Tones turned on, your radio will sound beeps each time you press a button or change a setting. To change keystroke tones: Mode Button 1. Press the Mode button until the Keystroke Tones icon flashes on the display. The current on or off setting is displayed. Keystroke Tones On 2. Press the Channel Up or Channel Down button to turn keystroke tones on or off. 3. Choose one of the following: a.
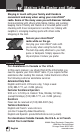
Customer Assistance Licensing Licensing Introduction • For Products Used in Canada Industry Canada Notice Operation is subject to the following two conditions: 1) this device may not cause interference, and 2) this device must accept any interference, including interference that may cause undesired operation of the device. «IC» before the equipment certification number signifies that the Industry Canada technical specifications were met.
Customer Assistance Trademark, Products and Product Service Trademark Acknowledgement Cobra®, microTALK®, Nothing Comes Close to a Cobra®, VibrAlert® and the snake design are registered trademarks of Cobra Electronics Corporation, USA. Cobra Electronics Corporation™ is a trademark of Cobra Electronics Corporation, USA.
Warranty Warranty Limited One-Year Warranty on Radio(s) & Charger • For Products Purchased in Canada Your new Cobra GMRS radios and charger are covered by a one-year replacement warranty. If any manufacturing defect becomes apparent in this product within one year from the original date of purchase, it will be replaced. Please return the GMRS radio or charger to your dealer with original or copy of dated proof of purchase.