
User manual


Chapter 2: To get started
98-143082-A To connect your WLAN-enabled device 8
To connect your WLAN-enabled device
Do as follows:
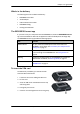
1. Check that the WLAN LED is on (green or yellow),
meaning that WLAN is ready in your EXPLORER 510.
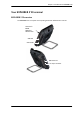
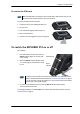
2. Place your WLAN-enabled device (computer, tablet
or smartphone) close to the EXPLORER 510, but not
in front of the BGAN antenna.
3. On your device, search for available WLAN networks.
4. Select the EXPLORER 510 WLAN access point when
it appears in your list of available wireless networks.
The default name is EXPLORER510.
Your device is now connected to the EXPLORER 510.
For information on how to configure the WLAN interface in the EXPLORER 510, see WLAN
interface setup on page 39.
For information on how to set up the LAN network, see Terminal settings on page 46.
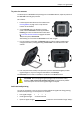
To connect to LAN
The EXPLORER 510 does not have a LAN connector, but you can use the USB to LAN Converter
Cable supplied with your EXPLORER 510 to connect your computer.
Do as follows:
1. Connect the USB to LAN Converter Cable to the USB interface.
2. Connect your LAN cable between the USB to LAN Converter Cable and your computer.
Your computer should now be connected to the EXPLORER 510 and you should be able to
access the web interface as described in the next section.
Note
You may have to enter a password. By default the password is the serial number
a
of
your EXPLORER 510 and the encoding type is WPA2.
a. You find the serial number on the label on the EXPLORER 510
Note
The USB charge current must be set to 1.0 A. This is the default setting. See USB
interface setup on page 41.