
User manual


Adding components to the Qube 3
Cobalt Qube 3 User Manual 219
Replacing a hard disk drive
1. If you are simply replacing the drive(s) that you removed in order to remove
the CPU riser board, re-install the drive(s) in the drive bay.
If you are re-installing a single drive, it goes in slot A.
If you are re-installing two drives, install the correct drive in slot B first, and
then the other drive in slot A second.
2. If you are replacing a failed hard drive, locate the bay in which the failed
drive is installed. The slots in the drive bay are stamped with “A” and “B”.
3. Remove the power and IDE ribbon cables from the failed drive.
4. Remove the thumb screws holding the drive in place and slide the drive out.
See Figure 106, #3.
5. Remove the guide rails from the sides of the failed drive and attach them to
the replacement drive. Position the rails so that the drive will be inserted
properly and can receive the power cable and IDE ribbon cable. See
Figure 106, #4.
6. Once the rails are attached to the replacement drive, slide the drive into the
selected slot on the drive bay.
7. Tighten the thumb screws to secure the drive in place.
8. Attach the power cable and the IDE ribbon cable to the drive.
9. Close the Qube 3; see “Closing the Qube 3” on page 220.
☞
Important: If your Qube 3 has two hard disk drives, ensure that you
re-install the drives in the same slot from which you removed them.
If you re-install the drives in the wrong slots, your Qube 3 will not
function.
✍
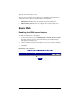
Note: If you have a Qube 3 Professional Edition with RAID-1 disk
mirroring and one of the hard drive fails, the failed hard disk drive
is indicated in the Server Desktop under the Active Monitor
function.
✍
Note: The power cable has a “D” shape and fits in one direction
only. The IDE ribbon cable has an alignment notch.