
User manual

Phase 1: Making the connection
Cobalt RaQ XTR User Manual 15
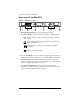
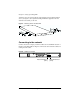
Connecting the power cord
Connect the power supply cord to the RaQ XTR and to an electrical outlet
(100-240 volts AC, 50/60 Hz; see “Physical data” on page 213).
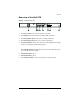
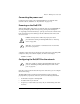
Powering on the RaQ XTR
When the RaQ XTR is plugged into an electrical outlet, the
“C” logo badg
e on
the front panel lights up. Turn on the power by pressing and releasing the
“C” logo badge. The hard disk drive(s) “spins up”, the fans turn on and the front
LCD screen lights up. The Cobalt logo and the Cobalt Networks name scroll
across the screen.
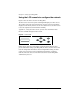
A number of status messages are displayed on the LCD screen as the RaQ XTR
completes its boot process. When complete, the LCD screen displays
PRIMARY IP ADDR:
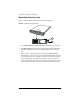
Configuring the RaQ XTR for the network
Now that you have made the network and power connections, you can configure
the network settings.
The RaQ XTR requires specific network information in order to function
properly. Before you proceed, make sure you have the following information:
• the IP address assigned to the RaQ XTR
• the subnet mask of your network
• the gateway or router address (necessary only if communicating with other
networks)
!
Caution:
It is important to follow the proper power-down
procedure before turning off the RaQ XTR. Refer to “Powering
down” on page 208.
✍
Note:
The “C” logo badge is a soft button; it does not click into
place when you press it.
✍
Note: It is possible to configure the RaQ XTR through the serial
port. See “Initializing the RaQ XTR through the serial console
port” on page 236.