
User manual


Knox Arkeia
Cobalt RaQ XTR User Manual 269
5. Click
Save
.
6. Select
Backup and Restore > Control
. The “Backup System Control” table
appears.
• Lock the UI by clicking the check box Locked (check mark).
• Turn off the services by disabling the check box Active (no check mark).
7. Click
Save Changes
.
Performing a disaster-recovery operation
After completing the preparation steps in the previous section, the RaQ XTR is
now ready to be restored. In the arkx UI on the backup server:
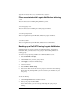
1. Select
Restoration > Restoration Options
.
2. Check the box labelled “Files modified since backup date”.
3. Check the box labelled by user ID.
4. Click the check box to close the window.
5. Select
Restoration > Restoration
.
6. Click the Navigator icon. The icon has four arrows pointing in different
directions. Ensure that all clients are de-selected.
7. Double click on the icon for the RaQ XTR client and select the following
directories and files:
/home
/root
.nsr
/usr
/nsr
/var
/etc
opt
8. Click the check box to close the navigator window.
9. Click the check box to close the restoration window.
10. A list of tapes appears. Select
OK
.
11. A progress window appears. Wait for the restore to complete.
☞
Important:
Ensure that you also de-select all the hard-to-see partial
selections.