
User manual


Chapter 4: Site Management
106 Cobalt RaQ XTR User Manual
To perform a restore:
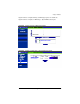
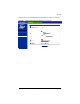
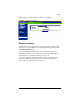
1. Select Site Management > Restore. The “Site Data Restore” table appears.
See Figure 52.
2. Fill in the following fields:
• Existing Archives (.tgz) You can choose to restore backup archive
files (.tgz) that have already been uploaded to the RaQ XTR. Select an
archive file from the pull-down menu.
Once an archive file has been successfully restored, it is be deleted to
conserve space on the hard disk drive.
• Upload an Archive The server saves backed-up data in an archive file
with a .tgz extension. Use the Browse button to select the .tgz archive on
your computer, or the pull-down menu to select an archive.
• Selective Restore You can browse the contents of backup archive files
and choose only the files you wish to restore.
• Directed Restore By default all files are restored to the site directory
/home/sites/home/. If you enter the name of a subdirectory in this
field, the restored files are placed in that subdirectory instead of the site
directory. If the specified subdirectory does not exist, the system
creates it.
3. Click Restore Archive to begin the restore process.
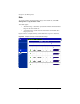
4. If you chose Selective Restore, a separate browser window opens. This
window lists the various files that you can restore.
To select a file, click to the enable (check mark) the check box next to that
file name.
Click Restore to continue. The browser window closes.
5. A confirmation dialog appears, asking whether you are sure that you want to
continue with the restore process.
Click OK.
✍
Note: The Selective Restore option is enabled by default.