
User`s manual


UC-7400-LX Plus User’s Manual Getting Started
2-12
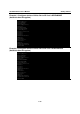
Plug the 3G Card into the Cardbus Slot
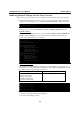
The UC-7400-LX Plus supports plug-and-play feature for the supported 3G datacards. When the
3G datacard is inserted, the UC-7400-LX Plus will detect the card automatically. You may use the
command “dmesg” to see the kernel ring buffer message. The kernel ring buffer message will
show the following message if the UC-7400-LX Plus detects the 3G card.
<6>cs: cb_alloc(bus 1): vendor 0x1931, device 0x000c
<4>PCI: enabling device 01:00.0 (0000 -> 0002)
<6>[1507] nozomi_card_init(): Init, cards_found: 1
<6>[1392] nozomi_get_card_type(): Card type is: 2048
<6>Nozomi driver nozomi_tty<6>[805] nozomi_read_config_table(): Version of card: 1
<6>[797] nozomi_read_config_table(): Initialization OK!
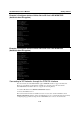
Note: This example is the message detected for the Vodafone Mobile Connect
HSDPA/UMTS/EDGE datacard. For different cards, these messages will be slightly different.
If you do not see these messages, it means that the UC-7400-LX Plus is unable to detect your 3G
datacard.
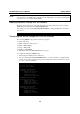
NOTE
When the datacard is plugged into the card bus slot, your SIM card will ask for the PIN code. You
can use minicom or Hyper terminal on a host computer to disable it. Enter the AT+CLCK
command.
AT+CLCK=“SC”,0,”XXXX”
(replacing xxxx with your own PIN) to turn off the PIN function. This way, your UMTS card will
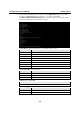
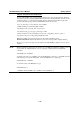
start searching for a network immediately. To turn the PIN function on again, type
AT+CLCK=“SC”,1,”XXXX”
To check the status of the PIN function, type
AT+CLCK=“SC”,2
“+CLCK: 0” means the PIN is off; “+CLCK: 1”means the PIN is on.