
User`s manual


UC-7400-LX Plus User’s Manual Getting Started
2-5
Modifying Network Settings with the Serial Console
In this section, we use the serial console to configure the network settings of the target computer.
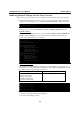
1. Follow the instructions given in a previous section to access the Console Utility of the target
computer via the serial Console port, and then type #cd /etc/network
to change directories.
root@Moxa:# cd /etc/network/
root@Moxa:/etc/network/#
2. Type #vi interfaces to edit the network configuration file with vi editor. You can configure
the Ethernet ports of the UC-7400-LX Plus for static or dynamic (DHCP) IP addresses.
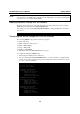
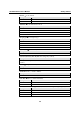
Static IP addresses:
As shown below, 2 network addresses need to be modified: address, network, netmask, and
broadcast. The default IP addresses are 192.168.3.127 for LAN1 and 192.168.4.127 for
LAN2, with default netmask of 255.255.255.0.
# We always want the loopback interface.
auto eth0 eth1 lo
iface lo inet loopback
# embedded ethernet LAN1
iface eth0 inet static
address 192.168.3.127
network 192.168.3.0
netmask 255.255.255.0
broadcast 192.168.3.255
# embedded ethernet LAN2
iface eth1 inet static
address 192.168.4.127
network 192.168.4.0
netmask 255.255.255.0
broadcast 192.168.4.255
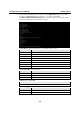
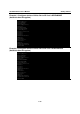
Dynamic IP addresses:
By default, the UC-7400-LX Plus is configured for “static” IP addresses. To configure one or
both LAN ports to request an IP address dynamically, replace static with dhcp and then delete
the address, network, netmask, and broadcast lines.
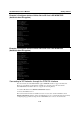
Default Setting for LAN1 Dynamic Setting using DHCP
iface eth0 inet static
address 192.168.3.127
network: 192.168.3.0
netmask 255.255.255.0
broadcast 192.168.3.255
iface eth0 inet dhcp
Auto eth0 eth1 lo
iface lo inet loopback
iface eth0 inet dhcp
iface eth1 inet dhcp
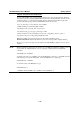
3. After the boot settings of the LAN interface have been modified, issue the following
command to activate the LAN settings immediately:
#/etc/init.d/networking restart