
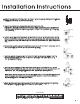
Installation Guide


5. Insert the stopper (#1) into the pop-up body (#5). Verify the hole in the stopper (#1) falls
towards the ball nut (#6). Insert the ball rod (#7) through the hole in the stopper (#1).
See the diagram for visual.
6. Insert the lift rod (#10) through the hole on the faucet. From underneath the sink, turn the
button (#9) counterclockwise and insert lift rod (#10) into the button (#9). Turn the button (#9)
clockwise to lock. Next insert the lift rod strap (#8) into a hole on the ball rod (#7).
Note: Ensure there is enough room to move the lift rod (#10) up and down the fully open and
close the stopper (#1). Remove the lift rod strap (#8) from the ball rod (#7) and choose a
different hole to make adjustments as needed.
7. Close the drain and fill the sink with water. Check for leaks. If water is leaking from the drain,
refer to step 5 or 6 to tighten the washer (#3) and lock nut (#4).
1. Remove the old drain assembly. Clean the surface to remove the old adhesive and dirt before
installing the new drain. Dry the area thoroughly.
2. Remove the stopper (#1), the threaded end (#2) and washer (#3),
Note: Before installation, verify there is no damage to the pop-up body (#5) or the threaded
end (#2). If there is damage, please call customer service for a replacement. Do NOT install
damaged parts.
3. Place a ring of silicone sealent around the threaded end (#2) or the drain opening of the sink.
Verify the washer (#3) and lock nut (#4) are on the pop-up body (#5). Insert the pop-up body
(#5) into the drain hole from underneath and screw the threaded end (#2) to the pop-up body
(#5).
4. Verify the ball nut (#6) is pointed straight back to the lift rod (#10) location. Tighten the lock nut
(#4) firmly against the base of the sink to ensure a tight seal.
01/07/2022