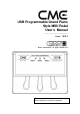
USB Programmable Grand Piano Style MIDI Pedal User’s Manual ————————————————— Model:GPP-3 Read “Precautions” on page 5 before use Please ready this manual carefully before use. Please keep this manual for reference.
Thank you for choosing CME GPP-3 — USB Programmable Grand Piano Style MIDI Pedal Please keep all the important information here Attach your invoice or receipt here ~~~~~~~~~~~~~~~~~~~~~~~ for reference Serial(on the back of the product) Purchase date Dealer’s name and addr. Dealer’s tel. Warning: z Improper connection may cause damage to the device. Copyright z Copyright of the manual belongs to Central Music Co. Anyone must get a written permission from Central Music Co.
Special Message Section This product utilizes batteries or an external power supply (adapter). Do NOT connect this product to any power supply or adapter other than the one described in the manual, on the product, or specifically recommended by CME. user safe and environment friendly. We sincerely believe that our products and the production methods used to produce them, meet these goals.
FCC INFORMATION (U.S.A) 1. IMPORTANT NOTICE: DO NOT MODIFY THIS UNIT! This product, when installed as indicated in the instructions contained in this manual, meets FCC requirements. Modifications not expressly approved by CME may void your authority, granted by the FCC, to use the product. 2. IMPORTANT: When connecting this product to accessories and/or another products use only high quality shielded cables. Cable(s) supplied with this product MUST be used. Follow all installation instructions.
PRECAUTIONS IMPORTANT Always follow the basic precautions listed below to avoid the possibility of serious injury or even death from electrical shock, damages, fire or other hazards. These precautions include, but are not limited to, the follows: 1. Read and understand all the instructions. 2. Always follow the instructions on the instrument. 3. Before cleaning the instrument, always remove the electric plug from the outlet as well as the USB cable. When cleaning, use a soft and dry cloth.
Setting up Do not connect the instrument when thundering. Do not set up the cord or outlet to a moist place, except for that the outlet is specially designed for moist places. When the power cord is connected to the AC outlet, do not touch the naked part of the cord or the connector. Always follow the instructions carefully when setting up the instrument. WARNING: z Do not expose the instrument to rain or moisture, to avoid fire or electrical shock.
Content 1 2 3 4 5 6 7 General view .............................................................................................................. 8 1.1 Front panel .................................................................................................. 8 1.2 Rear panel ................................................................................................... 8 Connection.................................................................................................................
1 General view 1.1 Front panel Pedal 3 Pedal 2 Pedal 1 1.2 Rear panel 2 Connection z ON/OFF: You can use the power switch to power on/off this product.
z z z z z DC: You can use the DC port to connect an AC adaptor. USB: You can use the USB port for computer connection. MIDI OUT: You can connect the MIDI OUT port to the MIDI IN port of another MIDI device. PEDAL 1-3:You can connect the Pedal 1-3 output to the pedal in jacks of your instruments. TRIM.: This is the fine tuning knob for PEDAL 3. 2.1 PEDAL out ports 2.
2.3 USB port z z GPP-3 is an USB MIDI class compliant product; you do not have to install a separate device driver on WINDOWS XP/MAC OS X. When you connect the GPP-3 to your computer via the USB port, the OS will automatically install the device driver, and show the installed device driver as “USB Audio Device”. 3 Operation 3.1 Power on z z z z You can supply the power via the USB port or an AC adaptor, then switch on the product.
3.2 Pedal Outs z Please use cables, with the right connectors, as below: Pedal out port Pedal type Connector type PEDAL 1 Switch TS PEDAL 2 Switch TS PEDAL 3 Continuous TRS 3.3 MIDI OUT z z z z z Please connect the MIDI OUT port to the MIDI IN port of another MIDI device. Power supply via USB or AC adaptor is necessary when using MIDI OUT port. Each time when a pedal is depressed, the corresponded LED will flash.
z product. The 3 pedals will flash for 5 times, then the reset operation is completed. The reset operation will clear all the settings, you have made to the product. 4 Settings 4.1 Polarity z z If you find a pedal is working in the reverse way, please change its polarity setting. Please depress the pedal you want to change, and power on the product, then the pedal polarity is changed. 4.2 Range z z You can adjust the data range of PEDAL3 .
assigning mode for a pedal, then the controller# will not be changed and you will enter the MIDI channel assigning mode. 4.4 Assign MIDI Channel z By assigning a MIDI channel, you can change the sent out MIDI messages of a pedal for the MIDI OUT and the USB port. z Follow the below steps to assign the MIDI channel: I. After you finished the controller# assigning for a pedal and no pedal is depressed for 3 seconds, you will enter the MIDI channel assigning mode for the same pedal, that the LED is on.
5 Controller list Controller# Controller name Data type Data range 0 Bank Select Controller 0-127 1 Modulation wheel Controller 0-127 2 Breath control Controller 0-127 3 Undefined Controller 0-127 4 Foot controller Controller 0-127 5 Portamento time Controller 0-127 6 Data Entry Controller 0-127 7 Channel Volume Controller 0-127 8 Balance Controller 0-127 9 Undefined Controller 0-127 10 Pan Controller 0-127 11 Expression Controller 0-127 12 Effect control
Controller# Controller name Data type 43 Expression Controller 0-127 44 Effect control 1 Controller 0-127 45 Effect control 2 Controller 0-127 46 Undefined Controller 0-127 47 Undefined Controller 0-127 48 General Purpose #1 Controller 0-127 49 General Purpose #2 Controller 0-127 50 General Purpose #3 Controller 0-127 51 General Purpose #4 Controller 0-127 52 Undefined Controller 0-127 53 Undefined Controller 0-127 54 Undefined Controller 0-127 55 Undefine
Controller# Controller name Data type Data range 90 Undefined Controller 0-127 91 Reverb Send Level Controller 0-127 92 Tremolo Depth Controller 0-127 93 Chorus Send Level Controller 0-127 94 Celeste/Detune Depth Controller 0-127 95 Phaser Depth Controller 0-127 96 Data entry +1 Controller 0-127 97 Data entry -1 Controller 0-127 98 NRPN LSB Controller 0-127 99 NRPN MSB Controller 0-127 100 RPN LSB Controller 0-127 101 RPN MSB Controller 0-127 102 Undefine
6 Firmware upgrade z You can upgrade the firmware of GPP-3 via an USB connection, by using the upgrade program. z To enter the upgrade mode, please depress both PEDAL1 and PEDAL3. Now power on the product. z You can find the upgrade program and the instructions on the CME web site. (http://www.cme-pro.com). 7 Specifications z Pedal 3 pedals including two switch pedals and one continuous pedal. z Functions Basic functions: switch data and continuous data. MIDI data sent: Controller# change.
2006-Aug Central Music Co. Tel: +86-10-8580 1115 Fax:+86-10-8580 1114 Web: www.cme-pro.com E-mail for support: support@cme-pro.