
Installation Guide

Once you’ve prepped your wall or project space, you can finish the job in 6 simple steps:
Now step back and admire your work. ClipStone® makes it easy!
Fig. 6
Fig. 7
Fig. 8
Fig. 9
Fig. 10
Fig. 11
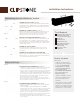
STEP 1: ATTACH STARTER STRIP (see Fig. 6)
• Starter strips are required at the bottom of a wall and across the top of all windows, doors and other openings.
• Attach Starter Strip 1" below the bottom of where you want your stone wall height to start.
• Cut the Starter Strip to the length of wall being covered with ClipStone.
• Have outer layer of Water Resistive Barrier (WRB) positively flashed/layered over top of starter strip a minimum
of 2 inches
• Make sure starter strip is level.
STEP 2: START WITH THE CORNERS (see Fig. 7)
• Starting with the outside corners at the starter strip, install the first corner by lowering the bottom end of the clip
into the groove of the starter strip and insure it is level.
• ClipStone corners are reversible and can be installed in either direction.
• Alternate each corner left to right (short leg and long leg) up 3 or 4 feet by tucking bottom of clip behind the
stone below and attaching screws in all visible eyelets.
• Tip: Oset corner short leg 3/8 inch o wall to allow for potential settling or house movement.
STEP 3: COMPLETE YOUR FIRST ROW (see Fig. 8)
• Place first course of ClipStone pieces by inserting the bottom of clip into the v-groove of the Starter Strip.
• Check for level prior to attachment to wall.
• While gently pushing back and down, insert screws into the top of each top eyelets of the leveled stone.
Once secure, the piece of stone should be snug when gently pulling on it.
• Measure and cut final ClipStone piece in row with a chop saw to fit the space at the end of a row. Each piece
must always have two points of attachment. If necessary, cut a few pieces to the left or right of the clips to allow
for this.
STEP 4: COMPLETE YOUR OTHER ROWS (see Fig. 9)
• Repeat as above, always starting with the corners.
• Remember to alternate the short and long wing of corners after corners built up several more feet, install flat
pieces across the wall from the corner.
• Tip: When installing a new piece, bend top clip forward and tuck bottom legs behind stone below.
Then push top of piece back toward wall. With a gentle pressure back and down, screw piece into wall.
STEP 5: ADDING ACCESSORIES (see Fig. 10)
• 20 inch long Tapered sills are available for capping wainscot or as a window sill to carry water away from windows.
• Where outlets are present, an outlet stone is available to fit over a single gang electrical box that has been
installed by a licensed professional in compliance with local building codes.
• Both accessories come with attachment clips and installed with approved fasteners similar to flats and
corners above.
• Tip: For tapered sills below siding, it may be advantageous to partially remove first course of siding to
secure sill to wall.
STEP 6: FINISHING YOUR INSTALLATION (see Fig. 11)
• Once you’ve reached your final top row, finish your project with either a Drip Ledge Stone for a wainscot cap or cut
the ClipStone pieces to fit in the remaining area, always trying to maintain two points of fastening to the substrate.
• Cut stone as needed to fit both horizontally and vertically (see “How to Cut Stone” on other side).
• If you cut the stone horizontally and therefore remove clip above stone, you will need to use DAP® DynaGrip®
Heavy Duty Max on the bottom edge and 2 side edges. Insert the top piece with adhesive into its proper place
and press firmly into the surrounding pieces.
manufactured by
©2021, Environmental Materials, LLC. Lit# ESW-026 6/2021
Installing ClipStone is easy.
myclipstone.com