
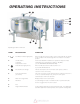
Operating instructions

ELECTRICAL
ENSURE THE ELECTRICAL SUPPLY MATCHES THE
KETTLE'S REQUIREMENTS AS STATED ON THE
RATING LABEL.
A cord and plug are supplied with the unit. Simply plug
the unit into any grounded outlet rated for a minimum of
10 amps. The wiring diagram is located under the cover
of electrical box inside the back console.
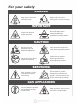
WARNING: Electrical Grounding Instructions.
This unit is equipped with a three-prong (grounding)
plug for your protection against shock hazard and
should be plugged directly into a properly grounded
three-prong receptacle. Do not cut or remove the
grounding prong from this plug. Standard supply
voltage is 115 volts A.C., however, optional A.C.
voltages can be supplied on special order. A separate
fused disconnect switch must be supplied and installed
in the high voltage electrical supply line. The kettle must
be electrically installed and grounded in accordance
with local codes, or in the absence of local codes, with
National Electrical Code, ANSI/NFPA 70-1990 (USA) or
the Canadian Electrical Code, CSA C22.2, Part 1
(Canada).
WATER
The sealed jacket of the gas-fired kettle is precharged
with the correct amount of a water-based formula, and
therefore, no water connection is required to the kettle
jacket. The kettle can be equipped with optional hot and
cold water taps, requiring 1/2" copper tubing as supply
lines.
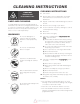
CLEANING
After installation the kettle must be thoroughly cleaned
and sanitized prior to cooking.
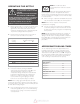
INSTALLATION CHECKS
Although the kettle has been thoroughly tested before
leaving the factory, the installer is responsible for
ensuring the proper operation of kettle once installed.
DO NOT ATTEMPT TO OPERATE THIS APPLIANCE
DURING A POWER FAILURE.
KEEP APPLIANCE AND AREA FREE AND CLEAR OF
COMBUSTIBLES.
1. Before turning the kettle on, read the
vacuum/pressure gauge. The gauge's needle
should be in the green zone. If the needle is in the
"VENT AIR" zone, follow air venting procedure.
2. Unit has been thoroughly checked for gas leaks at
the factory however the installer should check all
connections using soap bubble or gas detector for
any leaks which may have resulted from shipping or
installation.
3. Supply power to the kettle by placing the fused
disconnect switch to the "ON" position.
4. Open gas shut-off valve to turn on main gas supply..
5. Turn the temperature control knob to "1" (Min.). The
green LED light should remain lit, indicating the burner
is lit, until the set temperature is reached. Then the
green light will cycle on and off, indicating the burner
is cycling on and off to maintain temperature.
6. Tilt the kettle forward. After a few seconds the red
"LOW WATER" light should be lit when the kettle is in
a tilted position. This light indicates that the burner
has automatically been shut off by the kettle's safety
circuit. This is a normal condition when the kettle is
in a tilted position.
7. Raise the kettle to the upright position. The red
"LOW WATER" light should go out when the kettle is
upright.
8. Turn the temperature control knob to "10" (Max.) and
allow the kettle to preheat. The green light should
remain on until the set temperature is reached. Then
the green light will cycle ON and OFF, indicating the
burner is cycling ON and OFF to maintain
temperature.