
Manual

Example
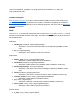
Lets say we want the TurtleBot 4 to have the following button functions:
● Make a short press of Create® 3 button 1 toggle EStop.
● Power off robot with 5 second press of Home on the TurtleBot 4 Controller.
● Short press of HMI button 1 performs Wall Follow Left, long press of 3 seconds performs
Wall Follow Right.
Create a new yaml file:
cd /home/ubuntu/turtlebot4_ws
touch example.yaml
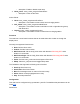
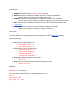
Use your favourite text editor and paste the following into example.yaml:
turtlebot4_node:
ros__parameters:
buttons:
create3_1: ["EStop"]
hmi_1: ["Wall Follow Left", "Wall Follow Right", "3000"]
controller:
home: ["Power", "5000"]
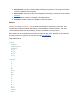
Launch the robot with your new configuration:
ros2 launch turtlebot4_bringup standard.launch.py
param_file:=/home/ubuntu/turtlebot4_ws/example.yaml
The buttons should now behave as described in example.yaml.
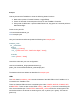
LEDs
The Leds class in turtlebot4_node controls the states of the HMI LEDs on the TurtleBot 4. It is
not used for the TurtleBot 4 Lite.
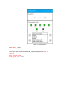
There are 5 status LEDs which are controlled by the node: POWER, MOTOR, COMMS, WIFI,
and BATTERY. There are also 2 user LEDs: USER_1 and USER_2 which are controlled by the
user via the /hmi/led topic. The BATTERY and USER_2 LEDs consist of a red and green LED
which allows them to be turned on as either green, red, or yellow (red + green). The rest are
green only.