I/Port User’s Guide
Technical Support Please refer to our support website for technical updates, additional warranty information and documentation, and software revisions: Web: http://support.clearcube.com Email: support@clearcube.com Phone: (512) 652-3400 or call toll free (866) 652-3400 (United States) ClearCube Technology Corporate Headquarters Mailing and Shipping Address: The ClearCube Building 8834 Capital of Texas Hwy N. Austin, Texas 78759 Email: info@clearcube.
Contents How to Use This Guide . . . . . . . . . . . . . . . . . . . . . . . . . . . . . . . . . . . . . . . . . . . . . . . . . . . . . . . . . . . . v FCC Warning . . . . . . . . . . . . . . . . . . . . . . . . . . . . . . . . . . . . . . . . . . . . . . . . . . . . . . . . . . . . . . . . . . . . v California Proposition 65 Statement . . . . . . . . . . . . . . . . . . . . . . . . . . . . . . . . . . . . . . . . . . . . . . . . . . v WEEE Information . . . . . . . . . . . . . . . . . . . . . . . . . . .
Optimizing RDP and the I/Port . . . . . . . . . . . . . . . . . . . . . . . . . . . . . . . . . . . . . . . . . . . . . . . . . . 14 Adding a Printer . . . . . . . . . . . . . . . . . . . . . . . . . . . . . . . . . . . . . . . . . . . . . . . . . . . . . . . . . . . . . . 17 Configuring NeoLinux I/Ports . . . . . . . . . . . . . . . . . . . . . . . . . . . . . . . . . . . . . . . . . . . . . . . . . . . . . . 18 Configuring the I8330 I/Port . . . . . . . . . . . . . . . . . . . . . . . . . . . . . . . . .
How to Use This Guide This manual provides all the product and installation information needed to set up and run ClearCube Technology’s I/Port architecture for managed desktop environments. Familiarize yourself with the ClearCube architecture and product descriptions and read through the entire installation and setup procedures before beginning installation. If you encounter any problems, contact Technical Support using the contact information provided on the inside front cover of this manual.
WEEE Information The products described in this document are subject to regulation under the European Union Directive 2002/96/EC, that mandates separate waste collection, treatment, and recycling of electronic products.
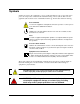
Symbols Symbols are used on the equipment to convey specific information to the operator and service person. It is important to understand the intended meaning of these symbols. Below are the graphical symbols that are used on ClearCube Technology, Inc. Products and their meaning. Refer to Manual Used on the equipment’s rating label to direct the operator or service person to the manual for additional information.
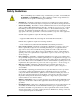
Safety Guidelines Before undertaking any troubleshooting or maintenance procedure, read carefully all WARNING and CAUTION notices. This equipment contains voltage hazardous to human life and is capable of inflicting personal injury. • • Installations – ClearCube equipment is required to be installed in accordance with the local electrical codes and may be subject to inspection by the authority having jurisdiction.
• Modification – Do not modify any part of the I/Port, chassis, host, or PC blade from its original condition. Modifications may result in hazards. CAUTION: Use of controls or adjustments or performance of procedures other than those specified herein may result in hazardous radiation exposure.
x •
Chapter 1. ClearCube I/Port Overview The ClearCube architecture delivers PC functionality to the desktop from a secure, centralized location. This results in dramatic increases in manageability and security while providing mission-critical reliability, performance, and uptime improvements with lowered costs. Replacing a traditional PC box with a ClearCube C/Port or I/Port in an office or cubicle also saves space, eliminates fan noise and simplifies cabling resulting in a clear cube.
I8330 I8020 / I8820 I9420 and I9440 Figure 1. ClearCube I/Ports Thin Clients and Operating Systems ClearCube I/Ports are available with: • Windows XPe operating system—Windows XPe offers the power of Windows XP in a compact, componentized form. • Neoware NeoLinux operating system—NeoLinux is a tailored version of Linux® that is targeted at and optimized for a broad range of information appliances and thin clients.
I8820 The I8820 features Windows XPe as the operating system. The small form factor of the I8820 I/Port allows customers to easily mount the I8820 under desks, vertically on walls, or behind a monitor using the optional mounting bracket. Connecting to hosts using RDP, the I8820 I/Port delivers video and peripheral signals to users using Ethernet, eliminating distance limitations between hosts and users.
• Existing Ethernet networks • Secure point-to-point connections to prevent desktop-display data commingling with other network traffic I94xx I/Ports do not require unique OS drivers, and support the following standard peripherals: • Multiple monitors • Keyboards • Mouse devices • Audio devices • USB peripherals, including isochronous USB devices Supporting Technology and Software The following applications work together to enable and enhance I/Port functionality: • Remote Desktop Protocol (R
• Audio – The audio streams, such as .wav and .mp3 files, play through the I/Port’s speaker connection. RDP provides downstream audio only. RDP only supports audio out (i.e., from the host to the I/Port) so speakers connected to an I/Port can play sound generated by the host. However, audio in (i.e., from the I/Port to the host) isn't supported by RDP so audio devices such as microphones cannot transmit back to the host.
PCoIP I9420 and I9440 I/Ports use PCoIP technology to deliver high–performance video and audio to users. PCoIP technology consists of dedicated processors on the thin client (I94xx I/Port) and on the host to which the thin client connects.
Chapter 2. I/Port Installation Caution Statements Improper connection, mounting, or use of this product could result in component failure or undesired interference. Read the following caution statements before setting up and operating your I/Port. Setup • Do not connect to AC power until all other connections are made, including the power adapter. Connecting or disconnecting components or equipment on the back panel when the I/Port is receiving AC power can cause power surges and damage the device.
Power Sources • To ensure regulatory compliance, use only the power supply included in the shipping carton with the I/Port, or a ClearCube-approved equivalent. • Surge protectors for electrical devices are recommended in areas of frequent lightning. However, when lightning is occurring, your equipment should be properly shut down and unplugged from AC power until the storm has passed. • Be careful to not interrupt power while the I/Port is receiving a software update.
The following figure shows a typical cabling configuration to connect I9420 I/Ports and I9440 I/Ports to an A3100 chassis. A3100 Chassis with 10 A1410 Blades PCoIP .... PRI SEC BLADE 5 PCoIP PRI .... SEC BLADE 6 External Data Sources and Entities Data Network Switch Thin Clients and Peripherals Figure 4.
– I8020 or I8820 I/Port—Figure 5 on this page – I8330 I/Port—Figure 6 on this page – I9420 I/Port—Figure 7 on page 11 – I9440 I/Port—Figure 8 on page 11 Do not attach the I/Port to a telephone jack. This will permanently damage the I/Port. This damage is not covered under the ClearCube Technology limited warranty. 11 1 2 10 3 4 5 6 7 8 9 1. Power supply connector 5. Serial port 9. Audio line in (local use only) 2. VGA video port 6. USB 1.1 port (rear panel) 10. USB 1.
Front Rear Audio In Power Indicator Link Indicator USB 1.1 Ports Power Button Power Connector RJ-45 DVI–I Port 1 DVI–I Port 2 Audio Out Rear USB 1.1 Ports Figure 7. I9420 I/Port Front and Rear Front Rear Audio Out Power Jack Power Indicator Link Indicator USB 1.1 Ports RJ–45 DVI–I Video Ports Audio In Host Power USB 1.1 Ports Power Button Figure 8. I9440 I/Port Front and Rear 3. Connect the power cord. 4. Press the power push-button on the I/Port to turn power on. 5.
Using the I94xx Mounting Bracket Use the I94xx mounting bracket, included with I9420 and I9440 I/Ports, to mount an I94xx I/Port under a desk. Use the following tools to mount the bracket: • Phillips screwdriver • Optionally, a drill to drill 3/32–inch pilot holes for the mounting bracket screws. Note: ClearCube recommends attaching all cables to the I/Port, as described in "Setting up the I/Port" on page 9, before inserting the I/Port into the bracket. 1.
Enabling RDP on Hosts for I/Port Connections The Remote Desktop Protocol (RDP) is used to connect your I/Port to a host or blade running Windows XP Professional. The I/Port and host can be located anywhere – across the hall, across town, or across an ocean from each other – provided that you have network access from the I/Port to the host, you have sufficient network bandwidth (> 50 Kbps for each I/Port), and you have the appropriate permissions set up on the host.
Filter and enable writes to Flash. After you make your changes, double-click on the Write Filter icon in the system tray and select Commit changes to disk and enable write filter. Your changes are saved to Flash, the I/Port automatically restarts in 15 seconds, and the Write Filter is re-enabled when the restart is complete. The Sentral client is provided as the default client on both the XPe- and NeoLinux- based I/Ports.
on the I/Port to optimize the user experience. Most of the performance optimization revolves around configuring RDP in the most appropriate fashion, given your infrastructure. ClearCube recommends using the I/Port primarily on a corporate network (100Mbps or faster) with Sentral. However, you may have users who will use I/Ports for remote applications, such as office access from home, offshore development, etc. RDP allows several configurable capabilities.
Figure 10. RDP Display Tab • Local Resources: Sound—Sound is configurable in three ways. Sound can either be left at the remote computer so it plays at the source (the host). This probably would not be done, since the hosts are in the data center. The other two options are to ignore sound, or to redirect sound to the I/Port. This last option provides the highest quality experience but also requires additional bandwidth.
If the user does not require printers or serial ports, it is best to disable re-direction to prevent any potential bandwidth loss caused by the host OS carrying out any sort of detection or other processes for these devices. • Experience – Selecting a connection speed causes specific items listed in the connection speed pull-down menu to become checked or unchecked. Generally, the desktop background, especially if it is an image, is a significant source of performance slowdowns.
10. Click OK twice to commit the changes and close the Firewall control panel. 11. Double-click on the Write Filter icon in the system tray and select Commit changes to disk and enable write filter to reboot the I/Port. To perform the tasks on the host, do the following: 1. Select Start > Printers and Faxes > Add a printer. 2. Select Network Printer and use the Add Printer Wizard. 3.
If you are not using the Sentral client, a native RDP client is also available from the ezConnect interface. To use the ezConnect RDP client, select Neoware > ezConnect from the menu bar. The ezConnect client allows viewing and modifying settings on the I/Port such as display settings and network configurations. The ezConnect client can also be used to set up local or remote connections using X.11 or tty. To add a local tty connection, do the following: 1. From the Connection window, select Connect > Add.
Note: Once this setting has been changed, the I8330 no longer displays the option to enter Setup. If you need to enter Setup, cycle the power on the I8330 and press F10 when prompted. The user must be joined to the Windows domain used by your Sentral installation, or must be a local user on the host or virtual machine (VM) to which the user will connect. The user must also be joined to a Sentral User Group, and the target host or VM must be allocated to that User Group.
Table 1. I8330 Setup Tabs Option Description Network Tab IP Address This radio-button menu specifies IP Addressing mode. Choices include: • Get Dynamic IP Address • Get Static IP Address The default selection is Get Dynamic IP Address. When Static IP Address mode is chosen, the administrator can specify the IP address and IP Gateway for this I8330 I/Port. MAC Address This static field specifies the MAC Address for this I8330 I/Port.
Option Description Desktop size This radio-button menu specifies the Connection mode. Choices include combinations of the following: • 640 x 480 – – 256 Colors (8-bit) or HI-Color (16-bit) (default) 60 Hz or 75 Hz vertical sync • 800 x 600 – – 256 Colors (8-bit) or HI-Color (16-bit) 60 Hz or 75 Hz vertical sync • 1024 x 768 – 256 Colors (8-bit) or HI-Color (16-bit) • 1280 x 1024 HI-Color (16-bit), 63 Hz The default selection is 640 x 480 256 Color at 60Hz.
– • V5120 Dual Host card processor Each PCoIP processor has an IP address, for a total of two IP addresses. Note that the IP addresses of the PCoIP processors are not the same as the host’s (that is, the computer’s) IP address. You must provision PCoIP processors on blades and on I9420 I/Ports when deploying I9420s. To provision an I9420, you must: 1. Determine the IP address structure for your environment and determine the IP addresses of the blade, the V5120 Dual Host card, and the I9420 I/Port. 2.
• IP addresses • Subnet mask • Gateway These values can be any value appropriate for your environment. d. Click Apply and then click Reset in the Attention dialog box to reset the I9420. e. In the upper–left corner of the screen, click Options > Configuration to open the Configuration window. Click Unlock on the lower–left portion of the window to display the Unlock dialog box. Click OK to unlock the window (you should not need to type a password). f.
1. Ensure that you have connected devices as described in "Setting up the I/Port" on page 9. 2. Connect the chassis to a network switch. a. Connect one end of a CAT5 or CAT6 Ethernet cable to the appropriate port on your chassis. • R4300 chassis—Insert the cable in the Secondary Network port. • A3100 chassis—Insert the cable in the PCoIP port. b. Connect the other end of the cable to a network switch on a known subnet. 3. Connect the I9420 I/Port to a network switch. a.
I9420 I/Port Display Resolution and Bandwidth Requirements The following table describes dual display resolutions for various display resolutions. Bandwidth values are provided in megabits per second (Mbps). Table 2.
Updating I/Port Software The XPe I8820 and the NeoLinux I8020 I/Ports use ezRemote Manager for software updates. Software updates are sent, or pushed, to the I/Ports in a package called a snap-in. Custom system images can also be pushed out to I/Ports. These brief procedures describe how to update or re-image XPe- and NeoLinux- based I/Ports. The ezRemote Manager User Manual provides complete details on pushing software updates or re-imaging the I/Port.
I/O-intensive applications between the host and the I/Port can significantly affect performance. ClearCube offers these recommendations: • Do not use I/Ports for writing to CDs or DVDs. Mass-storage devices such as CD burners and DVD burners rely on a predictable and relatively constant data transfer rate from the source to the burner. Although modern burners have large write buffers, the likelihood of a buffer underrun is high, and increases both with recording speed and with file size.
unable to test all devices. If your peripheral is not on this list, contact your Account Executive to ask about ClearCube certification services. • Limit the number of USB peripherals connected to your I/Port. When connecting more USB devices to an I/Port than there are available ports (three ports on the I8020/I8820), you need a USB hub. You should select a powered USB hub to reduce the likelihood of drawing too much power from the I/Port's USB port(s).
• The I8330 implements USB 1.1. Read and write performance are specified at 300KB/s read and 200KB/s write. • The I8330 does not support remote power on/off or reset functionality. • The I8330 is not capable of running a VPN client locally (on the I8330 device). A VPN connection is possible only if another device (e.g., a router) to which the I8330 is connected includes a VPN client and can, therefore, make the VPN connection.
Appendix A. Specifications Table 3. I8020 I/Port Specifications Input/ Output • 3 USB 1.1 ports (2 on front, 1 on rear) • PS/2 Keyboard & Mouse • VGA (DB-15 connector) • Audio In/Out • Serial Port (DB-9) • 10/100BaseT Ethernet (RJ-45) Video 1600 x 1200; 24-bit color; 85 Hz max Operating System NeoLinux Power Adapter Input 100–240 VAC, 50–60 Hz Size 1.7 inches (H) x 7.6 inches (W) x 6.2 inches (D) (4.3cm x 19.4cm x 15.7cm) Weight Shipping Weight: 3 lbs. (1.
Table 5. I8330 I/Port Specifications Input/ Output • 4 USB 1.1 ports • PS/2 Keyboard & Mouse • VGA (DB-15 connector) • Microphone In • Audio Out • 10/100BaseT Ethernet (RJ-45) Video 800 x 600; 8- and 16-bit color; 60 / 75 Hz 1024 x 768; 8- and 16-bit color; 60 / 75 Hz 1280 x 1024; 8- and 16-bit color; 63 Hz Operating System None Power Adapter Input 100–240 VAC, 50–60 Hz Size 1.57 inches (H) x 9.5 inches (W) x 5.2 inches (D) (40cm x 242cm x 132cm) Weight Shipping Weight: 2.14 lbs.
Table 7. I9440 I/Port Specifications Input/ Output • 4 USB 1.1 ports • 4 DVI digital video ports (standard DVI-I) • Microphone In • HD audio Out • 10/100 RJ-45 Ethernet Video Up to 1600 x 1200; 32-bit color depth; 60 Hz Operating System None Power Adapter Input 100–240 VAC, 50–60 Hz; output 12 VAC, 5 amps Size 2.5 inches (H) x 9.5 inches (W) x 5.2 inches (D) Shipping Weight Approximately 3 pounds (1.
34 •
Appendix B. Troubleshooting This appendix provides troubleshooting information for the I9420 I/Port. The I9420 I/Port is connected to a 100/full-duplex switch but performance is poor and throughput is not full-duplex. To ensure 100/full-duplex throughput between a V5120 card in a blade and an I9420 I/Port, set any network switches connecting the blade and the I/Port to automatic negotiation. Explicitly setting a network switch to 100/full-duplex can cause throughput issues.
My I9420 I/Port does not recognize my keyboard, my mouse, or both. When I start the I/Port the Add New Hardware wizard starts and I cannot dismiss the wizard. The Realtek® HDAudio driver must be installed on a blade to use the I9420 or C7420. If the driver is not installed it can cause the Add New Hardware Wizard to start before the USB driver is installed. In this case there is no keyboard or mouse support and you cannot dismiss the wizard.
The A1410 blade does not support standby state. Briefly press the remote power (less than four seconds) to perform a graceful shutdown, or soft power off. I9420 does not support the hard reset option, or Hard-Power off (pressing and holding the remote client power button for more than four seconds). In the V5120 configuration Web page, click Permissions and then click Power. Ensure that Soft-Power off is selected. No other option is supported.
I cannot connect a I/Port to a blade using RDP, or I receive an Alert: Session timeout! message. I9420 I/Ports use PCoIP technology to deliver video, USB, and audio data. These user ports do not currently support RDP. Resolution From the I/Port V5120 configuration Web page, click Configuration > Session and ensure that you select PCoIP in the Session Type drop-down menu.
Appendix C. Technical Support In the event any problems arise with your ClearCube hardware or software, we recommend that you first check the support Web site for any relevant technical bulletins and updates for your specific product(s) before calling your authorized reseller or the ClearCube Technical Support Department.
40 •
P/N G020043 Revision G