I/Port User’s Guide Rev.
Technical Support Please refer to our support website for technical updates, additional warranty information and documentation, and software revisions: Web: http://support.clearcube.com Email: support@clearcube.com Phone: (512) 652-3400 or call toll free (866) 652-3400 (United States) ClearCube Technology Corporate Headquarters Mailing and Shipping Address: The ClearCube Building 8834 Capital of Texas Hwy N. Austin, Texas 78759 Email: info@clearcube.
Contents Figures . . . . . . . . . . . . . . . . . . . . . . . . . . . . . . . . . . . . . . . . . . . . . . . . . . . . . . . . . . . . . . . . . . . . . . .ii Tables . . . . . . . . . . . . . . . . . . . . . . . . . . . . . . . . . . . . . . . . . . . . . . . . . . . . . . . . . . . . . . . . . . . . . . .ii Introduction . . . . . . . . . . . . . . . . . . . . . . . . . . . . . . . . . . . . . . . . . . . . . . . . . . . . . . . . . . . . . . . . . . 1 How to Use this Guide . . . . . . . . . . . . . . . .
Figures Figure 1 Figure 2 Figure 3 Figure 4 Figure 5 Figure 6 Figure 7 Figure 8 Figure 9 ClearCube I/Ports. . . . . . . . . . . . . . . . . . . . . . . . . . . . . . . . . . . . . . . . . . . . . . 7 ClearCube I/Port Architecture Cabling Diagram . . . . . . . . . . . . . . . . . . . . . 12 I8020 / I8820 Port Connections . . . . . . . . . . . . . . . . . . . . . . . . . . . . . . . . . . 13 I8330 Port Connections . . . . . . . . . . . . . . . . . . . . . . . . . . . . . . . . . . . . . . . .
Introduction How to Use this Guide Thank you for purchasing your quality ClearCube products. The ClearCube Architecture was developed to bring you unprecedented levels of manageability, security, reliability, and space savings. The ease of use of ClearCube’s products makes installation straightforward. This manual provides all the product and installation information needed to set up and run ClearCube Technology’s I/Port Architecture for managed desktop environments.
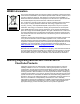
WEEE Information The products described in this document are subject to regulation under the European Union Directive 2002/96/EC, that mandates separate waste collection, treatment, and recycling of electronic products. This directive is commonly known as WEEE, for Waste from Electrical and Electronic Equipment, and its intent is to promote the safe and sensible disposal of products that have outlived their usefulness.
Symbols Symbols are used on the equipment to convey specific information to the operator and service person. It is important to understand the intended meaning of these symbols. Below are the graphical symbols that are used on ClearCube Technology, Inc. Products and their meaning. Refer to Manual Used on the equipment’s rating label to direct the operator or service person to the manual for additional information.
Safety Guidelines Before undertaking any troubleshooting or maintenance procedure, read carefully all WARNING and CAUTION notices. This equipment contains voltage hazardous to human life and is capable of inflicting personal injury. • Installations – ClearCube equipment is required to be installed in accordance with the local electrical codes and may be subject to inspection by the authority having jurisdiction.
replacements will void the warranty and may cause harm to personnel operating the chassis. Furthermore, damage or fire may occur if replacement parts are unsuitable. • Modification – Do not modify any part of the I/Port, chassis, or PC blade from its original condition. Modifications may result in hazards. CAUTION: Use of controls or adjustments or performance of procedures other than those specified herein may result in hazardous radiation exposure. ClearCube I/Port User’s Guide, Rev.
ClearCube I/Port Overview The ClearCube architecture delivers Intel-based PC functionality to the desktop from a secure, centralized location. This results in dramatic increases in manageability and security while providing mission-critical reliability, performance, and uptime improvements with lowered costs. Replacing a traditional PC box with a ClearCube C/Port or I/Port in an office or cubicle also saves space, eliminates fan noise and simplifies cabling resulting in a clear cube.
I8020 / I8820 Eon e100 I8330 Figure 1 ClearCube I/Ports Operating Systems ClearCube I/Ports are available with Windows XPe or Neoware NeoLinux operating systems, depending on the I/Port model. Windows XP Embedded (XPe) Based on the same binary code as the Microsoft flagship operating system, Windows XP Professional, Windows XPe offers the power of Windows XP in a compact, componentized form.
Eon e100 The Eon e100 connects to any ClearCube PC blade over standard Ethernet infrastructure that may include routers, switches, hubs and media converters. This means the distance between a PC blade and the desktop can be unlimited provided that sufficient network bandwidth is available. The Eon e100 is available with either the Windows XPe or the NeoLinux operating system. The Eon e100 I/Port provides a mezzanine PCI slot to allow adding expansion cards that enhance the device’s usability.
Supporting Software The following applications work together to enable and enhance I/Port functionality: • Remote Desktop Protocol (RDP) • ClearCube Sentral • Neoware ezRemote Manager • I83xx Driver and Admin Utility Remote Desktop Protocol Microsoft Remote Desktop Protocol (RDP) is a presentation protocol that allows the I/Port to communicate with a PC blade.
enterprise. Snap-ins are deployment packages that can automatically install peripheral drivers or local applications such as VPN clients. ezRM can fully re-image a device in order to deploy a customized image enterprise-wide or for disaster recovery on individual devices. ezRM is also the tool for keeping XPe based units up-to-date with Microsoft security updates.
I/Port Installation Caution Statements Improper connection, mounting, or use of this product could result in component failure or undesired interference. Read the following caution statements before setting up and operating your I/Port. Setup • Do not connect to AC power until all other connections are made, including the power adapter. Connecting or disconnecting components or equipment on the back panel when the I/Port is receiving AC power can cause power surges and damage the device.
Cable Requirements For I/Port installations, you need eight CAT5 cables per chassis to connect the blades to your network switch. You will not need to connect any cables to the C/Port connections. With I/Ports, the cables going to the desktop are connected directly to your network switch. Figure 2 provides schematics of the cabling required to connect your chassis to I/Ports and your Ethernet network.
2. Make connections as shown in Figure 3 through Figure 5, depending on your I/Port. CAUTION: Do not attach the I/Port to a telephone jack. This will permanently damage the I/Port. This damage is not covered under the ClearCube Technology limited warranty. 11 1 2 10 3 4 5 6 7 8 9 1. Power supply connector 5. Serial port 9. Audio line in (local use only) 2. VGA video port 6. USB 1.1 port (rear panel) 10. USB 1.1 ports (front panel) 3. PS/2 mouse port 7. 10/100 BaseT Ethernet port 11.
1. Power supply connector 2. PS/2 keyboard port 3. PS/2 mouse port 4. Audio line out 5. Audio line in 6. Serial ports 7. Parallel port 8. VGA video port 10 9. 10/100 BaseT Ethernet port 10. USB 2.0 ports (back panel) 11. Network activity LED 9 12. Power LED 13. On/Off switch 6 14. USB 2.0 ports (front panel) 11 8 12 7 6 5 4 3 2 13 14 1 Figure 5 Eon e100 Port Connections 3. Connect the power cord. 4. Press the power push-button on the I/Port to turn power on. 5.
Configuring the Sentral Console for the I/Port Connection In its default configuration, Sentral auto-detects I/Ports when they are connected to a Sentral-managed network, but some additional configuration is required. To configure the Sentral console for your I/Port connection, do the following: 1. If using I8330 I/Ports, install the I8330 Admin Utility on the Sentral Console system. 2. At the Sentral console, run Discovery to discover the I/Port.
Configuring the XPe I/Port The XPe-based I8820 and e100 auto-start to a Windows XPe desktop with a limited set of applications, including the ClearCube Sentral client and the Microsoft Remote Desktop Protocol client. The default XPe user ID and password is user / clearcube. The default administrator ID and password is administrator / clearcube. For full administrator access on an XPe-based I/Port, hold down the Shift key during startup or after logging off from the default login.
support.clearcube.com You can also use the ezConnect client to set up manual RDP connectivity to PC Blades. Click on Connections, select Add, and enter the connection information to your Blade. If using an XPe-based I/Port as a client managed by ezRemote Manager, please see the ezRemote Manager User Manual. Download this documentation at: http://www.clearcube.com/support/controller/manuals.php ezRemote Manager can be downloaded at: http://www.neoware.com/downloads/management.
Figure 6 Remote Desktop (RDP) Configuration Window The following items can be configured prior to initiating an RDP connection: • Display: Desktop Size – Though RDP allows the desktop to be sized so that the RDP connection runs in a window smaller than the local XPe desktop, anything less than full-screen mode is not recommended for I/Port users. • Display: Color Depth – The color depth options range from 256 to True Color.
options are to ignore sound, or to redirect sound to the I/Port. This last option provides the highest quality experience but also requires additional bandwidth. If the user has limited bandwidth and does not require sound, this option can be turned off. NOTE: RDP only supports audio out (i.e., from the blade to the I/Port) so speakers connected to an I/Port can play sound generated by the PC blade. However, audio in (i.e.
Figure 9 RDP Experience Tab Adding a Printer Installing a USB-attached local printer on an XPe I/Port requires installation steps both at the I/Port and on the PC blade. You need administrator privileges on both systems. To perform the tasks at the I/Port, do the following: 1. Disable the Write Filter (see Configuring the XPe I/Port on page 16). 2. Install the printer driver from a USB-attached storage device. 3.
Configuring NeoLinux I/Ports NeoLinux-based I/Ports autostart the ClearCube I/Port client on bootup. The default Administrator ID / Password is su / clearcube. No default user ID or Password is provided. The Write Filter Disable command, which allows writing to flash, is fsunlock. The Write Filter Enable command, which prevents writing to flash, is fslock. Enable any necessary ports on your switches and routers. Sentral uses ports 6502 UDP, 4001 UDP, 9000 TCP and 9000 UDP.
• vim (an enhanced version of vi) A limited amount of help is available (enter help) but man pages are not provided. Configuring the I8330 I/Port The I8330 I/Port provides a connection to a blade without requiring an operating system in the I/Port itself. This architecture provides a variety of benefits, including security and cost savings. Sentral Configuration The I8330 I/Port requires Sentral 5.2 or higher.
Operating Notes Use the power switch on the back of the I8330 to turn it on and off. The blue POWER LED on the front panel indicates that the I8330 has power. The blue READY LED indicates that the I8330 is ready to use. The blue LAN activity LED on the front panel blinks in response to traffic between the I8330 and the network, but will otherwise remains steadily lit. Turn the Num Lock function off before connecting to a blade.
Table 1 I8330 Setup Tabs (Continued) Option Server Connection List Description The default selections include: • Autodetection • TS 2 • TS 3 The default active connection is Autodetection. This selection’s name cannot be edited. The names of the other two choices can be edited. To activate or deactivate a connection, highlight it in the list and click the Enable/Disable button. To edit a connection, highlight it and click the Edit button.
Updating I/Port Software The XPe Eon e100 and I8820, and the NeoLinux Eon e100 and I8020 I/Ports all use ezRemote Manager for software updates. Software updates are sent, or pushed, to the I/Ports in a package called a snap-in. Custom system images can also be pushed out to I/Ports. These brief procedures describe how to update or re-image XPe- and NeoLinuxbased I/Ports. The ezRemote Manager User Manual provides complete details on pushing software updates or re-imaging the I/Port.
General Recommendations for I/Ports The following recommendations should be observed for best I/Port performance. RDP-Based I/Ports As previously noted, RDP is a limited-bandwidth connection when compared to 100baseT Ethernet. In addition, Ethernet bandwidth can be constrained by network activity anywhere between each end of a connection. I/O-intensive applications between the PC blade and the I/Port can significantly affect performance.
• Test your USB peripherals before putting them into a production environment. I/Ports are USB 1.1 or USB 2.0 compliant, depending on model number. I/Port peripherals, including USB devices, rely on redirection by RDP to work properly. RDP can only redirect the following devices: mass storage, printers, serial ports and smart card readers.
28 • I/Port Installation • Do not hot-plug PS/2 devices on an I8330 I/Port. On the I8330, PS/2 devices (keyboard or mouse) are not hot-pluggable. You must turn off the I8330 before attaching or detaching PS/2 devices. • Disconnect USB devices using the “Safely Remove Hardware” icon in the system tray. If USB devices are incorrectly disconnected, the USB chain is forced to re-enumerate completely.
Specifications Table 2: e100 I/Port Specifications • • • • • • 4 USB 2.0 ports (2 on front, 2 on rear) PS/2 Keyboard & Mouse VGA (DB-15 connector) Audio In/Out 1600 x 1200; 16-bit color; 85 Hz 1600 x 1200; 24-bit color; 60 Hz Operating System • Windows XPe –or– NeoLinux Power Adapter • Input 100–240 VAC, 50–60 Hz Size • 11.4" (H) x 2.1" (W) x 8.8"(D) (29cm x 5.3cm x 24cm) Weight • Shipping Weight: 9 lbs. (3.
Table 4: I8820 I/Port Specifications • • • • • 3 USB 1.1 ports (2 on front, 1 on rear) PS/2 Keyboard & Mouse VGA (DB-15 connector) 1600 x 1200; 16-bit color; 85 Hz max 1280 x 1024; 24-bit color; 85 Hz max Operating System • Windows XPe Power Adapter • Input 100–240 VAC, 50–60 Hz Size • 1.7” (H) x 7.6” (W) x 6.2” (D) (4.3cm x 19.4cm x 15.7cm) Weight • Shipping Weight: 3 lbs. (1.
Technical Support Contact Information In the event any problems arise with your ClearCube hardware or software, we recommend that you first check the support website for any relevant technical bulletins and updates for your specific product(s) before calling your authorized reseller or the ClearCube Technical Support Department.
32 • Technical Support ClearCube I/Port User’s Guide, Rev.
P/N G020043-C Rev.