User Manual FCC ID: Y7WPLUMZ350
Contents 1 Basic Knowledge..........................................................................1 1.1 Brief Introduction.....................................................................1 1.2 General Considerations..........................................................1 1.3 Battery Precautions..................................................................2 1.4 Charge Mobile Phone.............................................................3 1.5 Charger Precautions...............................
3.3 Messages....................................................................................14 3.22 Play Store............................................................................... 33 3.4 File Management....................................................................16 3.23 Intercom.................................................................................. 36 3.5 Camera........................................................................................17 3.
4.15 Date and Time..................................................................... 64 4.16 Schedule Power On/Off................................................... 65 4.17 Auxiliary Functions............................................................. 65 4.18 About the Mobile Phone................................................. 65 5 Common Problems & Solutions........................................66 1 Basic Knowledge 1.1 Brief Introduction Thank you for purchasing this digital mobile phone.
Do not use the mobile phone near the weak signal or high-precision electronic equipments. Radio wave interference may cause incorrect operation of the electronic equipment and other problems. Do not disassemble or modify the phone, otherwise it will cause damage, leakage and circuit faults to the phone. Avoid mobile phone too close to magnetic objects such as magnetic cards, mobile phone radiation wave may clear floppy disk, saving card, credit card information stored on. 1.
it will lead to a fire and electric shock. Please clean the dust on the power socket. Please do not put water container near the charger, to avoid overheating, leakage and malfunction caused by water spills. If the charger come into contact with water or other liquids, immediately unplug the power from the outlet down to prevent overheating, fire, electric shock and malfunction of the charger.
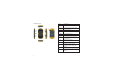
2.2 Phone Layout 6 1 2 11 12 7 8 3 4 9 5 10 Keys Instructions 1.Volume Key + Press this key to increase volume. 2.Volume Key - Press this key to decrease volume. 3. PTT Key Enter the intercom 4. Message Enter the intercom Key 5. FM Key The FM radio shortcut 6. USB/ Earphone The charger/USB/Earphone jack 7. Power Key Long press this key to turn off/on. Short press this key to lock the phone. Light the screen. Call Records shortcut 8. Call Records 9.
2.3 Boot Using 2.3.1 Insert and Remove SIM Card Turn off the phone, remove battery and other external power supply. According to the mobile phone label inserted SIM card. When you need to take out the SIM card, please turn it off, take out the battery, then remove SIM card from SIM card holder. 2.3.2 Power On/Off To turn on the phone, please long press the power key on the phone up side. Turn off the phone, long press the power key. The following message box pops up, select "Off”.
Users can clear the unlock pattern (see "Security Settings"). 3 Basic Functions 3.1 Dial In standby interface to click into the dial-up interface, click the digital on the screen to dial the number. If you need to change the phone number, please click back to delete characters, then press to dial the number. Press the Menu key to pop-up menu options, as shown, you can choose to send SMS, added to the "Contacts" or the Settings, etc.
Click to mute, do not send local voice. Click to keep current on the phone or restore is held. Click to use the keyboard to enter a contact or from call logs, contacts, select the relevant contact, to make a new call. Click to end the current call. Interface as shown when a call comes in, tap .. ... and drag to answer the phone, drag to reject a call, drag to send SMS. contact. Press the Menu key to modify, share and delete the contact.
In the contact interface click menu button will pop up the following menu options, you can according to your need to delete, import, export and share contacts and other operations. completion. Click on the screen, can insert images, video, audio and other files, SMS will be automatically converted into MMS. In Message interface, click on the menu, you can choose to delete, set up and send message, such as the menu. 3.3 Messages Click on the home screen, enter the message interface.
3.4 File Management You can view and management the files which be stored locally on the phone or SD card. You can copy the files, paste, rename, delete, share and other operations. 3.5 Camera On the main screen, tap into the application, and then click to enter the camera viewfinder screen. You can choose various camera mode at the top of the icon, at the bottom right corner, you can choose the flashlight mode, and switch camera mode. Touch the preview area can be adjusted to focus.
Click to take a picture, click interface, as shown: to convert video 3.7 Video Player On the main screen, tap into the application, and then click to enter the video list. Click on the menu key you can delete, sort, and other operations. Select a video to play, click to full-screen playback. Click time progress bar to forward and reverse operation. Click to send video to message, Bluetooth, E-mail to share. 3.
3.8 Music Player On the main screen, tap into the application, and then click to enter the music player. At the top of the screen, the artist, album, songs and playlists four ICONS respectively all the audio files are classified in the mobile phone. You can choose your favorite arrangement to find the songs that you want to listen. Choose to play a song: indicates pause/play song. indicates continue playing. indicates switch to last song, long press to rewind.
Start recording: Tap Play recording: Tap End recoding: Tap Pause recording: Tap List of recording: Tap Recorded audio files successfully saved automatically generated file list, click to view the recording or playback recording, and automatically save to your phone. 3.11 Clock On the main screen, tap into the application, and then click to enter the clock., You can see the setting date and time, week and alarm in the clock interface.
set, and other related operations. Settings can be set calendar view and reminder. Figure: 3.13 Calculator On the main screen, tap into the application, and then click to access the calculator. Your phone provides you a calculator with the four basic functions, allowing you to perform simple arithmetic. Press the "Clear" to clear the recent input or the result. 24 3.14 Notepad On the main screen, tap into the application, and then click into Notepad. Click on to add a new Notepad.
3.16 E-mail On the main screen, tap into the application, and then click to enter the e-mail. You can send email messages to anyone with an email address. Enter the program and set up my account, then you can click on your email account has been built into the account, to start, edit, create account, delete operations, can be sent or received email like computers. The program requires network support. 3.17 Browser On the main screen, tap into the application, and then click to enter the browser.
Click on the menu key on the main page, you can refresh, close, save to bookmark, share web pages, settings, etc. Click to go to the previous page; Click to enter next page; Click to view the pages you have open, you can slide up and down, and select a page to enter; clicking , you can view your bookmarks, history, and saved web page: 28 3.
Enter the content you want to search, click the Searching key, select the type of search you want, such as web pages, contacts, etc.: Click , enter the search results: Click on the menu key on the main page, you can refresh, close, save to bookmark, share web pages, settings, etc. 30 3.19 Download On the main screen, tap into the application, and then click to enter the download interface. You can view the content which have been downloaded or being download.
3.22 Play Store On the main screen, tap into the application, and then click to enter the Play Store. Play store when you first enter, you need to create a new account, you can follow the prompts to complete the creation process. When you use the account to enter Play store home page, you can see a variety of mobile phone software, you can choose according to your needs and install it to your phone.
After the download is complete, click Open, you can start to apply your newly downloaded this software: Click to install the selected software, application permissions in the popup choose to accept, the phone automatically starts to download the software, if you want to cancel the download, click next to the download progress bar.
S e l e c t " M y A p p l i c a t i o n" , y o u c a n v i e w y o u r click "Submit enter" to landing Walkie-talkie. If not "Installed application" and "All Applications", you can yet received verification code, can choose to resend also reset accounts, notifications, auto-updating the verification code after 60 seconds (figure 1.3). applications, password, etc.
C o n t a c t pa g e a s t h e n a m e s u g g e s t s t h e m a i n display of the interphone contacts, for the first time login, it will automatically access to mobile phone contact’s book as intercom contacts by default. This page provides to add contacts, modify contacts, search contacts, and delete contacts functions. Contact list in alphabetical order of the names, can be figure 2.1 figure 2.2 figure 2.3 viewed through the front and back contacts slide the screen up and down.
General intercom can through the following three answers, entering figure 3.1.2.2 page, click on the page in the center of the microphone to speak. If the ways: I n " d i a l - u p ( re c e n t ) " pa g e b y c l i c k i n g o n t h e other refuse to answer, then enter the page shown in intercom icon to launch the intercom (as shown in figure 3.1.2.4, after 3 seconds automatically return to figure 3.1.1.1) the page before the intercom.
3.Modify Contact In contact page, click on the contact entry, into the contact details page. In the top right corner of the edit button, click on the contact details page to enter to modify the contact page. Click "save" to complete the modification after modification completion. Specific as shown in the figure below: figure 3.1.3.1 2.Add Contact In contact page, click on the add contact icon in the top right corner. Enter the contact name and phone number, click add button to finish adding.
figure 3.4.1 figure 3.4.2 7.Direct Dialing 5.Search Contact In the Contacts page, click the search box, enter the contact name or phone number you want to find, the figure 3.5.1 Click on "Dial (recently)," on the right bottom page, "dial-up" can bring up the dial, dial directly. Specific as shown below: system automatically displays qualified contacts. Specific as shown below: 6.View Intercom Record Enter dial-up (recently) page, you can see intercom records by date classification.
9.APP Update APP Click on "about the app" in more page, enter the page of "about app". Click the update button to check if there is a new version app. If there is no new version will be prompted to current is the latest version, if there is a new version, will update pop-up prompt dialog box, select "update". Specific as shown in the figure below: figure 3.7.1 8.
1.TV/Set-Top Box/Home Theater Instructions a)When the first time entr y, directly into the TV page. Since did not add any equipment, the buttons on the page were grey, as shown in figure 1. Figure 2. Adding Device Figure 3. Adding Methods c)Adding devices are divided into "searching for specified manufacturers", "searching all manufacturers" and "Copy unknown manufacturers (i.e. learning)" in three ways. Click on the "Searching Figure 1.
Cancel to continue searching other data codes. Figure 5, some keys are grayed, which means that ther e is no data, it can study alone, and it can also be used for incorrect individual data buttons for individual learning, key to re-learning, as shown in figure 6. Figure 4. Adding Chang Hong TV d)After entering Chang Hong page, there are a total of 38 group code, the phone will automatically start from the first group code down search (You can also Figure 5.
e)Click on "Searching All manufacturer s", the phone When searching for a matching code group, the air will start to search down from the first set of code, conditioning will issue a "Di" sound, the other using regardless of brand sequential, the operation mode methods similar to TV, shown in Figure 8. with the "Searching for specified manufacturers”. f)Another way to add for the learning, users are free to define their needs by way of learning the device key, as shown in figure 7. Figure 8.
3.25 Software Update On the main screen, click the icon to enter the application, the interface prompt "Yes" "No" update, select "Yes" to continue to update, "no" to exit. If your software is the latest software, it will prompt current software is the latest, select confirm to exit. If your software is the old version, according to the Figure 9. “Other Page” key learning prompt update software, after restart the phone, your phone is updated with the latest version. 4.
then click to enter the settings, according to your need to personalize your phone settings. 4.1 SIM Management Set the SIM card for voice calls, video calls, Click to refresh the network list, if you get a license, you can click on your wir eless network license has been made, enter the password in the input area, and then click "Connect", the connection is messages, data connections and other settings. completed show "Connected", then your phone it can 4.2 WIFI be connected.
4.4 Mobile Network In this menu you can turn on or off the data connection, enabling 3G services, network operators and other options: 4.3 BT A c t i va te B l u e to o t h , t h e p h o n e a u to m a t i c a l l y searches for Bluetooth devices seen around, you can click on any device with which to pair the device to pair, with the search after connection for file transfer and other operations. 4.
t h e l o w e r r i g h t c o r n e r t o re t u r n t o t h e d e f a u l t settings. 4.9 Battery You can set the phone percentage of battery display and see remaining battery power and time. 4.10 Application 4.7 Display Open to personalize set the phone brightness, Yo u c a n v i e w t h e p h o n e h a s d o w n l o a d e d applications, phone storage applications, running scene, wallpaper, themes and automatically rotate the applications and all applications. You can click on the screen, etc.
4.12 SOS Setting You can set up an emergency number and edit emergency text messages in this, but when you press the emergency call button, the phone will a u t o m a t i c a l l y d i a l t h e n u m b e r, a n d s e n d t e x t messages. 4.13 Language and Input Method You can choose your preferred language and input method, you can also click for the input method for the relevant settings: 4.
4.14 Backup and Reset You can backup my data, automatically restore, 4.16 Schedule Power On/Off Set the time to automatically turn on or off the restore the factory settings and operations, restore phone. factory settings will delete all personal data on your 4.17 Auxiliary Function phone. 4.
View phone's current signal, power, service status, the phone's software and hardware information. Echo or noise Due to poor network trunk, is a regional problem Standby time shorter Standby time is related Turn off the to the network system mobile phone setting in the poor reception area.
contact point unable to connect the network Calls unable to call SIM card is invalid Beyond the GSM or 3G network service area. The signal is weak Please move to the strong signal place to retry set up the call barring function cancel the call barring function set up the fixed dial function cancel the fixed dial function. contact your network service supplier.
FCC RF EXPOSURE INFORMATION: WARNING!! Read this information before using your phone In August 1986 the Federal Communications Commission (FCC) of the United States with its action in Report and Outer FCC 96-326 adopted an updated safety standard for human exposure to radio frequency (RF) electromagnetic energy emitted by FCC regulated transmitters. Those guidelines are consistent with the safety standard previously set by both U.S. and international standards bodies.
(2) this device must accept any interference received, including interference that may cause undesired operation. NOTE: The manufacturer is not responsible for any radio or TV interference caused by XQDXWKRUL]HG PRGLILFDWLRQV WR WKLV HTXLSPHQW 6XFK PRGLILFDWLRQV FRXOG YRLG WKH XVHU·V authority to operate the equipment. NOTE: This equipment has been tested and found to comply with the limits for a Class B digital device, pursuant to part 15 of the FCC Rules.