Owner’s Manual SSP-800 Surround Sound Processor
NOTICE All of us at Classé take extreme care to ensure that your purchase will remain a prized investment. We are proud to inform you that all Classé components have been officially approved for the European Community (CE) mark. This means that your Classé product was subjected to the most rigorous manufacturing and safety tests in the world. The CE mark certifies that your purchase meets or exceeds all European Community requirements for manufacturing consistency and consumer safety.
Important Safety Instructions 1. Read these instructions. 2. Keep these instructions. 3. Heed all warnings. 4. Follow all instructions. 5. Do not use this apparatus near water. 6. Clean only with dry cloth. 7. Do not block any ventilation openings. Install in accordance with the manufacturer’s instructions. 8. Do not install near any heat sources such as radiators, heat registers, stoves, or other apparatus (including amplifiers) that produce heat. 9.
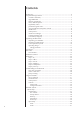
Contents Introduction ...................................................................................................... 6 Exceptional Design Features ............................................................................. 7 versatile connectivity ................................................................................ 7 upgradable DSP ........................................................................................ 7 superior performance ............................................
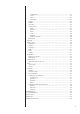
configuration ....................................................................................... 41 in use .................................................................................................. 42 video ................................................................................................... 42 next input ............................................................................................ 42 triggers .........................................................................
Introduction Welcome to the Classé family! Congratulations on your purchase of the Classé SSP-800 Surround Sound Processor, a next generation processor with reference-quality performance. We are sure that you will enjoy it for many years to come. Classe values the relationships with our customers and intend on supplying the highest level of support along with our product.
Exceptional Design Features The SSP-800 is a next-generation surround sound preamp/processor, conceived with pure performance as its raison d’être. It seamlessly unites a multitude of disparate audio and video signal formats to faithfully reproduce your music and movies as the artist intended. versatile connectivity The SSP-800 is a ten-channel preamp/processor with both balanced and singleended connections for all channels.
room equalization All home theater sound systems are affected by room characteristics. Sound and speaker control reflections and sound absorption can create dramatic variations in the performance of your system, particularly in the lower frequencies. The SSP-800 features a system of filters which can correct many room effects and provide the best possible sound.
Unpacking and Placement We have taken all precautions, and made every effort to make the SSP-800 simple and straightforward to install and use. Still, we recommend that you take a few minutes to review this manual. Even if you are having the processor professionally installed, you will want to know how to efficiently operate it to full potential. The SSP-800 menu system includes features that provide you with a great deal of fine-tuning.
placement considerations Before installing your SSP-800 into the system, be sure to read the following placement suggestions. • Do not place the SSP-800 directly on the top surface of a power amplifier or any other heat source. Also keep the processor out of direct sunlight. • Place the SSP-800 so that the IR window on the front panel is clearly visible and not blocked. • Position the SSP-800 in a central and convenient location for both visibility and use.
operating voltage The operating voltage of your SSP-800 has been factory configured to 100V, 120V, 220V, 230V, or 240V AC, depending on the country in which you purchased it (in European Union countries, CE regulations specify 230V). This voltage setting is not user selectable. Ensure that the voltage rating on the rear panel of the SSP-800 Surround Sound Processor matches the AC voltage rating of your electrical outlet.
voltage protection The SSP-800 Surround Sound Processor contains protection features that prevent the processor from operating at dangerously high or low voltages. These features are incorporated to help protect the processor from dangerous power surges and other power irregularities that could cause extensive damage to the processor. This circuitry guards against the following irregular supplied power conditions.
1 2 3 4 5 6 MUTE MENU SSP-800 Front Panel The front panel of the SSP-800 is shown above. The numbers in the drawing refer to the descriptions that follow. 1 Standby/On Switch Pressing the Standby button puts the SSP-800 into standby mode – a low-power state which leaves the Surround Sound Processor and outputs inactive but still allows the processor to respond to system commands via any of the supported control protocols (IR input, CAN-Bus, RS-232, or triggers).
3 Touchscreen The front panel touchscreen has two main functions: • Navigation of the SSP-800 menus and controls by simply touching the screen to make your selections. • Viewing incoming video from the selected source. 4 Audio Mute Control The Mute button reduces the SSP-800’s volume by a pre-determined amount. Pressing it a second time restores the volume to its previous level. This behavior can be easily customized for very specific user requirements.
1 2 3 8 7 9 5 4 11 10 6 15 13 14 12 16 17 THIS DEVICE COMPLIES WITH PART 15 OF THE FCC RULES. OPERATION IS SUBJECT TO THE FOLLOWING TWO CONDITIONS: (1) THIS DEVICE MAY NOT CAUSE HARMFUL INTERFERENCE, AND (2) THIS DEVICE MUST ACCEPT ANY INTERFERENCE RECEIVED, INCLUDING INTERFERENCE THAT MAY CAUSE UNDESIRED OPERATION.
2 Composite Video Inputs The SSP-800 supports two composite video inputs, with RCA connectors labeled 1 and 2. Use these inputs when the output of your source component is composite. A composite video signal (also called “baseband video” or “NTSC video”) combines the black & white and the color components of a video signal and transmits them over a single cable.
available. The HDMI standard also incorporates HDCP (High Definition Content Protection); a separate content-protection technology to prevent unauthorized distribution or duplication of copyrighted material. 5 HDMI Outputs The SSP-800 supports two HDMI outputs, labeled 1 and 2. The SSP800 HDMI outputs support HDMI V.1.3b featuring Deep Colour, x.v.Color(xvYCC), 1080p 24/50/60 fps, and provides a 2 channel SPDIF downmix of the source material.
9 Digital Audio Output - Coaxial The SSP-800 supports one digital audio coaxial output, with SPDIF connector labeled COAX. This output can pass PCM data streams up to 24-bits long and up to 96kHz sampling frequency. 10 Digital Audio Output - Optical These digital outputs carry only digital audio data, excluding any subcode information which some recorders might use to extract CD track information. 11 7.
14 IR Input Use the IR input when the front panel IR window does not have a clear line-of-sight with the remote control, for instance, when the SSP-800 is installed in a cabinet or closet. Attach this input to an infrared repeater system to route signals from the remote control to the SSP-800 via a mono mini-jack (3.5mm phono).
19 CAN-Bus Input and Output CAN-Bus (Controller Area Network) allows several Classé components to be connected together for simultaneous operation, such as switching from On to Standby. Using the CAN-Bus Input and Output connectors, the Classé components can be daisy chained together and controlled via the CAN-Bus interface. NOTE: The final component in the daisy chain MUST have a termination plug inserted into the CAN-Bus output. For more information, refer to the CAN-Bus section found later in this manual.
Main Power On/Off Switch This switch connects and disconnects the SSP-800 from AC. NOTE: Changes to settings are stored whenever the SSP-800 is put into Standby. Turning off power to the unit before first entering Standby mode erases any setting changes that have been made since the unit was last placed in Standby mode.
The Remote Control 1 LIPSYNC Your SSP-800 Surround Sound Processor includes a versatile remote control for both the processor itself and several aspects of the rest of a Classé-based system. The buttons are arranged in logical groups according to their functions. The remote control of the SSP-800 is shown on the left. The numbers in the drawing refer to the descriptions that follow.
4 Preset Config (Configuration) Button This button steps through the configurations set to “in use”. If there is already a configuration active (due to being a default) for a particular input it will be overridden until the input is selected again, or the user selects that default configuration. 5 Volume Control & Mute Buttons The Volume Up and Down arrow buttons increase or reduce the overall volume level of the audio output. The Mute button controls the system volume level.
Initial Setup Your SSP-800 Surround Sound Processor is delivered with default factory settings to facilitate initial setup. But we highly recommend that you work with your Classé dealer for the final setup of the SSP-800 processor. Your dealer’s knowledge and experience with Classé products will ensure that your surround system is optimized for your listening space. However, if you can’t wait to get started, this section is designed to assist you in setting up and becoming familiar with the SSP-800 hardware.
Step 3 Connect all source components to the SSP-800 rear panel. Source devices that you may want to integrate into your surround system might include audio and video devices, such as CD and DVD players, and your main display, such as a flat-panel display or projection system. If necessary, refer to the Rear Panel section in this manual for a detailed description of each connector found on the rear panel.
Connect the Main Analog Audio Outputs, either RCA or XLR, from the rear panel of the SSP-800 to the corresponding inputs on your amplifier(s) as follows: • Connect the SSP-800 Front Left and Front Right outputs to the inputs of the amplifier(s) designated for the Front Left and Front Right speakers, respectively. • Connect the SSP-800 centre output to the input of the amplifier designated for the centre channel speaker.
Step 6 Power up the system! Now you are ready to power up your SSP-800 and your surround system. • Turn the rear panel power switch of the SSP-800 to ON. • The initial power-up cycle of the SSP-800 takes approximately 90 seconds. During this time, the blue LED on the standby button flashes. • When the power-up cycle is complete, the SSP-800 enters Standby mode. The LED stops flashing but remains illuminated, indicating that the SSP-800 is in Standby mode.
Understanding Surround Sound Today’s sophisticated surround sound systems have spawned a bewildering array of technologies and acronyms. In this section, we’ll give you a basic understanding of what all that jargon means. As a result, you’ll be better equipped to take advantage of the best that home entertainment has to offer. how many channels? Today’s home entertainment systems reproduce soundtracks that include anything from one to eight separate channels of information.
By contrast, modern soundtracks use discrete channels of information. That is, each speaker has a distinct signal that is completely independent of every other channel. This approach is clearly more desirable, since it gives the movie-makers more creative control over the quality of your experience. Musicians also prefer discrete formats, since it allows them to place their instruments and voices with greater precision, to create the musical effects they desire.
Dolby Digital Plus 1.0 - 7.1+ Discrete Audio codec which allows for higher bitrates, 7.1 channels or more (currently limited by HD DVD, Blu-ray disc™ standards), while still remaining compatible with older 5.1 systems. The codec was designed based on Dolby Digital but provides the necessary versatility going into the future. Dolby TrueHD 1.0 - 7.1+ Discrete This is a true next-generation surround mode where the audio is bit-for-bit identical to the highresolution studio master audio.
Using the SSP-800 Your SSP-800’s versatile touchscreen LCD supports most of your day-to-day operations and provides access to a flexible menu system for setup functions that aren’t accessed as often as others. Although using the touchscreen is quite intuitive, the menu system is extensive. This section of the owner’s manual outlines the use of this touchscreen in day-to-day operation of the system.
mode selection While you can specify default surround processing modes for each input, there are times when you may wish to select a different mode for a particular recording. For example, when watching a classic movie from the 1940s, you may prefer to hear it in mono using only the centre channel speaker. Touch the Mode option on the Home page to open the Mode Select menu, which displays a complete list of processing modes. Modes that are grayed out cannot be applied to the current audio source.
Dolby PLIIx Movie Dolby PLIIx Matrix Dolby PLIIx Game DTS Neo:6 DTS Neo:6 Cinema DTS Neo:6 Music Discrete DTS Neo:6 Cinema ES DTS Neo:6 Music ES Dolby Surround EX Dolby Digital EX video preview The Movie mode routes the special effects signals to the surround channels for a fuller, dramatic impact while viewing movies and films. The Matrix mode provides a sound field similar to the Music mode, but does not have the additional adjustment options.
controls Touching the Controls option opens a new menu, as shown below. The Controls page allows you to adjust a variety of processor functions, such as audio levels and delays, as well as selecting listening configurations. These adjustments are temporary; when a new input is selected, the adjustments are deleted and replaced with the saved values. If you want to recalibrate the audio levels because of an equipment change, use the Speaker Setup menu, not the Controls menu.
configuration select Touching the Configuration option opens the Configuration Select menu, which allows you to select the current configuration you want to activate. Configurations, which reflect the speaker setup of your system, are defined and may be renamed in the Setup Menu. The Configuration Selection menu allows you to choose from up to six different system configurations.
The Menu System The comprehensive menu system provides setup and configuration controls for the SSP-800 Surround Sound Processor. These installation-specific features let you customize how the SSP-800 works within the context of your particular system. Pressing the Menu button on the front panel opens the main Menu page, which is divided into six sections as shown below.
system setup Touching the System Setup option from the main Menu page opens the System Setup page, which contains six setup options as shown below.
max volume The Max Volume page allows you to establish a maximum volume setting for your system. This scale runs from 0 to 100, with 100 indicating that you do not want any artificial limit placed on the maximum gain your Surround Sound Processor can provide. This setting is interactive. You can set the value to something less than 100, and then adjust the volume to see whether it is appropriate.
automation Touching the Automation option displays the Automation volume speed setup page, shown below. This volume control is specifically for use with automation control systems. Such control systems can vary in how quickly they repeat ramped volume commands. By first selecting a suitable volume control speed on the SSP-800 Surround Sound Processor, the programming required to tailor the speed from the control interface is simplified.
input setup Each of the 20 inputs supported by your SSP-800 Surround Sound Processor can be customized in several ways to enhance system performance or to simplify controls. The Input Setup menu always opens to the setup page for Input 1. The menu contains six buttons that completely define each input – Name, Audio, Configuration, In use, Video, and Next input, as shown below.
audio The Audio Input menu allows you to select the offset, delay, and favorite processing settings, affecting how the audio from this input source is handled. • offset is used to ensure that all analog source playback is at comparable levels. There can be significant differences in output levels among analog sources (this is not a problem with digital sources), which can lead to unexpected changes in volume when switching among multiple sources. The SSP-800 provides an offset adjustment range from -5 to +10 dB.
in use This button identifies active inputs. If the In Use button is highlighted, then the Input is active. If the In Use button is NOT highlighted, then the input is considered inactive and is removed from the source selection list. Deselecting the In Use button for unused inputs is a good way to simplify source selection. The Source menu on the Home page only lists active inputs so, if the In Use button is NOT highlighted in the input setup menu, that input does NOT appear in the Source menu.
profiles A Profile allows you to create a number of shortcuts to various functions of your surround sound processor. Two separate profiles can be customized with up to six commands each. Any defined profile has a named button available on the home page, as shown above. NOTE: By default both profiles are inactive, therefore the profiles button does not appear on the home screen. • To modify a profile name touch the Name button. A profile name can be up to 14 characters long.
room EQ The SSP-800 Room EQ capability allows you to build very precise digital audio filters to help correct for fixed sonic irregularities in your room. These filters should be constructed based upon audio measurements made by a well-qualified acoustical engineer. These powerful filters are made available in a completely manual fashion to help your professional installer give you the best listening experience possible.
name The Name button provides a way to customize the names of the speaker configurations. Each name can be up to 14 characters long. To change a configuration name to something more specific to your system, use the four buttons along the bottom of the Configuration Name menu. The buttons provide the following functions: • The left arrow button acts like the backspace key on a computer keyboard. Touch this button to delete characters by moving the cursor to the left.
levels The Levels menu allows you to adjust the output levels of the speakers. An SPL meter should be used from the primary seating position to ensure that each speaker delivers the same sound pressure from a given test noise audio signal. Touch the Noise Seq button to activate the noise generator; the top of the menu now states “Levels Noise: L” – indicating that the test noise is being generated on the front left speaker.
Each speaker opens the same menu with two buttons – size and crossover. To modify the crossover for the selected speaker, touch the Crossover button and then adjust the setting using the increase and decrease buttons. The crossover setting applies a high pass filter to the speakers set on crossed over, and a low pass filter to route bass information to the sub (if enabled).
auxiliary channels Now that the main speakers have been configured, we’ll discuss the Auxiliary Channel configurations. On the Speaker setup page, touch the Aux Channels button to open the Auxiliary Channels menu. The SSP-800 has two auxiliary channels that can be utilized as additional subwoofers, assigned as a 2-channel down-mix of a selected multichannel signal, or configured to bi-amped left and right audio. Alternatively, touch the None option to disable the auxiliary channels and leave them unused.
black level The more button on the System Setup screen accesses the Black Level setting. The “video setup” in North America assumes that black is reproduced at a video level of 7.5 IRE units, while most of the rest of the world assumes that video black is represented by a video level of 0 IRE units. The SSP-800 can operate either way; you should pick the standard common to your area for compatibility with the rest of your video sources.
display setup The Display Setup menu page, shown below, allows you to configure the brightness, display timeout, and language used in the front panel and menu system. It also determines the format and color of the OSD (on-screen display), and how volume settings are displayed on your system. brightness The Brightness setting of the SSP-800 front panel touchscreen has three possible values: low, medium, and high.
language The Language menu offers a choice between six different languages supported by the SSP-800. The language selected is then used for all touchscreen and menu system text. Classé has also provided our international distributors with a software tool that makes it possible for them to customize the translations to suit their local customs and terminology. This allows us to be sure operation of the SSP-800 is just as intuitive in countries other than its birthplace, Canada.
Dolby/DTS The SSP-800 incorporates both Dolby Pro Logic II and DTS Neo:6 technologies for converting a two-channel signal into an enjoyable multichannel listening experience. The Dolby/DTS Setup menu allows you to modify the Dolby PLIIx Music or DTS Neo:6 Music processing settings to best suit your personal preferences.
remote Fkeys The remote control supplied with the SSP-800 has four function keys (Fkeys), each of which gives you instant access to a specific system function that might otherwise be buried in the menu system. For example, if you use the balance control frequently, you may want to consider programming one of the Fkeys to directly access the balance control. By saving the balance control as an Fkey function, you do not need to access the menus to change the parameter..
status The Status screen provides several items of information on the currently playing disc, as well as access to information on the software used in and the internal sensors of the SSP-800. While on this page, pressing the more key will access the CAN-Bus features. version info The version info button on the status screen takes you to the Version Information screen, which displays information on various pieces of software used by your SSP-800.
hardware setup 1 Classé Delta Series Products Two or more Classé Delta series products are required, at least one of which must have a touchscreen display. 2 Category 5 Network Cables These are ordinary network cables, commonly used for broadband Internet connections. They should be typical “straight through” cables not the “crossed over” type, and the total required will be one less than the total number of Delta series components in your system.
using CAN-Bus CAN-Bus is controlled via the touchscreen of any Delta series component. There is no master component, so Delta series systems where two or more units have a touchscreen can be controlled through any of the touchscreens. However, it is probably easiest to start using CAN-Bus through just one. CAN-Bus is accessed by pressing the menu button on the face of the unit or remote, then the status button, followed by the more button.
CAN-Bus shared features The following CAN-Bus features are shared by all models. configuration Selecting configuration will present the CAN-Bus configuration screen allowing access to name, global brightness, and global standby features.. • name enables you to set the name that this component will be listed under in the CAN-Bus devices screen. The name will appear next to the unit model and serial number, and facilitate the identification of units in large systems.
CAN-Bus model The following CAN-Bus features are model specific. specific features PlayLink This feature is exclusive to Delta series disc players and will only function if the disc player is connected to a CAN-Bus enabled preamp or surround sound processor. When PlayLink is active, pressing play on the disc player will also automatically switch the preamp/processor to a specified input. This means that you can listen to a CD or watch a DVD literally at the touch of a button.
amp info Available for amplifiers only, this screen displays the data provided by the heatsink and AC Module temperature sensors. NOTE: This feature is only accessible when the target amplifier is on. event log Reserved for amplifiers, this feature is a protection circuitry event log which can only be accessed when the target amplifier is in standby. The protection circuit shuts down the amplifier or channel if it overheats or if its output could damage your speakers.
Troubleshooting Always refer any service problems to your Classé dealer. However, if you run into a problem, we recommend referring to this section first as sometimes an error is not a malfunctioning product, but simply an oversight in the proper setup of the component. This section provides suggested solutions to potential problems. If none of these solutions work, please consult your Classé dealer for assistance. There are no user-serviceable parts inside the Surround Sound Processor.
3 Only one speaker seems to be playing. 3 If the problem occurs with all inputs, check the interconnecting cables between the preamp and the power amp. Also check the speaker wires for secure connections.
3 If there is a preview image but no output image, check the display connection. Ensure the YPrPb cables are properly connected if using a component video TV. Some display devices may not display the source’s output resolution (for example, component 720p going into a standard definition display or an HDMI source which is preset to an unsupported resolution for a particular HDMI display.
Care & Maintenance To remove dust from the cabinet of your Surround Sound Processor, use a feather duster or a lint-free soft cloth. To remove dirt and fingerprints, we recommend isopropyl alcohol and a soft cloth. Dampen the cloth with alcohol first and then lightly clean the surface of the Surround Sound Processor with the cloth. Do not use excessive amounts of alcohol that might drip off the cloth and into the Surround Sound Processor.
Specifications All specifications are accurate at the time of printing. Classé reserves the right to make improvements without notice. Frequency response 20Hz - 200kHz < 0.1dB, stereo analog bypass 20Hz - 20kHz < 0.2dB, all other sources Distortion (THD+noise) 0.001%, digital source/bypassed analog source .
Dimensions 17.50" [ 444.5mm ] 6.00" [ 152.4mm ] 6.78" [ 172.1 MENU MUTE SSP-800 .78" [ 19.7mm 2.42" [ 61.5mm ] 12.66" [ 321.6mm ] 2.42" [ 61.5mm ] 16.48" [ 418.5mm ] 12.40" [ 315.1mm ] 17.30" [ 439.3mm 1.65" [ 41.9mm ] 2.20" [ 55.9mm ] 13.09" [ 332.6mm ] 17.50" [ 444.
Installation Worksheet Source: ______________________________________________________________ Audio Connector:______________________________________________________ Video Connector:______________________________________________________ Input:_______________________________________________________________ Source: ______________________________________________________________ Audio Connector:______________________________________________________ Video Connector:_______________________________________________
Classé Audio 5070 François Cusson Lachine, Quebec Canada H8T 1B3 +1 (514) 636-6384 +1 (514) 636-1428 (fax) http://www.classeaudio.com email: cservice@classeaudio.com North America: 1 800 370 3740 email: classe@bwgroupusa.com Europe: 44 (0) 1903 221 700 email: classe@bwgroup.com Asia: (852) 2790 8903 email: classe@bwgroup.hk All Others: +1 514 636 6394 email: cservice@classeaudio.com Copyright © 2008 Classé Audio, Inc. Printed in Canada. V 3.