
User's Manual

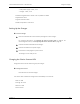
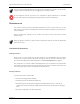

Table Of Contents
- About This Manual
- About the Clarius Ultrasound Scanner
- Using the Clarius Ultrasound Scanner
- Accessories
- Cleaning & Disinfecting
- Safety
- References
- Measurement Accuracy Tables
- Acoustic Output Tables
- Clarius Scanner C3 HD3: B-Mode
- Clarius Scanner C3 HD3: Color Doppler Mode
- Clarius Scanner C3 HD3: M-Mode
- Clarius Scanner C3 HD3: PW Doppler Mode
- Clarius Scanner C7 HD3: B-Mode
- Clarius Scanner C7 HD3: Color Doppler Mode
- Clarius Scanner C7 HD3: M-Mode
- Clarius Scanner C7 HD3: PW Doppler Mode
- Clarius Scanner EC7 HD3: B-Mode
- Clarius Scanner EC7 HD3: Color Doppler Mode
- Clarius Scanner EC7 HD3: M-Mode
- Clarius Scanner EC7 HD3: PW Doppler Mode
- Clarius Scanner L7 HD3: B-Mode
- Clarius Scanner L7 HD3: Color Doppler Mode
- Clarius Scanner L7 HD3: M-Mode
- Clarius Scanner L7 HD3: Needle Enhance B-Mode
- Clarius Scanner L7 HD3: Ocular (Ophthalmic) B-Mode
- Clarius Scanner L7 HD3: PW Doppler Mode
- Clarius Scanner L15 HD3: B-Mode
- Clarius Scanner L15 HD3: Color Doppler Mode
- Clarius Scanner L15 HD3: M-Mode
- Clarius Scanner L15 HD3: Needle Enhance B-Mode
- Clarius Scanner L15 HD3: Ocular (Ophthalmic) B-Mode
- Clarius Scanner L15 HD3: PW Doppler Mode
- Clarius Scanner L20 HD3: B-Mode
- Clarius Scanner L20 HD3: Color Doppler Mode
- Clarius Scanner L20 HD3: Ocular (Ophthalmic) B-Mode
- Clarius Scanner L20 HD3: M-Mode
- Clarius Scanner L20 HD3: Needle Enhance B-Mode
- Clarius Scanner L20 HD3: PW Doppler Mode
- Clarius Scanner PA HD3: B-Mode
- Clarius Scanner PA HD3: Color Doppler Mode
- Clarius Scanner PA HD3: M-Mode
- Clarius Scanner PA HD3: PW Doppler Mode
- Clarius Scanner PA HD3: Transcranial B-Mode
- Clarius Scanner PA HD3: Transcranial Color Doppler Mode
- Clarius Scanner PA HD3: Transcranial M-Mode
- Clarius Scanner PA HD3: Transcranial PW Doppler Mode
- Revision History

Clarius Ultrasound Scanner - HD3 Scanners Using the Charger
revision 1 28
• wall power supply: 5 VDC, 3.2 A
• charger: 5 VDC, 3.2 A
• Protection Against Electric Shock: Class II / double insulated
• Applied Part: None
• Ingress Protection: IP00
• Mode of Operation: Continuous
Setting Up the Charger
To use the Charger:
1. Clean and disinfect the scanners before placing them in the Charger.
For cleaning instructions, see Cleaning the Clarius Scanner HD3 on page 34. For
disinfecting instructions, see Disinfecting the Clarius Scanner HD3 on page 35.
2. Connect the Micro USB cable to the Charger.
3. Connect the USB A to the power supply.
4. Insert the AC male plug into a power source.
The Charger is now ready to use.
Charging the Clarius Scanner HD3
Charge the Clarius Scanner HD3 using only the Charger.
To charge the scanner:
Place the scanner into the Charger.
The scanner LED indicates the charge level of the battery in the scanner:
• Red: 0
– 30%
• Orange: 30 – 65%
• Blue: 65
– 95%
• Green: 95%+