FileMaker Server 9 Help ®
© 2007 FileMaker, Inc. All Rights Reserved. FileMaker, Inc. 5201 Patrick Henry Drive Santa Clara, California 95054 FileMaker is a trademark of FileMaker, Inc., registered in the U.S. And other countries, and ScriptMaker and the file folder logo are trademarks of FileMaker, Inc. All other trademarks are the property of their respective owners. FileMaker documentation is copyrighted. You are not authorized to make additional copies or distribute this documentation without written permission from FileMaker.
FileMaker Server 9 Help Answers to Your FileMaker Server Questions Are You New to FileMaker Server? What is FileMaker Server? Find out what you can do. Uploading database files Use the Upload Database assistant to transfer databases from any networked computer to FileMaker Server. Backing up databases Set up schedules to automatically back up databases on FileMaker Server. Hosting a website FileMaker Server Getting Started Guide Learn how to install and start using FileMaker Server. See the Start Page.
Contents FileMaker Server 9 Help . . . . . . . . . . . . . . . . . . . . . . . . . . . . . . . . . . . . . 3 About FileMaker Server . . . . . . . . . . . . . . . . . . . . . . . . . . . . . . . . . . . . . . 8 New features in FileMaker Server 9 . . . . . . . . . . . . . . . . . . . . . . . . . . . . 9 Deploying FileMaker Server . . . . . . . . . . . . . . . . . . . . . . . . . . . . . . . . . 11 Setting up an administrator account . . . . . . . . . . . . . . . . . . . . . . . . . . . . . . . . . . . . . . .
Configuring general settings . . . . . . . . . . . . . . . . . . . . . . . . . . . . . . . . 54 Server information settings . . . . . . . . . . . . . . . . . . . . . . . . . . . . . . . . . . . . . . . . . . . . . . . . . . . . . 55 Email notification settings . . . . . . . . . . . . . . . . . . . . . . . . . . . . . . . . . . . . . . . . . . . . . . . . . . . . . . . 57 Admin Console settings . . . . . . . . . . . . . . . . . . . . . . . . . . . . . . . . . . . . . . . . . . . . . . . . . . . . . . . .
Monitoring FileMaker Server . . . . . . . . . . . . . . . . . . . . . . . . . . . . . . . . 107 Viewing statistics . . . . . . . . . . . . . . . . . . . . . . . . . . . . . . . . . . . . . . . . . . . . . . . . . . . . . . . . . . . . 108 Tracking activity in log files . . . . . . . . . . . . . . . . . . . . . . . . . . . . . . . . . . . . . . . . . . . . . . . . . . . . 110 Event log . . . . . . . . . . . . . . . . . . . . . . . . . . . . . . . . . . . . . . . . . . . . . . . . . . . . . . . . . . . . . .
Troubleshooting . . . . . . . . . . . . . . . . . . . . . . . . . . . . . . . . . . . . . . . . . . 156 Deployment problems . . . . . . . . . . . . . . . . . . . . . . . . . . . . . . . . . . . . . . . . . . . . . . . . . . . . . . . . 157 Admin Console problems . . . . . . . . . . . . . . . . . . . . . . . . . . . . . . . . . . . . . . . . . . . . . . . . . . . . . . 158 General problems . . . . . . . . . . . . . . . . . . . . . . . . . . . . . . . . . . . . . . . . . . . . . . . . . . . . . . . . . . . .
About FileMaker Server About FileMaker Server FileMaker® Server is a dedicated database server that opens FileMaker Pro files, makes them available to clients on your network, and publishes FileMaker data in web pages or to other applications. FileMaker Server Advanced has all the features of FileMaker Server plus: • Instant Web Publishing. See Using Instant Web Publishing (page 50). • Sharing data as a SQL data source via ODBC and JDBC. See Sharing FileMaker databases via ODBC and JDBC (page 103).
New features in FileMaker Server 9 New features in FileMaker Server 9 FileMaker Server 9 includes the following new features and improvements: All-new Admin Console • Start from almost any networked computer. No installation required. • Same user interface on both Windows and Mac OS. • Configure and administer all FileMaker Server components from a single administration application. Run server-side ScriptMaker scripts • Schedule a ScriptMaker™ script in a hosted database to run on FileMaker Server.
New features in FileMaker Server 9 • Control how much information is logged by FileMaker Server. See Logging and statistics settings (page 76).
Deploying FileMaker Server Deploying FileMaker Server When you install FileMaker Server, you decide whether to deploy FileMaker Server on a single machine or on multiple machines. In a multiple-machine deployment, one machine is always the master and the others are workers. • The master machine is always the machine on which the Database Server is deployed. • The worker machines are the machines that run the Web Publishing Engine or the web server.
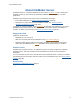
Deploying FileMaker Server Setting up an administrator account In this Deployment assistant step, set up the account that you’ll use to login to FileMaker Server Admin Console. To set up an administrator account: 1. For User Name, enter the name that you want to login with. 2. For Password, enter the password that you want to login with. You cannot leave Password empty. 3. Reenter your password in Confirm Password. 4. Click Next to go to the next step. Click Cancel to exit the Deployment assistant.
Deploying FileMaker Server Naming FileMaker Server In this Deployment assistant step, assign a name to your FileMaker Server deployment and optionally provide additional information. To name your FileMaker Server deployment: 1. For Server Name, enter a name for your FileMaker Server deployment. FileMaker Pro users see this name when they use the Open Remote File dialog box. 2. For Server Description, enter an optional description of your FileMaker Server deployment.
Deploying FileMaker Server Enabling sharing via ODBC and JDBC In this Deployment assistant step, enable your server to be a data source via ODBC and JDBC, if you purchased a FileMaker Server Advanced license. To enable sharing via ODBC and JDBC: 1. Click Yes, enable ODBC/JDBC to enable sharing or click No, do not enable ODBC/JDBC to disable. 2. Click Next to go to the next step. Click Back to return to the previous step or Cancel to exit the Deployment assistant.
Deploying FileMaker Server Enabling web publishing In this Deployment assistant step, enable web publishing if you want to publish FileMaker databases to web users. You must enable this feature if you want to use FileMaker Server Custom Web Publishing or Instant Web Publishing. For more information, see Using Instant Web Publishing (page 50), Hosting XSLT websites (page 47), or Hosting PHP websites (page 45). To enable web publishing: 1.
Deploying FileMaker Server Enabling technologies for web publishing In this Deployment assistant step, choose the technologies you want to use to publish your FileMaker databases on the web. To enable the technologies for web publishing: 1. Select the web publishing technologies that you want to use. If you want to Enable Send HTTP requests along with XML query commands and parameters and retrieve FileMaker data as an XML document.
Deploying FileMaker Server Related topics Deploying FileMaker Server (page 11) Enabling web publishing (page 15) Changing a FileMaker Server deployment (page 28) FILEMAKER SERVER 9 HELP 17
Deploying FileMaker Server Selecting a deployment type In this Deployment assistant step, choose how to deploy FileMaker Server components. FileMaker Server includes three components: the Database Server, Web Publishing Engine, and Web Server components. With the Deployment assistant, you can choose to deploy these components on one, two, or three machines to meet your needs. See Which deployment type is right for me? (page 23) for more information. To select a deployment type: 1.
Deploying FileMaker Server Assigning worker machine roles In this Deployment assistant step, unassigned worker machines on your local network are detected and presented with their IP addresses in the list beside each machine role. Assign a worker machine to each machine role (Web Publishing Engine or web server). To assign a worker machine role: 1. In the Machines column beside the machine role that you want to assign, choose the IP address of an unassigned worker machine.
Deploying FileMaker Server Specifying a web server In this Deployment assistant step, specify a web server to use for web publishing. To specify the web server: 1. For Web server, select the web server you wish to use. If you want to configure the web server setting later, click Skip this step and configure later. Note If you skip this step, web publishing will not be available and you will have to use Edit Server Deployment to activate it later. 2. Click Next to go to the next step.
Deploying FileMaker Server Web Server Test Failed If the Deployment assistant cannot communicate with the web server that you specified, you can provide more information and try again. To change web server settings: 1. In the Web Server Test Failed step in the Deployment assistant, specify the settings to use to communicate with the web server. To change Do this The protocol FileMaker Server uses to communicate with the web server For Protocol, choose either HTTP or HTTPS.
Deploying FileMaker Server Deployment summary In this Deployment assistant step, review and confirm your deployment selections before FileMaker Server implements them. To confirm your deployment: • Click Finish if you are satisfied with your deployment details. The Deployment assistant deploys FileMaker Server according to your selections. This may take a few minutes. • Otherwise, click Back to return to the previous step or Cancel to exit the Deployment assistant.
Deploying FileMaker Server Which deployment type is right for me? Which deployment type is right for me? The type of deployment you should use depends primarily on the web publishing load, as summarized below. The greater the web publishing load, the more machines you may want to include in your FileMaker Server deployment. You can first deploy on fewer machines and, if the load increases over time, you can change the deployment later to use up to three machines.
Deploying FileMaker Server Testing FileMaker Server Testing FileMaker Server The easiest way to test your FileMaker Server deployment is to use the Technology Tests page. The links on this page access the hosted FMServer_Sample.fp7 database via the technologies listed below. If a test succeeds, then all the FileMaker Server components are working. To test the FileMaker Server deployment: 1. Open the Technology Tests page.
Deploying FileMaker Server Testing FileMaker Server Configuring web publishing settings (page 78) FILEMAKER SERVER 9 HELP 25
Deploying FileMaker Server Checking the status of your deployment Checking the status of your deployment The FileMaker Server Overview pane displays real-time status information about your FileMaker Server deployment updated every few seconds. The Server Status Information area shows the overall condition of your FileMaker Server deployment.
Deploying FileMaker Server Checking the status of your deployment Related topics Troubleshooting (page 156) Deploying FileMaker Server (page 11) FILEMAKER SERVER 9 HELP 27
Deploying FileMaker Server Changing a FileMaker Server deployment Changing a FileMaker Server deployment You can first deploy on fewer machines and, if the web publishing load increases over time, you can use the Deployment assistant to change your FileMaker Server deployment to use up to three machines. To change a FileMaker Server deployment: 1. Click FileMaker Server Overview, then click the Edit Server Deployment link. The Deployment assistant starts. 2.
Starting Admin Console Starting Admin Console You can start FileMaker Server Admin Console on a Windows or Mac OS computer that has network access to the master machine in your FileMaker Server deployment. FileMaker Server delivers Admin Console as a lightweight Java client to your remote computer via Java Web Start technology. Note Remote computers must have at least version 5 of the Java Runtime Environment installed before they can start Admin Console. To start Admin Console: 1.
Starting Admin Console • If Admin Console doesn’t start, your browser might have downloaded the Java Web Start file but might not have started it. Check your web browser configuration to enable Java or automatically open downloaded files. You can also look for the admin_console_webstart.jnlp file where your browser saves downloaded files. Double-click this file to start Admin Console.
Hosting databases Hosting databases Before you can share FileMaker Pro database files, it’s important to prepare the files for hosting. The steps below provide an overview of the process. 1. Edit the accounts and privileges sets that clients will use for shared access. See Editing accounts and privilege sets (page 32). 2. Upload the database files to FileMaker Server. See Uploading database files (page 33). 3.
Hosting databases Editing accounts and privilege sets Editing accounts and privilege sets In FileMaker Pro, edit the accounts and privilege sets that clients will use for access to each database. Choose File menu > Manage > Accounts & Privileges. • Enable the appropriate extended privileges for particular privilege sets.
Hosting databases Uploading database files Uploading database files Use the Upload Database assistant to transfer database files from your computer’s file system to FileMaker Server, and optionally have FileMaker Server open the files. To upload database files to FileMaker Server: 1. Ensure that the appropriate accounts and privilege sets are enabled. See Editing accounts and privilege sets (page 32). 2. If the database files are open, you must close them before you can upload them. 3.
Hosting databases Uploading database files • After uploading is complete, the Database Server checks whether a database has some form of sharing enabled. If no sharing is enabled, the Database Server automatically enables sharing via FileMaker Network (extended privilege fmapp) for the Full Access privilege set. • For information on how to remove databases that are already hosted, see Removing hosted files (page 100). • You can upload only files with a filename extension of .
Hosting databases Uploading database files Uploading database files manually You can manually copy FileMaker Pro database files to FileMaker Server instead of using the Upload Database assistant. However, you must be sure to do the following: • Place database files in the proper location. • Change group ownership for files (Mac OS only). Important If you need to move, copy, or rename a hosted file, be sure to close it first.
Hosting databases Uploading database files Users, groups, and permissions (Mac OS) Note The Upload Database assistant automatically sets the correct ownership and permissions in Mac OS. This section describes what you must do only if you upload databases manually. During installation, the fmserver user and the fmsadmin group are created. The fmsadmin group must have read and write access to the FileMaker Pro databases that FileMaker Server hosts.
Hosting databases Uploading database files To add a user to the fmsadmin group using the Terminal application: 1. Start the Terminal application (/Applications/Utilities/Terminal/). 2. Enter the following at the command line: sudo dseditgroup -o edit -a username -t user fmsadmin where username is the name of the existing user you wish to add to the fmsadmin group. To change group permissions for database files hosted by FileMaker Server: 1.
Hosting databases Uploading database files Selecting databases to upload Important Database files must be closed before you can upload them. Uploading a database file that is open in FileMaker Pro could result in data loss. If you have the databases open in FileMaker Pro, for each file choose File menu > Close. 1. Select the FileMaker Server folder where you want to place the database files.
Hosting databases Uploading database files Specifying an upload option 1. You can optionally select Automatically open the database after upload. Select this option to open all files after the upload is complete. If you don’t select this option, the uploaded databases remain closed. To open the files later, see Opening hosted files (page 96). 2. Click Next to begin the database upload. Click Back to return to the previous pane or Cancel to exit the Database Upload assistant.
Hosting databases Uploading database files Viewing the database upload status During the upload, you can view the progress. When the upload is complete, you can: • Click Next when the database upload successfully completes. • If the upload fails, click Back to return to a previous step to correct the problem. • Click Cancel to exit the Upload Database assistant. Note If you want to stop the upload, click Cancel next to the progress meter.
Hosting databases Uploading database files Reviewing the upload summary Database files that have uploaded successfully are listed OK in the Status column. If there is an error, the Message column describes the problem uploading the associated database. • Click Finish to exit the Upload Database assistant. Click Back to return to the previous pane. Note An upload can fail because the database is open.
Hosting databases Verifying databases are available to FileMaker Pro clients Verifying databases are available to FileMaker Pro clients When FileMaker Server starts, it automatically opens and hosts all FileMaker Pro databases located in the default database folder and in an additional database folder, if specified. In the Databases pane, the databases are listed as Normal in the Status column.
Hosting databases Verifying databases are available to FileMaker Pro clients Closing hosted files (page 97) FILEMAKER SERVER 9 HELP 43
Hosting websites Hosting websites With FileMaker Server you can publish your FileMaker databases on the web in these ways: To Use See Access FileMaker data using the FileMaker API for PHP in PHP web applications Custom Web Publishing with PHP Hosting PHP websites (page 45) Transform, filter, or format XML data in a FileMaker database using XSLT stylesheets for use in a web browser or in other applications Custom Web Publishing with XSLT Hosting XSLT websites (page 47) Send HTTP requests along with
Hosting websites Hosting PHP websites Hosting PHP websites Custom Web Publishing with PHP lets you use the PHP scripting language to integrate data from FileMaker databases with your customized webpage layouts. In your webpages, you call the FileMaker API for PHP, which is a PHP class created by FileMaker that accesses databases hosted by FileMaker Server. This PHP class connects to the Web Publishing Engine and makes data available to your web server’s PHP engine.
Hosting websites Hosting PHP websites Note If the database file is properly hosted and accessible on FileMaker Server, and the container fields store the actual files in the FileMaker database, then you need not relocate the container field contents. 8. To access your PHP website, use the following URL syntax: ://[:]// where: • is the HTTP or HTTPS protocol. • is the IP address or domain name of the host computer where the web server is installed.
Hosting websites Hosting XSLT websites Hosting XSLT websites FileMaker Custom Web Publishing with XSLT provides the ability to transform, filter, or format XML data for use in a web browser or in other applications. You can use an XSLT stylesheet to transform the data between a FileMaker XML grammar and another XML grammar for use in another application or database.
Hosting websites Hosting XSLT websites • is the IP address or domain name of the host computer where the web server is installed. • is optional and specifies the port that the web server is listening on. If no port is specified, then the default port for the protocol is assumed (port 80 for HTTP, or port 443 for HTTPS). • is optional and specifies the folder inside the xslt-template-files folder where the XSLT stylesheet is located.
Hosting websites Hosting databases for XML queries Hosting databases for XML queries FileMaker Custom Web Publishing with XML enables you to send query requests to FileMaker Server, and display, modify, or manipulate the resulting data as needed. Using an HTTP request along with the appropriate query commands and parameters, you can retrieve FileMaker data as an XML document. For more information on preparing a database and accessing XML data, see CUSTOM WEB PUBLISHING WITH XML AND XSLT on the Start Page.
Hosting websites Using Instant Web Publishing Using Instant Web Publishing Instant Web Publishing allows you to quickly and easily publish your database on the web. You don’t need to modify your database files or install additional software — anyone with compatible web browser software and access to the internet or an intranet can connect to your database to view, edit, sort, or search records, if you give them access privileges.
Starting and stopping FileMaker Server Starting and stopping FileMaker Server Admin Console allows you to start and stop the Database Server and the Web Publishing Engine individually without restarting the machine.
Starting and stopping FileMaker Server Starting or stopping the FileMaker Server service (Windows) In some cases, you may need to start or stop all components of FileMaker Server on a machine. For example, after you restrict access to Admin Console (General Settings > Admin Console tab), you must restart all FileMaker Server components. You can restart all FileMaker Server components either by restarting the machine or by restarting the FileMaker Server service.
Starting and stopping FileMaker Server Starting or stopping FileMaker Server daemons (Mac OS) In some cases, you may need to start or stop all components of FileMaker Server on a machine. For example, after you restrict access to Admin Console (General Settings > Admin Console tab), you must restart all FileMaker Server components. You can restart all FileMaker Server components either by restarting the machine or by restarting the FileMaker Server daemons.
Configuring general settings Configuring general settings Choose General Settings and select one of the following tabs to specify FileMaker Server settings: Choose To Server Information Specify the FileMaker Server name and description, specify optional server and administrator contact information, and update the FileMaker Server license. See Server information settings (page 55). Email Notifications Specify the users that will receive emails whenever errors or warnings occur in FileMaker Server.
Configuring general settings Server information settings Server information settings The General Settings > Server Information tab specifies the following configuration settings: • Specify the host name that is displayed in the FileMaker Admin Console and FileMaker Pro, and the server description that is displayed on the Admin Console Start Page. • Enter FileMaker Server contact information that is published in the directory service and the Start Page.
Configuring general settings Server information settings To Do this View or update your FileMaker Server license information For License Information, click Update License Key. 1. Enter the User Name and Organization and your new License Key. 2. Click Update, then click Close. Your FileMaker Server license information is listed on the tab. See About the license key (page 170). You can also update the license key if you are using a trial version or you want to upgrade to FileMaker Server Advanced.
Configuring general settings Email notification settings Email notification settings You can configure FileMaker Server to send an email notification when errors or warnings are detected or to receive email notification of scheduled tasks. You configure for email notification by entering the SMTP server configuration settings and then sending a test message to test the connection. Then, enter the email addresses of the users who will receive notification of errors or warnings.
Configuring general settings Email notification settings To Do this Enable email notifications For Notification Settings: • Select Enable email notifications. Send Email Notifications to: Enter the email addresses for users who will be notified. Specify email addresses separated by commas. • Severity Level: Specify whether emails will be sent only when FileMaker Server detects errors or when FileMaker Server detects warnings or errors. 2. Click Save.
Configuring general settings Admin Console settings Admin Console settings The General Settings > Admin Console tab specifies the following configuration settings: • Restrict running Admin Console to a specific system or a range of systems identified by IP addresses. Using FileMaker Server Admin Console, you can remotely control, or administer, FileMaker Server from a different computer than the one on which FileMaker Server is installed and hosting databases.
Configuring general settings Admin Console settings To Do this Check for FileMaker Server updates For Check for Updates, select Enable FileMaker Server to check for updates. You can check for updates by selecting Help menu > Check for Update. See Checking for updates (page 169). 2. Click Save.
Configuring general settings Auto Start settings Auto Start settings You can automatically start the Database Server when the system restarts. You can also automatically start the Web Publishing Engine when the system restarts. To specify Auto Start settings: 1. Choose General Settings > Auto Start tab. 2. Choose the Auto Start options: To Do this Automatically start the Database Server component on the master machine when the computer restarts Select Automatically start Database Server.
Configuring Database Server settings Auto Start settings Configuring Database Server settings Choose Database Server and select one of the following tabs to specify FileMaker Server settings: Choose To FileMaker Pro Clients Specify the maximum number of simultaneous FileMaker Pro client connections and the maximum idle time before disconnecting clients. You can also configure the FileMaker Server to work with a directory service. See FileMaker Pro client settings (page 63).
Configuring Database Server settings FileMaker Pro client settings FileMaker Pro client settings The Database Server > FileMaker Pro Clients tab specifies the following configuration settings: • Specify the maximum number of simultaneous FileMaker Pro client connections to FileMaker Server. • Enable FileMaker Pro users to download updated plug-ins used by hosted databases. • Specify the maximum idle time before disconnecting FileMaker Pro clients.
Configuring Database Server settings FileMaker Pro client settings To Do this Configure FileMaker Server to work with a directory service Use the Directory Service assistant: 1. Click Configure Directory Service to open the Directory Service assistant. 2. Enter the directory service settings. See Specifying directory service settings (page 65). Click Next. 3. Select the information you want to publish. See Publishing directory server settings (page 66). 4.
Configuring Database Server settings FileMaker Pro client settings Specifying directory service settings In this Directory Service assistant step, specify the server settings. 1. For Server Information, enter the following information: • Directory Server (host name or IP address). • Port number for the LDAP connection. • Directory Entry Point. The distinguished name that specifies the location of FileMaker Server in the directory service.
Configuring Database Server settings FileMaker Pro client settings Publishing directory server settings In this Directory Service assistant step, choose the information you want to publish. 1. Select Publish FileMaker Server to publish the FileMaker Server name, host name, and IP address to the directory service. 2. Select Publish administrator contact information to publish the administrator’s contact information specified in the General Settings > Server Information tab. 3.
Configuring Database Server settings Database settings Database settings The Database Server > Databases tab specifies the following configuration settings: • Specify the maximum number of files that FileMaker Server can host. • Select whether FileMaker Server automatically hosts registered runtime solution. • Specify the amount of database cache memory. • Specify how often to flush the database cache. To specify database settings: 1. Choose Database Server > Databases tab.
Configuring Database Server settings Database settings To Do this Specify the cache flush distribution interval For Cache flush distribution interval, enter the time between cache flushes in hours and minutes. To enhance performance, FileMaker Server saves changes to a RAM-based cache. Every second, a portion of the cache is saved (flushed) to disk. By default FileMaker Server attempts to scan the entire cache every minute.
Configuring Database Server settings Database settings Cache flushing operation In FileMaker Server, the cache is constantly being flushed. The cache flushing routine scans the cache, looking for pages that have changed. FileMaker Server inspects up to 1/60th of the cache and writes any changed pages it discovers to the disk. The process repeats continuously, writing 1/ 60 of the cache to disk every second, even during scheduled backups.
Configuring Database Server settings Database Server security settings Database Server security settings The Database Server > Security tab lets you configure the following security settings: • Specify whether clients are authenticated using FileMaker accounts only or also using an external authentication server. • Limit the list of hosted databases that clients can view. • Encrypt data passed between the Database Server and clients. To specify Database Server security settings: 1.
Configuring Database Server settings To Database Server security settings Do this Encrypt data passed between Select Secure connections to FileMaker Server. the Database Server and clients All Database Server client connections use the Secure Sockets Layer (SSL), except ODBC and JDBC connections. For more information about data security, see Securing your data (page 125). Secure connections are slower because of data encryption.
Configuring Database Server settings Database Server security settings External authentication for database access FileMaker Server authenticates users with FileMaker accounts defined within a FileMaker Pro database.
Configuring Database Server settings Default folder settings Default folder settings Choose the Database Server > Default Folders tab to specify the following configuration settings: • Specify an additional database folder for database files. • Specify a backup folder for database files. Setting up an additional database folder At startup, FileMaker Server searches the default database folder (and in subfolders one level down) for databases to host.
Configuring Database Server settings Default folder settings 2. Click Validate to ensure that the path entered is correct. When the path is found to be valid, the label changes from Not a valid path to Valid path. If the path is not valid, see Tips for valid folders (page 75). 3. Click Save.
Configuring Database Server settings Default folder settings Tips for valid folders The folders you specify as a backup folder and as an additional database folder must be valid. • Specify a folder on a local volume, not on a remote volume. If you want to store database backups on a remote volume, first backup the database to a local volume, and then copy the backup to a remote volume. • Ensure that the folder has permissions set correctly so that FileMaker Server can read and write to the folder.
Configuring Database Server settings Logging and statistics settings Logging and statistics settings The Database Server > Logging tab lets you configure how the Database Server collects and logs events, client access, and statistical information while FileMaker Server is running. You can enable usage statistics logging to collect performance information and write to your log at a specified interval. In this tab you can configure the following settings: • Statistics.
Configuring Database Server settings Server plug-in settings Server plug-in settings The Database Server > Server Plug-ins tab allows you to enable FileMaker Server to use external function plug-ins with hosted FileMaker Pro databases that are designed to use server-side plugins. For more information on plug-ins, see Managing plug-ins (page 119). To allow FileMaker Server to use plug-ins: 1. Select Enable FileMaker Server to use plug-ins. The list shows the plug-ins that are in the plug-in folder. 2.
Configuring web publishing settings Server plug-in settings Configuring web publishing settings Choose Web Publishing and select one of the following tabs to specify FileMaker Server settings: Choose To General Settings Specify the web publishing error logging level and the maximum number of web publishing sessions. See General web publishing settings (page 79). PHP Enable and configure Custom Web Publishing with PHP.
Configuring web publishing settings General web publishing settings General web publishing settings You can specify the following web publishing settings on the Web Publishing > General Settings tab: • Select the logging level for web publishing. • Set the maximum number of web publishing sessions. To specify web publishing settings: 1. Choose Web Publishing > General Settings tab. To Do this Enable access logging Select Enable access logging, to generate the Web Publishing Core internal access logs.
Configuring web publishing settings PHP web publishing settings PHP web publishing settings Custom Web Publishing with PHP enables PHP web applications to access data using the FileMaker API for PHP. You can configure how the Web Publishing Engine responds to the API. You can specify the following PHP Publishing settings on the Web Publishing > PHP tab: • Enable PHP publishing. • Enable pre-validation of record data. • Select the default character encoding. • Select the language used with PHP publishing.
Configuring web publishing settings PHP web publishing settings Configuring web publishing settings (page 78) FILEMAKER SERVER 9 HELP 81
Configuring web publishing settings XSLT web publishing settings XSLT web publishing settings You can specify the following XSLT Publishing settings on the Web Publishing > XSLT tab: • Enable XSLT Publishing. • Enable database sessions. • Set the session timeout value. • Configure SMTP information to send email messages in an XSLT stylesheet. • Select the default character encoding. Note Changing any of these settings requires restarting the Web Publishing Engine.
Configuring web publishing settings XSLT web publishing settings To Do this Set the default session timeout value For Session Timeout, set the default session time-out for Custom Web Publishing with XSLT. Sessions are optional in Custom Web Publishing with XSLT and you create them by using the fmxslt:create_session() extension function. You can override the default setting by using the fmxslt:invalidate_session() and fmxslt:set_session_timeout() extension functions.
Configuring web publishing settings XSLT web publishing settings Text encoding for XSLT requests When the Web Publishing Engine is installed, the initial default text encoding for XSLT requests is UTF-8. For email messages, the default is ISO-8859-1. You can change these default text encoding settings. For more information about overriding default settings for individual requests, see the FILEMAKER SERVER CUSTOM WEB PUBLISHING WITH XML AND XSLT on the Start Page.
Configuring web publishing settings XSLT web publishing settings Configuring the interaction between web sessions and database sessions Sessions allow you to store data or maintain states between requests. Custom Web Publishing with XSLT supports two types of sessions: • Database sessions: FileMaker Server creates a database session whenever it retrieves data for a request. The maximum number of concurrent database sessions is determined by your FileMaker Server license.
Configuring web publishing settings XML web publishing settings XML web publishing settings On the Web Publishing > XML tab, you can enable or disable Custom Web Publishing with XML. Select Enable XML publishing to allow FileMaker Server to generate XML data from hosted databases based on query commands and parameters. Note Disabling XML does not affect your ability to use XSLT or the FileMaker API for PHP, but could affect the connectivity of other third-party web technologies.
Configuring web publishing settings Instant Web Publishing settings Instant Web Publishing settings You can specify the following Instant Web Publishing settings on the Web Publishing > Instant Web Publishing tab: • Enable Instant Web Publishing. • Set the Instant Web Publishing session timeout value. • Select the language for the Instant Web Publishing status area. Notes • Changing any of these settings requires restarting the Web Publishing Engine.
Administering clients Administering clients The Clients pane lists all users, including FileMaker Pro and Web Publishing clients, currently connected to databases hosted by FileMaker Server. You can view details about each user, send messages to users, and disconnect users. Viewing client details Select a User Name to view client details below the Connected Clients list.
Administering clients About user details The User Details tab lists detailed information about the client connected to FileMaker Server. Detail Description Computer Name The client's computer name. MAC Address The MAC (Media Access Control) address for the computer network adapter that the client is using to connect to FileMaker Server. Operating System The name of the client computer operating system.
Administering clients About databases open details The Databases Open tab lists detailed information about the client and the databases the client is currently using. Detail Description Database Name The database that the client is using. If the client is connected to more than one database, the databases will be listed here. Account Name The account name used to log in to FileMaker Server. Privilege Set The FileMaker Pro privilege set used by the account to access the hosted database.
Administering clients Sending messages to FileMaker Pro clients Sending messages to FileMaker Pro clients You can send a message to FileMaker Pro clients connected to databases hosted by FileMaker Server. You can send a message to selected or all FileMaker Pro clients. To send a message to one or more clients: 1. Choose Clients, then select a client in the Connected Clients list. 2. For Actions, select Send Message or Send Message to All Clients.
Administering clients Disconnecting clients Disconnecting clients To disconnect a selected client or all clients from FileMaker Server: 1. Choose Clients, then select a client in the Connected Clients list. 2. For Actions, select Disconnect or Disconnect All Clients. 3. Click Perform Action. The Disconnecting Clients dialog box opens. 4. For Message, type the message to send to clients before they are disconnected. 5.
Administering databases Administering databases The Databases pane lists all databases hosted by FileMaker Server. The database files are grouped in the default Databases folder, the additional database folder, and any subfolders. To manage hosted databases, choose what you want to do from Actions and click Perform Action.
Administering databases For Actions, choose To Upload Upload FileMaker Pro databases. Selecting this option opens the Upload Database assistant to copy database files to the FileMaker Server Default Folder or Additional Folder. See Uploading database files (page 33). Notes • You can use the shortcut menu in the Databases list to perform the commands listed in Actions. Right-click selected databases and choose an action.
Administering databases Sending messages to FileMaker Pro clients of selected Sending messages to FileMaker Pro clients of selected databases You can send a message to FileMaker Pro clients connected to selected databases or all databases hosted by FileMaker Server. To send a message: 1. Choose Databases. 2. Open the Databases folder or the additional database folder, if required. 3. If you are sending a message to clients of selected databases, select one or more databases. 4.
Administering databases Opening hosted files Opening hosted files Open one or more database files with a Closed status. To open hosted databases: 1. Choose Databases. 2. Open the Databases folder or the additional database folder, if required. 3. If you are opening selected databases, select one or more Closed databases. 4. For Actions, select Open or Open all. 5. Click Perform Action. Notes • If you select a folder in the Databases list, FileMaker Server opens all of the files in that folder.
Administering databases Closing hosted files Closing hosted files Close one or more hosted databases with Normal or Paused status. To close databases and disconnect clients: 1. Choose Databases. 2. Open the Databases folder or the additional database folder, if required. 3. If you are closing selected databases, select one or more Normal or Paused databases. 4. For Actions, select Close or Close all. 5. Click Perform Action. 6.
Administering databases Pausing hosted files Pausing hosted files Temporarily stop access to one or more open databases with Normal status. Connected clients can read data from the database while it is paused, but cannot modify the database until the database is resumed. For example, you can pause a database and safely use the operating system to make a copy of the file. To pause one or more hosted databases: 1. Choose Databases. 2.
Administering databases Resuming hosted files Resuming hosted files Make available one or more databases that have been paused. To resume one or more hosted databases: 1. Choose Databases. 2. Open the Databases folder or the additional database folder, if required. 3. If you are resuming selected databases, select one or more Paused databases. 4. For Actions, select Resume or Resume all. 5. Click Perform Action.
Administering databases Removing hosted files Removing hosted files You can remove one or more selected databases with Closed status or delete empty subfolders. The selected databases are moved to the folder Removed_by_FMS/Removed. The Removed_by_FMS/Removed folder is created inside either the default Databases folder or the additional database folder, depending on which folder the selected databases are in.
Using ODBC and JDBC with FileMaker Server Using ODBC and JDBC with FileMaker Server You can use FileMaker Server as: • a data source, if you have a FileMaker Server Advanced license. You can share hosted FileMaker Pro database files with other applications on the same computer or over a network using ODBC (Open Database Connectivity) and JDBC (Java Database Connectivity). For example, you can create charts, analyze numbers, and generate reports using FileMaker Pro data in other applications.
Using ODBC and JDBC with FileMaker Server Related topic Server information settings (page 55) FILEMAKER SERVER 9 HELP 102
Using ODBC and JDBC with FileMaker Server Sharing FileMaker databases via ODBC and JDBC Sharing FileMaker databases via ODBC and JDBC You can use FileMaker Server Advanced to host a FileMaker database file as a data source, sharing your data with other applications using ODBC and JDBC. FileMaker Server allows up to 50 connections and supports local access (same computer) and remote access (both for middleware such as web servers, and for remote client access from desktop productivity applications).
Using ODBC and JDBC with FileMaker Server Sharing FileMaker databases via ODBC and JDBC Enabling sharing via ODBC and JDBC FileMaker Server Advanced can host data via ODBC/JDBC for other applications (like spreadsheets, word processors, and reporting tools). Users can view, analyze, and modify data in hosted FileMaker databases. To host data, you must enable this feature in FileMaker Server Admin Console and use FileMaker Pro to enable sharing via ODBC/JDBC in each database that you want to share.
Using ODBC and JDBC with FileMaker Server Accessing external ODBC data sources Accessing external ODBC data sources If you want to host a FileMaker Pro database that works with data in an external ODBC data source, you must configure an ODBC client driver for the ODBC data source that the FileMaker Pro database accesses. For example, if the database accesses records from an Oracle database, you must configure an Oracle client driver.
Using ODBC and JDBC with FileMaker Server Accessing external ODBC data sources 5. In Data Source Name, enter the identical Data Source Name that the FileMaker Pro database is designed to connect to. Important The Data Source Name you enter here must be exactly the same as the Data Source Name that the database was designed to use in FileMaker Pro. So for each Data Source Name used by each database you host, you must configure a matching Data Source Name on the FileMaker Server master machine.
Monitoring FileMaker Server Monitoring FileMaker Server You can view usage statistics and track the activity of FileMaker Server. Admin Console displays usage statistics that help you monitor server performance.
Monitoring FileMaker Server Viewing statistics Viewing statistics To view FileMaker Server statistics in Admin Console, choose Statistics. The Statistics pane lists a summary of Connection and Database Statistics attributes. Connection Statistics The attributes collected for each statistic Type include the number of Current, Average, Low, and Peak client connections. Statistic Description FileMaker Pro Clients Number of connected FileMaker Pro clients.
Monitoring FileMaker Server Viewing statistics Statistic Description Remote Calls/Second Number of separate remote calls received from all clients, divided by the statistics sampling interval. Note that there can be multiple remote calls to perform a single operation from the client's perspective. Wait Time/Call Time a remote call waits for other processes. FileMaker Server updates the statistics list at the time interval you specify.
Monitoring FileMaker Server Tracking activity in log files Tracking activity in log files FileMaker Server tracks activity and client access and other information as it operates and stores this information in these log files: • Event log (page 111) • Access log (page 115) • Statistics log (page 116) • Web publishing logs (page 117) • Web Server Module log (page 118) You can use any application capable of opening plain text files or the Mac OS Console application to view or print the log files.
Monitoring FileMaker Server Tracking activity in log files Event log Events that occur while the Database Server is running are logged and timestamped.
Monitoring FileMaker Server Tracking activity in log files Viewing activities in the Event Viewer (Windows) To view information about FileMaker Server activities, you can use the Windows Event Viewer. To open Event Viewer, click Start menu > Control Panels > Administrative Tools > Event Viewer. Select the Application log. In the Source column, look for events logged by FileMaker Server. Double-click an event to display details about it.
Monitoring FileMaker Server Tracking activity in log files Changing the language of the Event log If you prefer to use a different language in the Event.log than the one used by your computer at the time you installed FileMaker Server, you can change the language of the Event.log by modifying a preferences file (Mac OS) or the registry (Windows) on the master machine.
Monitoring FileMaker Server Tracking activity in log files 7. Restart the Database Server for the change to take effect. The next time you open Event.log, the entries will appear in the new language.
Monitoring FileMaker Server Tracking activity in log files Access log The Database Server logs accesses to databases in a separate log file called Access.log. Typical events that are logged include: • clients that connect to and disconnect from the Database Server • databases that clients access with a unique account and with the built-in Guest account Accesses are logged in the tab-delimited Access.log file that is created in the FileMaker Server/ Data/Logs/ folder. You can view the Access.
Monitoring FileMaker Server Tracking activity in log files Statistics log When you enable statistical logging for the Database Server, a log file is created in the FileMaker Server/Data/Logs/ folder. All of the values that you see in the Statistics pane in Admin Console are timestamped and written to a file. See Viewing statistics (page 108). You can view these statistics by opening the Stats.
Monitoring FileMaker Server Tracking activity in log files Web publishing logs The Web Publishing Engine generates the following log files: • The wpc_access_log.txt access log is a record of all end-user requests to generate XML and to use FileMaker Server Instant Web Publishing. These requests are routed from the web server directly to the Web Publishing Core component of the Web Publishing Engine. • The pe_internal_access_log.
Monitoring FileMaker Server Tracking activity in log files Web Server Module log If the web server is unable to connect to the Web Publishing Engine, the Web Server Module generates a log file that is a record of any errors with its operation. This file is called web_server_module_log.txt and is located in the FileMaker Server/Logs/ folder on the machine running the web server.
Managing plug-ins Managing plug-ins FileMaker Server can use external function plug-ins with hosted FileMaker Pro databases that are designed to use server-side plug-ins. When hosted databases use plug-ins enabled on FileMaker Server, the machine running FileMaker Server can execute plug-in functions rather than client machines. Alternatively, FileMaker Server can automatically install or update required or outdated client-side plug-ins on FileMaker Pro clients.
Managing plug-ins Enabling server-side plug-ins Enabling server-side plug-ins Server-side plug-ins can provide external functions used in the following: • stored calculations or server-side queries • ScriptMaker scripts that are scheduled to run on FileMaker Server (see Running ScriptMaker scripts (page 131)) To enable plug-ins on FileMaker Server: 1. Place plug-ins in the proper folders so that FileMaker Server can use them. For details, see Folders for server-side plug-in files (page 121). 2.
Managing plug-ins Enabling server-side plug-ins Folders for server-side plug-in files To enable the Database Server to use plug-ins, you must place them in the proper folder on the master machine in your FileMaker Server deployment. • Windows: [drive]:\Program Files\FileMaker\FileMaker Server\Database Server\Extensions\ • Mac OS: /Library/FileMaker Server/Database Server/Extensions/ If a web publishing solution uses a plug-in, you must place a copy of the same plug-in in a folder on the machine running th
Managing plug-ins Enabling server-side plug-ins Changing plug-in file permissions (Mac OS) To change plug-in file permissions: 1. Start the Terminal application and use the cd command to set your path as needed. 2. Enter the following at the command line: chmod g+rx or chmod g+wrx The g+rx is necessary because plug-ins and system-level scripts must have the group read and executable bits enabled. Use the g+wrx form to permit write permission as well.
Managing plug-ins Enabling auto-update for plug-ins Enabling auto-update for plug-ins If database files hosted on FileMaker Server use plug-ins that are designed to execute on the client, you can enable the Auto Update plug-in feature in both FileMaker Server and FileMaker Pro clients. This feature enables FileMaker Server to automatically install or update required or outdated plugins or support files on FileMaker Pro clients. To automatically update a plug-in: 1.
Managing plug-ins Enabling auto-update for plug-ins Preparing Mac OS plug-in files for conversion to .tar format FileMaker Server on Mac OS temporarily converts an uncompressed Mac OS plug-in to the .tar format for downloading to clients. However, this automatic conversion deletes any resource forks, which may make a plug-in that contained a resource fork unusable by the client.
Securing your data Securing your data You can take advantage of several FileMaker Server features that make your data more secure for both FileMaker Pro and web clients: • Encrypt the connection between the Database Server and FileMaker Pro clients and between the Database Server and the Web Publishing Engine. Both user account information and the data are secured using Secure Sockets Layer (SSL) encryption. Click Database Server > Security tab and enable Secure connections to FileMaker Server.
Scheduling administrative tasks Scheduling administrative tasks The Schedules pane lists the scheduled tasks performed on databases hosted by FileMaker Server. Scheduled tasks run automatically if Allow Enabled Schedules to Run is selected and the selected schedule is enabled. See Enabling and disabling schedules (page 140). Viewing scheduled tasks details The list displays a summary of each defined schedule, including the task it performs, the last time it ran, and the next time it will run.
Scheduling administrative tasks Notes • A new scheduled task is enabled by default, which means the task will automatically run at its scheduled time. For more information about enabling and disabling scheduled tasks, see Enabling and disabling schedules (page 140). • To sort scheduled tasks in a list in ascending or descending order, click a column heading. • To resize the width of a column, select the column heading border and drag it horizontally. • You can define up to 50 schedules in FileMaker Server.
Scheduling administrative tasks Scheduling database backups Scheduling database backups You can back up all hosted databases, databases in selected folders, or a selected database. Database backups are saved in the default backup folder or in a folder that you specify. You can set the path in the Schedule assistant. During backups, FileMaker Server copies the database while it is active. Users can continue to make modifications.
Scheduling administrative tasks Scheduling database backups Tips for database backups Develop plans for restoring data, including alternate sites and systems to run business-critical information services. A current backup can help you recover from a situation where someone loses the administrator account information for a file, or where user error (and sometimes bad database design) causes data to be deleted or modified inappropriately.
Scheduling administrative tasks Running server-side scripts Running server-side scripts FileMaker Server can run two types of scripts to automate administrative tasks: • ScriptMaker scripts defined in hosted databases. See Running ScriptMaker scripts (page 131). • System-level script files. See Running system-level script files (page 132). Both types of scripts execute on the master machine in your FileMaker Server deployment. To run a script, create a scheduled task on FileMaker Server.
Scheduling administrative tasks Running server-side scripts Running ScriptMaker scripts FileMaker Server can run ScriptMaker scripts that are defined in hosted databases. You create a Run Script scheduled task, specify the database and the FileMaker account to use to run the script, choose a script defined in the database, and when to run the script.
Scheduling administrative tasks Running server-side scripts Running system-level script files FileMaker Server can run system-level script files, such as Windows batch, Mac OS shell scripts, Perl, or VBScript files. You create a Run Script scheduled task, specify the script file, and when to run the script. Use system-level scripts to perform tasks outside of FileMaker Server.
Scheduling administrative tasks Sending scheduled messages to clients of hosted Sending scheduled messages to clients of hosted databases You can create a message and set up a schedule to deliver the message to FileMaker users. Messages can notify users about important events such as server shutdowns, database upgrades, or deadline reminders.
Scheduling administrative tasks Creating schedules Creating schedules The following are general steps for creating a scheduled task. For detailed instructions and procedures, click the Schedule assistant help button. To create a scheduled task: 1. Choose Schedules. 2. For Actions, select Create a schedule. 3. Click Perform Action to open the Schedule assistant. 4. Specify schedule details. Click Finish in the Schedule assistant to save changes to the schedule.
Scheduling administrative tasks Creating schedules Examples of repeating schedules The following examples show how schedules work when they run more than once. For a schedule created and enabled at 4:30 PM today, assuming today is Friday: A schedule defined this way Runs at these times A Daily schedule that runs once per day The first time is at 5:00 PM today, Friday. at 5:00 PM, with an end date of 12/31/2008 The next time is at 5:00 PM tomorrow, Saturday.
Scheduling administrative tasks Editing schedules Editing schedules The following are general steps for editing a scheduled task. For detailed instructions and procedures, click the Schedule assistant help button. To edit a schedule: 1. Choose Schedules, then select a schedule from the list. 2. For Actions, select Edit a schedule. 3. Click Perform Action to open the Schedule assistant. 4. Make changes to the schedule. Click Finish in the Schedule assistant to save changes to the schedule.
Scheduling administrative tasks Duplicating a schedule Duplicating a schedule Sometimes it is easier to duplicate and edit an existing schedule rather than define a new schedule. To duplicate an existing schedule: 1. Choose Schedules, then select a schedule from the list. 2. For Actions, select Duplicate a schedule. 3. Click Perform Action. The selected schedule is copied with the name Copy. Tip You can rename the schedule in the Schedule assistant.
Scheduling administrative tasks Deleting a schedule Deleting a schedule To delete a schedule: 1. Choose Schedules. 2. Select one or more schedules from the list. 3. For Actions, select Delete selected schedules. 4. Click Perform Action. Click Yes to confirm that you want to delete the selected schedules.
Scheduling administrative tasks Running a schedule manually Running a schedule manually You can run a schedule manually even in cases where it will not run automatically or it is disabled. For example, you can run a schedule manually when: • You have disabled a given schedule by clearing Enabled • You have disabled all schedules by clearing Allow enabled schedules to run • A schedule is disabled because its final scheduled run has already occurred.
Scheduling administrative tasks Enabling and disabling schedules Enabling and disabling schedules You can enable or disable specific schedules or you can disable all schedules at once. To Do this Enable a schedule when creating or editing it If you use the Schedule assistant to create a schedule, the scheduled task is enabled by default. Enable a schedule that was disabled In the Schedules pane, select the empty checkbox to the left of the schedule name.
Scheduling administrative tasks Enabling and disabling schedules Selecting a task In this Schedule assistant step, select a task to perform. To select a task: 1. Select one of the task options: Choose To Back Up Databases Back up one or more hosted databases. Run Script Run a ScriptMaker or system-level script on FileMaker Server. Send Message Send a message to one or more FileMaker Pro users connected to a hosted database. The message appears in a dialog box within FileMaker Pro. 2. Click Next.
Scheduling administrative tasks Enabling and disabling schedules Database backup schedule In this Schedule assistant step, choose a preset backup schedule or a custom schedule. You can choose a preset schedule as a starting point and change the details later in the Schedule assistant. To select a backup schedule: 1. Select a preset or a custom backup schedule: Choose To Hourly Back up all databases to the default backup folder daily, every hour from 8 am to 5 pm.
Scheduling administrative tasks Enabling and disabling schedules Selecting databases In this Schedule assistant step, choose which databases to back up in this schedule. To choose databases to back up: 1. Choose the databases to back up: Choose To All Databases Back up all databases in the default database folder and the additional database folder, including databases in subfolders. For information about the additional database folder, see Default folder settings (page 73).
Scheduling administrative tasks Enabling and disabling schedules Selecting the backup folder In this Schedule assistant step, be sure to specify a backup folder that is not the same as the default database folder or the optional additional database folder. Otherwise, your backed up files could accidentally be hosted when FileMaker Server starts up. To select the backup folder: 1. For Backup Folder, enter the path to the backup folder.
Scheduling administrative tasks Enabling and disabling schedules Selecting the schedule frequency In this Schedule assistant step, specify when and how often to run the scheduled task. To specify the schedule frequency: 1. For Frequency, choose Daily, Every n days, Once Only, or Weekly. 2. Specify the Schedule Details, which depend on the frequency selected: Choose To Start date Select the start date for this schedule. Click the calender to select a date.
Scheduling administrative tasks Enabling and disabling schedules Naming the schedule In this Schedule assistant step, specify a unique name for this schedule. This is the name that appears in the Schedules pane. To name the schedule: 1. Enter a Schedule Name. Note The schedule name can contain up to 31 characters. 2. Click Next. Click Back to return to the previous step or Cancel to exit the Schedule assistant.
Scheduling administrative tasks Enabling and disabling schedules Enabling email notifications in schedules In this Schedule assistant step, you can enable a schedule to send an email notification when a task is completed. To enable email notification: 1. Select Send email notification. 2. Enter the email addresses that you want to notify. You can enter multiple addresses separated by a comma. Example: user1@email.com,user2@email.com,... 3. Click Next.
Scheduling administrative tasks Enabling and disabling schedules Receiving email notifications only when a schedule fails Administrators may want to receive email notifications only when a scheduled task fails. If you enable email notifications for a scheduled task, all addressees receive emails every time the task completes, whether the task fails or succeeds.
Scheduling administrative tasks Enabling and disabling schedules Reviewing schedule details In this Schedule assistant step, review the details of this schedule, then optionally enable this schedule to run at the times specified. To review and enable the schedule: 1. Review the details. Select Back to return to the previous steps to change the schedule settings. 2. Select Enable this schedule. 3. Click Finish to save the schedule.
Scheduling administrative tasks Enabling and disabling schedules Selecting the script type In this Schedule assistant step, you can choose to run a ScriptMaker script or a system-level script on FileMaker Server. For more information, see Running server-side scripts (page 130). Place system-level script files in the Script folders before starting the Schedule assistant: • Windows: [drive]:\Program Files\FileMaker\FileMaker Server\Data\Scripts\ • Mac OS: /Library/FileMaker Server/Data/Scripts/ To select t
Scheduling administrative tasks Enabling and disabling schedules Selecting a database to run the ScriptMaker script In this Schedule assistant step, select the database containing the ScriptMaker script that you want to run. For more information, see Running ScriptMaker scripts (page 131). To select a database with the ScriptMaker script to run: 1. Select the Database from the list. 2. Choose the type of account that you want FileMaker Server to use when it runs the script.
Scheduling administrative tasks Enabling and disabling schedules Selecting a ScriptMaker script to run In this Schedule assistant step, select the ScriptMaker script that you want to run. To select a ScriptMaker script to run: 1. Select the script from the Script Name list. Tip If a script group in the list is closed, click the icon beside the group name to open the group and view the scripts. 2. Enter an optional Script parameter. Note For more information on script parameters, see FileMaker Pro Help.
Scheduling administrative tasks Enabling and disabling schedules Selecting a system-level script to run In this Schedule assistant step, select the system-level script to run. For more information, see Running system-level script files (page 132). Put system-level script files in the Scripts folder before starting the Schedule assistant: • Windows: [drive]:\Program Files\FileMaker\FileMaker Server\Data\Scripts\ • Mac OS: /Library/FileMaker Server/Data/Scripts/ If you do not see the script you want, click
Scheduling administrative tasks Enabling and disabling schedules Selecting users to send a message to In this Schedule assistant step, select the users that you want to receive a message. You select users by choosing one or more databases. Any FileMaker Pro user who is connected to one of these databases will receive the message. To select users to send a message to: 1.
Scheduling administrative tasks Enabling and disabling schedules Creating a message In this Schedule assistant step, create a message for FileMaker Pro users. To create the message: 1. Type the message that you want to send. 2. Click Next. Click Back to return to the previous step or Cancel to exit the Schedule assistant.
Troubleshooting Troubleshooting Problems with FileMaker Server typically occur in the following areas: • Deployment problems (page 157) • Admin Console problems (page 158) • General problems (page 159) • Network problems (page 160) • Problems on client computers (page 162) • FileMaker Server event log messages (page 164) • Command line error messages (page 167) • Improving performance (page 168) Note If FileMaker Pro is already running while the Database Server is starting up on the same machine, the Datab
Troubleshooting Deployment problems Deployment problems The Deployment assistant reports that the web server test failed If the Deployment assistant cannot communicate with the web server that you specified, you can provide more information and try again. To detect the web server: 1. Click Edit Server Deployment. 2. In the Deployment assistant, click Next until you reach the Web Server Test Failed step. 3. Follow the instructions in Web Server Test Failed (page 21).
Troubleshooting Admin Console problems Admin Console problems Admin Console Start Page says to install Java when it’s already installed Internet Explorer may be configured to prevent add-ons from running. Click the Information Bar at the top of the browser window and allow Internet Explorer to run the Java Web Start ActiveX Control add-on. Java Web Start technology uses this add-on to determine whether the required version of Java is installed.
Troubleshooting General problems General problems FileMaker Server is sending too many email messages You have many, frequently-run scheduled tasks with email notifications enabled. Try disabling email notifications or remove email addresses for some scheduled tasks. Also, see Receiving email notifications only when a schedule fails (page 148). None of the scheduled tasks are running FileMaker Server has been configured not to allow any schedules to run.
Troubleshooting Network problems Network problems A FileMaker Pro client using TCP/IP can't find FileMaker Server databases on the network Verify that TCP/IP networking software is properly configured on the host and client computers. Verify that the simultaneous client limit you specified has not been reached.
Troubleshooting Network problems Ports used by FileMaker Server When running FileMaker Server in an environment that uses a firewall, be sure to configure the firewall on each machine to allow FileMaker Server to communicate. The table below lists all the ports used in a FileMaker Server deployment. Note Not all of the ports listed below need to be open to end users or between all machines in a FileMaker Server deployment.
Troubleshooting Problems on client computers Problems on client computers Admin Console Start Page says to install Java when it’s already installed Internet Explorer may be configured to prevent add-ons from running. Click the Information Bar at the top of the browser window and allow Internet Explorer to run the Java Web Start ActiveX Control add-on. FileMaker Server uses this add-on to detect whether the required version of Java is installed.
Troubleshooting Problems on client computers Related topics FileMaker Server event log messages (page 164) Configuring Database Server settings (page 62) Improving performance (page 168) Users, groups, and permissions (Mac OS) (page 36) Troubleshooting (page 156) FILEMAKER SERVER 9 HELP 163
Troubleshooting FileMaker Server event log messages FileMaker Server event log messages The following is an alphabetical list and explanation of some of the log file messages you might see in the Event.log or in the Windows Event Viewer. Variables returned by FileMaker Server or the operating system, such as the name of the destination or file, are in [brackets]. Client [client name] no longer responding; connection closed.
Troubleshooting FileMaker Server event log messages Database [filename] is damaged and has been closed. Try opening the file in FileMaker Pro: start the FileMaker Pro application, open the file, and follow any instructions on your screen. (See FileMaker Pro Help for more information about recovering files.) Then try opening the file with FileMaker Server. Database [filename] was not closed properly, performing consistency check.
Troubleshooting FileMaker Server event log messages Schedule [schedule name] aborted; the destination [destination] is not writable. The specified destination is not accessible, and the schedule is now disabled. If the destination is a removable medium, you might need to remove it from the drive, make it writable, and reinsert it. Try again after the destination is correctly set up.
Troubleshooting Command line error messages Command line error messages The following is a list of the error codes you might see when working with the command line interface, and a brief description of each code. For additional information, consult the Event.log or see Troubleshooting (page 156). 10001 Invalid parameter 10502 Host was unreachable Make sure the server is available.
Troubleshooting Improving performance Improving performance For best performance, FileMaker Server should be run on a dedicated machine reserved for use as a database server. When FileMaker Server is hosting many clients or a large number of database files, it uses a high level of processor, hard disk, and network capacity.
Checking for updates Checking for updates From the Start Page, you can check for updates to FileMaker Server software. In the Software Update section, click Check Now. If an update is available, you can click a link to download the update. For information on enabling or disabling this feature, see Admin Console settings (page 59).
About the license key About the license key FileMaker software comes with a unique, 35-character license key. Do not lose this license key. We recommend that you keep the license key in a safe place in case the software ever needs to be reinstalled. You can find your license key(s) on the back of the CD sleeve. If you paid for your software electronically, you received an email with a link to a PDF file with your license key.
Command line reference Command line reference FileMaker provides the tool fmsadmin for administering FileMaker Server via the command line interface (CLI). You must be logged on to the computer running FileMaker Server to use the CLI. Note The CLI is available via the command prompt (Windows) and the Terminal application (Mac OS). Command Line Interface files The CLI executable fmsadmin is located in the folder: • Windows: [drive]:\Program Files\Filemaker\FileMaker Server\Database Server\fmsadmin.
Command line reference Options for specific commands Use To -d path, --dest path Specify a destination path. -f, --force Force close a database or shut down the server. -m message, --message message Specify a text message to be sent to clients. -o, --offline Perform an offline backup. -s, --stats Return file or client statistics. -t seconds, --grace-time seconds Specify time in seconds before client is forced to quit. • To specify the short form of options, use a single hyphen (-).
Command line reference Related topic Command line error messages (page 167) FILEMAKER SERVER 9 HELP 173
Command line reference fmsadmin commands fmsadmin commands The fmsadmin command line interface (CLI) commands are listed below. Type: fmsadmin help commands to see the list. Click a link for more information.
Command line reference fmsadmin commands BACKUP command Format fmsadmin BACKUP [FILE...] [PATH...] [options] Description Backs up the specified files (FILE) or all the hosted files in the specified paths (PATH). By default, the BACKUP command performs a live backup of a hosted file, without interfering with client usage. Alternatively, first PAUSE the databases, then issue the BACKUP command, followed by a RESUME command to perform an offline backup.
Command line reference fmsadmin commands CLOSE command Format fmsadmin CLOSE [FILE...] [PATH...] [options] Description Closes the specified files (FILE) or all the hosted files in the specified paths (PATH). If no FILE or PATH is specified, closes all hosted files. Note If you want to close a specific file, you must type a space between any options and the filename or file ID. For example, Command Result fmsadmin close -y Database Closes only the specified file.
Command line reference fmsadmin commands DISABLE command Format fmsadmin DISABLE [TYPE] [SCHEDULE_NUMBER] Description Disables the item of the specified TYPE. Valid TYPES SCHEDULE: Disables a schedule. SCHEDULE_NUMBER is the ID of the schedule to disable. Use the LIST SCHEDULES command to obtain the ID number of each schedule. Options None.
Command line reference fmsadmin commands DISCONNECT command Format fmsadmin DISCONNECT CLIENT [CLIENT_NUMBER] [options] Description Disconnects the specified client. The CLIENT_NUMBER is the ID number of the client. Use the LIST CLIENTS command to obtain a list of clients and their ID numbers. Important The command fmsadmin DISCONNECT client without a client ID number disconnects all clients.
Command line reference fmsadmin commands ENABLE command Format fmsadmin ENABLE [TYPE] [SCHEDULE_NUMBER] Description Enables items of the specified TYPE. Valid TYPES SCHEDULE: Enables a schedule. SCHEDULE_NUMBER is the ID of the schedule to enable. Use the LIST SCHEDULES command to obtain the ID numbers of each schedule. Options None.
Command line reference fmsadmin commands HELP command Format fmsadmin [options] HELP [COMMAND] Description Displays a help page for other fmsadmin commands. • Type fmsadmin help for general information. • Type fmsadmin help commands for a list of available commands. • Type fmsadmin help [COMMAND] for help on a specific command. • Type fmsadmin help options for a list of available options.
Command line reference fmsadmin commands LIST command Format fmsadmin LIST [TYPE] [options] Description Lists items of the specified TYPE. Valid TYPES CLIENTS: Lists the connected clients. The following example lists the currently connected users: fmsadmin list clients FILES: Lists the hosted files. The following example returns file IDs and other statistics for the currently open, hosted files in the default folders: fmsadmin list files [-s] PLUGIN: Lists Database Server calculation plug-ins.
Command line reference fmsadmin commands OPEN command Format fmsadmin OPEN [FILE...] [PATH...] Description Opens databases in the default and additional database folders. Each FILE specified is opened, or all the files in each PATH are opened. If no FILE or PATH is specified, all files in the default folder are opened.
Command line reference fmsadmin commands PAUSE command Format fmsadmin PAUSE [FILE...] [PATH...] Description Pauses the specified files (FILE) or all the hosted files in the specified paths (PATH). If no FILE or PATH is specified, pauses all hosted files. After a file is paused, it is safe to copy or back up the file until a RESUME is performed. Options None.
Command line reference fmsadmin commands RESUME command Format fmsadmin RESUME [FILE...] [PATH...] Description Makes a database that has been paused available again. Each FILE specified is resumed, and all files in each PATH are resumed. If no FILE or PATH is specified, all paused files are resumed. Options None.
Command line reference fmsadmin commands RUN command Format fmsadmin RUN schedule [SCHEDULE_NUMBER] Description Manually runs a schedule specified by its SCHEDULE_NUMBER. To obtain a list of schedules and their ID numbers, use the LIST SCHEDULES command. Options None.
Command line reference fmsadmin commands SEND command Format fmsadmin SEND [options] [CLIENT_NUMBER] [FILE...] [PATH...] Description Sends a text message to a client specified by CLIENT_NUMBER, to the clients connected to the specified files (FILE), or to all clients connected to any file in the specified paths (PATH). If no CLIENT_NUMBER, FILE, or PATH is specified, the message is sent to all connected clients. By default, parameters are expected to be FILES or PATHS.
Command line reference fmsadmin commands START command Format fmsadmin START SERVER Description Starts the Database Server. This command works only if the FileMaker Server service (Windows) or daemons (Mac OS) are running. Options None.
Command line reference fmsadmin commands STATUS command Format fmsadmin STATUS [TYPE] [CLIENT_NUMBER] [FILE] Description Retrieves the status of the specified TYPE. Valid TYPES CLIENT: Retrieves the status of a client specified by CLIENT_NUMBER. For example: fmsadmin STATUS client 2 Use the LIST CLIENTS command to obtain a list of clients and their ID numbers. FILE: Retrieves the status of an open file specified by FILE.
Command line reference fmsadmin commands STOP command Format fmsadmin STOP [options] Description Stops the Database Server. Options -f, --force Expedites shut down of the Database Server. All clients are immediately disconnected. -m message, --message message Specifies a text message to send to the connected clients. -t seconds, --grace-time seconds Specifies the total number of seconds to wait before forcing disconnection of clients. The default (and minimum) value is 120 seconds.
Glossary A Glossary A Access privileges Permission to view and work with certain records, fields, layouts, value lists, and scripts and to perform selected activities in a file. Account A username and (usually) password that accesses a file with a defined level of privileges. Active Directory In Windows, the distributed directory service that is included with the Microsoft Windows 2000 and 2003 Server operating systems. Active Directory provides centralized, secure management of a network.
Glossary C C Cache An area of RAM reserved by a program to store frequently used data, providing faster access than if the data had to be read from the hard disk. A larger cache size increases FileMaker Server performance. CLI CLI is the command line interface. Using the FileMaker Server CLI, an administrator can enter fmsadmin commands to administer FileMaker Server.
Glossary E Data source name (DSN) A data structure that contains the information about a specific database that an ODBC driver needs in order to connect to it. Deployment The process and result of installing and configuring FileMaker Server components on one or more machines. In a multiple-machine deployment, components are deployed across more than one machine and work together as a unit.
Glossary G, H G, H Hibernate Windows: A power conservation mode that saves energy on an idle system. If the computer running FileMaker Server hibernates, all client activity is suspended. Hibernation will not occur on the server machine if there are clients connected to hosted databases. Hosted database A file opened by FileMaker Server for clients to use on a computer network. One or more clients can access and change information simultaneously in hosted databases.
Glossary N N NetInfo The information management system for the Mac OS platform. It manages all of the operating system settings and information, such as users and groups. It also handles the authentication of users. Network protocol A set of rules that governs how computers exchange messages on a network. Common protocols include TCP/IP, HTTP, and HTTPS. O, P, Q ODBC An API that uses SQL statements to access data from, and exchange data with, many database management systems.
Glossary S S Schedules You can create schedules to back up hosted databases, run scripts, and send messages to clients. ScriptMaker A feature in FileMaker Pro that enables you to create a script that tells FileMaker Pro to perform one action or a sequence of actions, or script steps. Secure Sockets Layer (SSL) A protocol to encrypt and authenticate communications on the Internet. Used by the HTTPS access method.
Glossary U, V, W, X, Y, Z Web Publishing Engine The Web Publishing Engine provides the Custom Web Publishing services for databases hosted by FileMaker Server and the Instant Web Publishing services (for FileMaker Server Advanced). Web server The software responsible for responding to HTTP or HTTPS requests from users on the web. Required in a FileMaker Server deployment for publishing databases on the web. Web Server Module A FileMaker Server software component installed on the web server machine.
Registration Registration Please take the time to register your product by choosing Help menu > Register Now in FileMaker Server Admin Console. By registering your software, you may be eligible for upgrade offers and other customer services. If you are using the FileMaker Server trial version, you must register your software prior to use. For more information on registration, see “Registration and customer support” in FILEMAKER SERVER GETTING STARTED GUIDE on the Start Page.
Customer support and Knowledge Base Customer support and Knowledge Base For information about technical support and customer service, visit www.filemaker.com/intl. To access resources on the FileMaker web site such as ready-made solutions and the FileMaker Knowledge Base, in FileMaker Server Admin Console choose Help menu > FileMaker on the Web. For free online technical support, use the FileMaker Knowledge Base. It offers answers to frequently asked questions, tips, troubleshooting advice, and much more.
Copyright information Copyright information © 2007 FileMaker, Inc. All Rights Reserved. FileMaker, Inc. 5201 Patrick Henry Drive Santa Clara, California 95054 FileMaker is a trademark of FileMaker, Inc., registered in the U.S. And other countries, and ScriptMaker and the file folder logo are trademarks of FileMaker, Inc. All other trademarks are the property of their respective owners. FileMaker documentation is copyrighted.