
Web Publishing Installation Guide
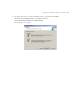
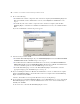


Table Of Contents
- Chapter 1 Before you begin
- Using FileMaker Server documentation
- Customer support
- About the license key
- Hardware and software requirements
- Windows requirements for the Web Publishing Engine
- Mac OS requirements for the Web Publishing Engine
- Windows requirements for FileMaker Site Assistant and FileMaker CDML Converter tools
- Mac OS requirements for FileMaker Site Assistant and FileMaker CDML Converter tools
- Important note about supported operating systems
- About the Web Publishing Engine software components
- About the tools for developing XSLT stylesheets
- Overview of installing, configuring, and using the Web Publishing Engine
- Installing the Web Publishing Engine in various host configurations
- Registering the Web Publishing Engine in FileMaker Server
- Installing plug-ins for the Web Publishing Engine
- Chapter 2 Installing the Web Publishing Engine in Windows
- Chapter 3 Installing the Web Publishing Engine in Mac OS X
- Chapter 4 Configuring the Web Publishing Engine
- About the Web Publishing Engine Administration Console
- General steps for configuring the Web Publishing Engine
- Configuring the Web Publishing Engine for the first time
- Configuring Instant Web Publishing
- Disabling Custom Web Publishing with XML
- Configuring Custom Web Publishing with XSLT
- Setting the Web Publishing Engine mode
- Setting server-side XSLT stylesheet caching
- Configuring the interaction between web sessions and database sessions
- Configuring access to a mail server for the Web Publishing Engine
- Setting the default text encoding for XSLT requests
- Disabling Custom Web Publishing with XSLT
- Specifying general settings for the Web Publishing Engine
- Restricting access to the Administration Console
- Viewing a list of the published databases for FileMaker Server
- Logging out of the Administration Console
- Using the Web Publishing Engine and Administration Console services
- Changing the user name and password for the Administration Console
- Where to go from here
- Index
Installing the Web Publishing Engine in Mac OS X 29
8. Click Install.
9. When installation completes, do one of the following:
1 Click Restart to leave the Installer and restart your computer.
1 If you want to install other software components before using the computer, you can either click
Continue to install the other components, or you can click Quit to quit the installer.
Note You must restart your computer before you can start using the Web Publishing Engine or
Administration Console.
Note The installer creates a group named fmsadmin and an account named fmweb to run the Web Publishing
Engine in.
Where files are stored on your hard disk
The Web Publishing Engine installer copies files to several folders on your hard disk, depending on the
installation options you choose. When installation is complete, you can view the Web Publishing Engine
Installer Log File, which lists the location of each installed file, in the FileMaker Server 7 folder inside the
Library folder. You can view the log file with TextEdit or a word processing program. If the log file already
exists from a previous installation, the new information is appended at the end of the file.
Uninstalling, modifying, or repairing the Web Publishing Engine
You can use the FileMaker Web Publishing Engine installer to uninstall the Web Publishing Engine software
components. Before uninstalling, be sure to stop the Web Publishing Engine services. See “Starting,
restarting, stopping, or disabling the services in Mac OS X” on page 52.
Installing the FileMaker Site Assistant and FileMaker CDML Converter
You can install the FileMaker Site Assistant on any computer that has network access to the Web Publishing
Engine, or it can be installed on the same computer as the Web Publishing Engine. The Site Assistant needs
access to the Web Publishing Engine to operate.
You can install the FileMaker CDML Converter, which does not need access to the Web Publishing Engine,
on any computer.