
Web Publishing Installation Guide
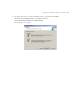
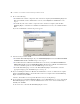


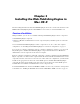

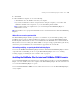
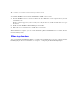
Table Of Contents
- Chapter 1 Before you begin
- Using FileMaker Server documentation
- Customer support
- About the license key
- Hardware and software requirements
- Windows requirements for the Web Publishing Engine
- Mac OS requirements for the Web Publishing Engine
- Windows requirements for FileMaker Site Assistant and FileMaker CDML Converter tools
- Mac OS requirements for FileMaker Site Assistant and FileMaker CDML Converter tools
- Important note about supported operating systems
- About the Web Publishing Engine software components
- About the tools for developing XSLT stylesheets
- Overview of installing, configuring, and using the Web Publishing Engine
- Installing the Web Publishing Engine in various host configurations
- Registering the Web Publishing Engine in FileMaker Server
- Installing plug-ins for the Web Publishing Engine
- Chapter 2 Installing the Web Publishing Engine in Windows
- Chapter 3 Installing the Web Publishing Engine in Mac OS X
- Chapter 4 Configuring the Web Publishing Engine
- About the Web Publishing Engine Administration Console
- General steps for configuring the Web Publishing Engine
- Configuring the Web Publishing Engine for the first time
- Configuring Instant Web Publishing
- Disabling Custom Web Publishing with XML
- Configuring Custom Web Publishing with XSLT
- Setting the Web Publishing Engine mode
- Setting server-side XSLT stylesheet caching
- Configuring the interaction between web sessions and database sessions
- Configuring access to a mail server for the Web Publishing Engine
- Setting the default text encoding for XSLT requests
- Disabling Custom Web Publishing with XSLT
- Specifying general settings for the Web Publishing Engine
- Restricting access to the Administration Console
- Viewing a list of the published databases for FileMaker Server
- Logging out of the Administration Console
- Using the Web Publishing Engine and Administration Console services
- Changing the user name and password for the Administration Console
- Where to go from here
- Index

Installing the Web Publishing Engine in Windows 23
12. Click Install.
13. When the installation is complete, click Finish.
14. If you installed the Web Server Module and Administration Console, restart the IIS web server.
Note The Web Publishing Engine documentation is installed in the Electronic Documentation folder (inside
the English Extras folder).
About the Web Publishing Engine services
For information on restarting the services, see “Using the Web Publishing Engine and Administration
Console services” on page 51.
Installing the Web Publishing Engine from the command line
To install the Web Publishing Engine from the command line:
1. Insert the FileMaker Server 7 Advanced CD into the CD or DVD drive on the host computer where you
want to install the Web Publishing Engine software components.
2. Open a command window and type:
msiexec /i <path>\FileMaker Server 7 Web Publishing Engine.msi /qn+ /Lr <log file>.txt
where:
1 <path> is the drive for your CD or DVD drive and this folder path:
\FileMaker Web Publishing Engine
Note If you have copied the FileMaker Server 7 Web Publishing Engine.msi to your hard disk, replace
the preceding path with the path to the file’s location on your hard disk.
1 <log file>.txt specifies the path and name of the text log file, such as C:\logfile.txt. You can view the log
file with WordPad or a word processing program.
For more information on using msiexec, see Windows help.
3. Follow the on-screen instructions.
If you install this software component These services are also installed
Web Publishing Engine FileMaker Publishing Engine (WPC)
FileMaker Publishing Engine (CWPE)
Administration Console FileMaker Publishing Engine (CONFIG)
Web Publishing Engine and Administration
Console installed on same host
FileMaker Publishing Engine (WPC)
FileMaker Publishing Engine (CWPE & CONFIG)