
Quick Start


6 FileMaker Server 7 Advanced QuickStart Guide
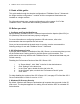
vii. The admin console will automatically display the “Overview” tab. The screen
should now show a single blue box that lists the Web Server, Publishing
Engine, and FileMaker Server.
Refer to page 38 in the FileMaker Server Advanced Web Publishing
Installation Guide for a more detailed explanation of the overview page.
The system is now configured. The default values that are established will allow you to
start publishing databases to the web with FileMaker Server 7 Advanced. Refer to the
Web Publishing Installation Guide for information about customizing the other settings.
6. Verify Success
The simplest test is to try Instant Web Publishing. If there are any web enabled
databases on the FileMaker Server, they should now be accessible via the Instant Web
Publishing home page.
Try accessing the sample database that is installed with FileMaker Server 7 named
“FMServer_Sample_Config”.
Note: If you upgraded your server from v1 or v2, then you must first add the “fmiwp”
extended privilege to the “FMServer_Sample_Config” database by using the “Accounts
and Privileges” dialog in FileMaker Pro 7.
For more information about configuring the extended privileges, see page 17 of the
Custom Web Publishing Guide, page 12 of the Instant Web Publishing Guide or the
FileMaker Pro Help.
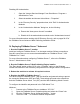
i. Connect to the Instant Web Publishing home page by pointing a
compatible web browser (Safari on Mac OS X or Internet Explorer on
Windows) to:
http://localhost/fmi/iwp
ii. The homepage should display a list of databases accessible via IWP.
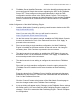
iii. Click on one of the database names to log in to the database. If
successful, you should now see your FileMaker database rendered as a
web page!