
Tutorial

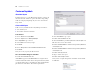
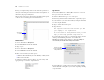

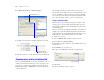
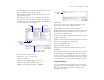
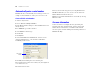
Table Of Contents
- Lesson 1 FileMaker Pro basics
- Lesson 2 Browsing information
- Lesson 3 Finding and sorting records
- Lesson 4 Creating a database and entering records
- Lesson 5 Customizing what you see
- Lesson 6 Creating lists, mailing labels, and form letters
- Lesson 7 Simplifying data entry
- Lesson 8 Automating tasks with buttons and scripts
- Lesson 9 Creating and running reports
- Lesson 10 Making databases relational
- Lesson 11 Sharing and exchanging data
- Lesson 12 Protecting data in FileMaker Pro
- Lesson 13 Keeping your data safe

Lesson 6 | Creating lists, mailing labels, and form letters 35
Customize the letter with the company name
1. Click after the word company in the first paragraph.
2. Type a comma and a space.
3. Insert a merge field for the company name.
4. Type another comma.
Add the closing
1. Click at the end of the text and enter two line spaces.
2. Type With regards, then enter four line spaces.
3. Type John Jones and a comma.
4. Enter a line space, then type President.
5. Choose View menu > Browse Mode to see your personalized letter,
ready to print, for every record in the database.
See “Add a graphic to the layout” on page 29 to learn how to add a
logo to the letterhead.
6. When you are finished with this lesson, close the file by choosing
File menu
> Close.
For more information
In this lesson, you have created list, label, and form-letter layouts.
You can create as many layouts as you like, to organize your
information in any way you like. To learn how to create other
layouts, see
lesson 9 in this tutorial and chapter 3 in the
FileMaker Pro User’s Guide. For information about turing off
spelling checking in specific fields in a file, see FileMaker
Pro Help.