
Tutorial
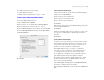
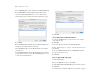
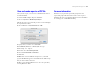


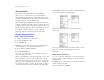
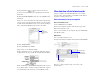
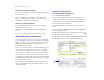
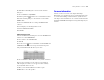

Table Of Contents
- Lesson 1 FileMaker Pro basics
- Lesson 2 Browsing information
- Lesson 3 Finding and sorting records
- Lesson 4 Creating a database and entering records
- Lesson 5 Customizing what you see
- Lesson 6 Creating lists, mailing labels, and form letters
- Lesson 7 Simplifying data entry
- Lesson 8 Automating tasks with buttons and scripts
- Lesson 9 Creating and running reports
- Lesson 10 Making databases relational
- Lesson 11 Keeping your data safe

58 FileMaker Pro Tutorial
View the new record in the related table
1. Go to the Data Entry layout, which is based on the Members table.
2. Go to the last record.
You see Joe Williams’ record, with the company information
filled in. You automatically created this record when you typed
Joe Williams into the list in the Companies table.
Add a new record and view it in the list
1. In the Data Entry layout, create a record for a new member
who works at ABC Company.
2. Now return to Companies layout, and look at the ABC Company
record.
You see the new member in the list (scroll down if necessary).
About working with lists of related records
In “View data from one related record” on page 55, a relationship
between the Members and Companies tables displays data (company
addresses) from the Companies table. Here, the same relationship
displays data (member names) from the Members table.
Relationships are bidirectional.
There is more than one matching record in the related table because
there is more than one member from each company. A portal in
the Companies table displays all the members for each company.
When you added Joe Williams to the list of members who work at
ABC Company, the relationship automatically created a record for
Joe Williams in the Members table. ABC Company is automatically
entered into the match field because the name was added to the portal
of the ABC Company record.
A new member added to the Members table automatically appears
at the end of the members list in the matching company record in
the Companies table.
Display a list of related records
Create a portal to display matching records
1. Choose Window menu > MyFile10.
2. Choose the Companies layout from the Layout pop-up menu.
A relationship must always be defined before you can display data
from related records. You will use the relationship to the Members
table you defined earlier in this lesson.
This relationship must be edited to allow the creation of related
records.
3. Choose File menu > Define > Database, and click the Relationships
tab, if it isn’t already selected.
4. In the relationships graph, double-click the relational operator
to display the Edit Relationship dialog box.
5. In the Members table, select Allow creation of records in this table via
this relationship. This lets you add a name to the Members list.
Select
this
checkbox