
Tutorial
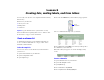
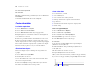
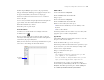

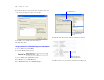
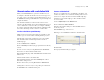
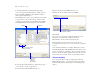
Table Of Contents
- Lesson 1 FileMaker Pro basics
- Lesson 2 Browsing information
- Lesson 3 Finding and sorting records
- Lesson 4 Creating a database and entering records
- Lesson 5 Customizing what you see
- Lesson 6 Creating lists, mailing labels, and form letters
- Lesson 7 Simplifying data entry
- Lesson 8 Automating tasks with buttons and scripts
- Lesson 9 Creating and running reports
- Lesson 10 Making databases relational
- Lesson 11 Keeping your data safe

34 FileMaker Pro Tutorial
11. Click View in Layout mode.
12. Click Finish.
13. When you finish viewing your label layout, choose View menu >
Preview Mode.
Your labels should look like those in the sample file.
Create a form letter
Look at the sample letter
1. Choose Window menu > Sample06.
2. Choose View menu > Browse Mode.
3. Choose Welcome Letter from the Layout pop-up menu.
4. Flip through the records and look at the letter. You might need
to scroll down to see all of it.
5. Notice the personalized address and salutation for each record.
6. Also notice that the wording in each letter is the same, except
that the company name for each record appears in the first paragraph.
The text flows around the company name, regardless of its length.
This letter is ready to print, for every record in the database.
About form letter layouts
The letter is simply a layout containing text, merge fields, and
a graphic.
1. Choose View menu > Layout Mode.
2. Click anywhere on the text.
You see the handles in the corners of the entire text block. All of
the text is in a single text block.
3. Notice that Company is a merge field in the body of the letter.
The address and salutation also use merge fields.
Create a form letter
To create this letter, you will:
1 create a blank layout
1 create a text block to contain your letter
1 add merge fields for the recipient’s name and address
1 type the letter
1 customize the letter with the recipient’s company name
1 add the closing
Create a one-page blank layout
1. Choose Window menu > MyFile06.
2. Choose View menu > Layout Mode.
3. Choose Layouts menu > New Layout/Report.
4. For Layout Name, type Welcome Letter.
5. Select Blank layout for the new layout type.
6. Click Finish.
7. On the layout, click the Header tab, then press Backspace
(Windows) or Delete (Mac
OS).
8. Click the Footer tab, then press Backspace (Windows) or
Delete (Mac OS).
This letter will not use a header or footer.
9. Drag the Body tab down to about 11 inches.
When you release the mouse button, you will see the page boundary.
If you don’t see the page boundary, drag the Body tab down farther.
Body tab
Page boundary