
Tutorial
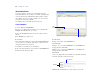
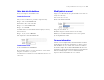

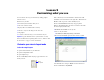
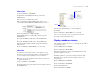
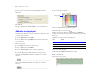
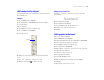
Table Of Contents
- Lesson 1 FileMaker Pro basics
- Lesson 2 Browsing information
- Lesson 3 Finding and sorting records
- Lesson 4 Creating a database and entering records
- Lesson 5 Customizing what you see
- Lesson 6 Creating lists, mailing labels, and form letters
- Lesson 7 Simplifying data entry
- Lesson 8 Automating tasks with buttons and scripts
- Lesson 9 Creating and running reports
- Lesson 10 Making databases relational
- Lesson 11 Keeping your data safe

Customizing what you see 29
Add custom text to a layout
You will add the name of the organization to the top of the layout,
then format the text.
Add text
1. Choose Window menu > Sample05.
2. Choose View menu > Layout Mode and look at the heading at
the top of the layout.
This is your model.
3. Open MyFile05.fp7 if it is not already open.
4. Choose View menu > Layout Mode.
5. Select the text tool.
6. Click the top of the layout where you want to begin the line
of text.
7. Type The Corporate Travelers Club.
8. Click the selection tool to end the text entry.
Change text size and color
1. Click the Corporate Travelers Club text to select
the text block.
2. Choose Format menu > Text.
3. Choose Times from the Font list.
4. Choose Custom from the Size list, and type 28.
5. For Color, choose white or another color.
6. Click OK.
Add a graphic to the layout
Add a logo beside the club name.
1. Choose Window menu > Sample05.
2. In the Fee Information layout, choose View menu > Layout Mode
and notice where the logo appears on the layout.
3. Open MyFile05.fp7 if it is not already open.
4. Choose View menu > Layout Mode.
5. Click beside the Corporate Travelers Club text, where
you want to place the club logo.
You will see no change onscreen yet.
6. Choose Insert menu > Picture.
7. Open the Working Files folder.
8. Make sure all file types are showing, and select logo.gif.
9. Click Open.
10. Drag the logo to move it if necessary.
Text tool