
U.M. (Windows)


1-4
FileMaker Pro Installation & New Features Guide
Installing FileMaker Pro
You must use the installation program to install FileMaker Pro—you can’t
install FileMaker Pro by dragging files to your hard disk.
The CD-ROM contains information, such as additional templates and
support information, not found in the disk set. The floppy disks are included
as a convenience for users who do not have CD-ROM drives. If you have a
CD-ROM drive, you should use the CD-ROM disc; you do not need to use
the floppy disks.
If you don’t have a CD-ROM drive
The floppy disks included with
FileMaker Pro 3.0 contain the application and all the files you need to
start working.
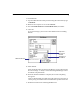
If you’re on a network
You need to know which type of network you’re using.
If you’re not sure which network option to choose, check with your network
administrator before you begin installation.
Installing with Windows 95
To install FileMaker Pro from the CD-ROM:
1.
Insert the CD-ROM disc into the CD-ROM drive.
2.
Follow the instructions provided on the screen.
Important
Because the CD-ROM contains additional templates and other
information not available on floppy disk, you should install from the floppy
disks only if you do not have a CD-ROM drive.
To install FileMaker Pro from the floppy disks:
1.
Start Windows 95.
2.
Click the
Start
button and then point to
Settings
.
3.
Click
Control Panel
.
4.
Double-click
Add/Remove Programs
.