
Installation and New Features Guide (Mac OS)


1-4
FileMaker Pro Installation & New Features Guide
Installing from the FileMaker Pro floppy disk set
Important
Because the CD-ROM contains additional templates and other
information not available on floppy disk, you should install from the floppy
disks only if you do not have a CD-ROM drive.
To start the FileMaker Pro Installer:
1.
Disable virus protection and file sharing if you haven’t already.
See “Turn off virus protection and file sharing” on page 1-2 for more
information.
2.
Insert
Disk 1
in the floppy disk drive.
You see the disk’s window on your screen. If you see only the disk icon,
double-click the icon to open its window.
3.
Double-click the FileMaker Pro Installer icon to start the FileMaker Pro
Installer.
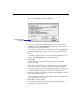
4.
Click
OK
to dismiss the FileMaker Pro Installer welcome screen.
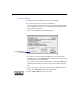
You see the FileMaker Pro Installer dialog box.
5.
Follow the steps described in one of the following sections:
1
If you want to install all the available files, go to the next section, “Easy
installation.”
1
If you want to install a subset of the FileMaker Pro files, skip to
“Custom installation” on page 1-6.
Easy installation
Follow these steps to install the complete FileMaker Pro package on your
hard disk. The Installer automatically installs the correct version for either
680x0 Macintosh or Power Macintosh computers.
Important
To install a subset of FileMaker Pro files, see the next section,
“Custom installation.”
To install FileMaker Pro on your hard disk:
1.
If you have not done so already, start the Installer.
To do so, use the steps described in “Installing from the FileMaker Pro
CD-ROM disc” on page 1-3 or “Installing from the FileMaker Pro floppy
disk set” on page 1-4.
Double-click this icon