
Installation and New Features Guide (Mac OS)


Installing FileMaker Pro
1-3
Installing FileMaker Pro
You must use the installation program to install FileMaker Pro—you can’t
install the application by dragging files to your hard disk.
The FileMaker Pro CD-ROM contains information, such as additional
templates and support information, that is not found in the disk set. If you
have a CD-ROM drive, you should use the CD-ROM disc; you do not need
to use the floppy disks. The floppy disks are included as a convenience for
users who do not have CD-ROM drives.
If you don’t have a CD-ROM drive
The floppy disks included with
FileMaker Pro 3.0 contain the application and all the files you need to start
working.
Installing from the FileMaker Pro CD-ROM disc
To start the FileMaker Pro Installer:
1.
Disable virus protection and file sharing if you haven’t already.
See “Turn off virus protection and file sharing” on page 1-2 for more
information.
2.
Insert the CD-ROM disc into your CD-ROM drive.
You see the disc’s window on your screen. If you see only the disc icon,
double-click the icon to open its window.
3.
Double-click the file named “Start Here”.
4.
Follow the instructions provided on the screen to start the Installer.
5.
When you see the FileMaker Pro Installer welcome screen, click
OK
.
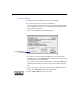
You see the FileMaker Pro Installer dialog box.
6.
Follow the steps described in one of the following sections:
1
If you want to install all the available files, skip to “Easy installation”
on page 1-4.
1
If you want to install a subset of the FileMaker Pro files, skip to
“Custom installation” on page 1-6.
Double-click this icon