
ODBC and JDBC Guide


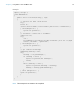
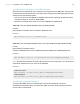
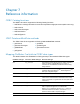
Table Of Contents
- Chapter 1 Introduction
- Chapter 2 Accessing external SQL data sources
- Chapter 3 Installing FileMaker ODBC client drivers
- Hardware and software requirements
- ODBC client access to FileMaker Cloud for AWS
- ODBC client driver architecture overview (Windows)
- ODBC client driver installation (Windows)
- Configuring client drivers (Windows)
- ODBC client driver installation (macOS)
- Configuring client drivers (macOS)
- Where to go from here
- Chapter 4 Using ODBC to share FileMaker data
- Chapter 5 Installing FileMaker JDBC client drivers
- Chapter 6 Using JDBC to share FileMaker data
- Chapter 7 Reference information
- Index

Chapter 5
Installing FileMaker JDBC client drivers
To access a hosted FileMaker Pro database file as a JDBC data source, you need to install the
JDBC client driver. These instructions help you install the client driver needed to access FileMaker
data from third-party and custom applications via JDBC. Install the client driver on the machine
where the third-party application is installed.
Check for updates to the client drivers on the FileMaker
downloads and resources page.
If you’ll be hosting a FileMaker Pro database file using FileMaker Server, make the client drivers
available to remote users.
After installing the client driver you need, you can configure the driver to access a FileMaker data
and construct SQL queries to interact with the data.
The JDBC client driver constitutes the driver portions of the FileMaker software that allow third-
party applications or custom applications to access FileMaker files as JDBC data sources.
Software requirements
To install and use the JDBC client drivers, you need JDK 1.6 or later.
To find which version of Java you’re running, open a command window (Windows) or Terminal
window (macOS) and type java -version.
Networking requirements
If you’ll be accessing FileMaker data hosted on another computer, you’ll need network access via
TCP/IP.
JDBC client access to FileMaker Cloud for AWS
For information on connecting a JDBC client application to a database hosted by FileMaker Cloud
for AWS, see FileMaker Cloud for AWS Help.
JDBC client driver installation
You must have write access to the folder where you’re installing the JDBC client driver.
To install the JDBC client driver:
1. Do one of the following:
1 Windows: If you received your software electronically, double-click the installation icon (.exe
file).
1 macOS: If you received your software electronically, double-click the disk image icon (.dmg
file).
1 If you have an installation disk, insert the disk into the drive.
2. In the FileMaker Pro or FileMaker Server window, double-click the Extras folder.
3. Double-click the xDBC folder.