
Network Install Setup Guide

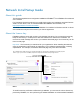

Table Of Contents
- About this guide
- About the license key
- Installing FileMaker Pro in Windows
- Choosing an installation method (Windows)
- About installing Bonjour (Windows)
- About installing the Microsoft .NET Framework (Windows)
- Installing FileMaker Pro using a networked volume (Windows)
- Installing from the command line (Windows)
- Setting up silent assisted installations (Windows)
- Saving the license key in the .msi installer (Windows)
- Installing FileMaker Pro in OS X
- About the personalization file

Network Install Setup Guide 7
Installing FileMaker Pro using a networked volume (Windows)
To make FileMaker installation files available on your network:
1. Create an installer folder on a networked volume for the FileMaker installation files.
2. Locate the installation files in your software download or on the DVD, then copy them to the
folder you created on your networked volume.
Note If you don’t copy the files to a networked volume, you can share the software download
or DVD over the network.
1 Only the installers for the platform of the machine (Windows or OS X) running the DVD will
be available.
1 You can’t use a personalization file. See “About the personalization file” on page 12.
3. To set up an assisted installation, use a text editor such as Notepad to open the personalization
file, Assisted
Install.txt, located in the installer folder you created.
4. Edit the personalization file. See “About the personalization file” on page 12.
5. Save changes as plain text.
To install FileMaker Pro or FileMaker Pro Advanced, instruct users to:
1. Mount the volume containing the installation files.
2. Double-click Setup.exe.
3. Windows users will see the Open File – Security Warning dialog box. Click Run to continue
installing.
Installing from the command line (Windows)
You can install FileMaker products from the command line without using the file,
Assisted
Install.txt. A command line installation requires you to run the Command Prompt as
administrator.
1. Do one of the following:
1 Windows 7: Choose Start menu > All Programs > Accessories, then right-click Command
Prompt and choose Run as administrator.
1 Windows 8: On the start screen, type command prompt, then right-click Command
Prompt, and choose Run as administrator.
If you received
FileMaker Pro as a Installation files are in
Software download The Files folder
DVD 1 The Files folder for the 32-bit version of FileMaker Pro
1 The 64-bit folder for the 64-bit version of FileMaker Pro