FileMaker Pro 13 ® User’s Guide
© 2007–2013 FileMaker, Inc. All Rights Reserved. FileMaker, Inc. 5201 Patrick Henry Drive Santa Clara, California 95054 FileMaker and Bento are trademarks of FileMaker, Inc. registered in the U.S. and other countries. The file folder logo, FileMaker WebDirect, and the Bento logo are trademarks of FileMaker, Inc. All other trademarks are the property of their respective owners. FileMaker documentation is copyrighted.
Contents Chapter 1 Introducing FileMaker Pro About this guide Using FileMaker Pro documentation Where to find PDF documentation FileMaker Pro Help Getting Started tour Starter Solutions Suggested reading FileMaker Pro overview Creating simple or complex database solutions Using layouts to display, enter, and print data Finding, sorting, and replacing data Protecting databases Creating scripts to automate tasks Sharing and exchanging data Saving and sending data in other formats Chapter 2 Using databases Ab
Finding records Performing quick finds in Browse mode Making find requests in Find mode Finding text and characters Finding numbers, dates, times, and timestamps Finding ranges of information Finding data in related fields Finding empty or non-empty fields Finding duplicate values Finding records that match multiple criteria Finding records except those matching criteria Viewing, repeating, or changing the last find Saving find requests Deleting and reverting requests Hiding records from a found set and
Creating layouts and reports About layout types Working with layout themes Setting up a layout to print records in columns Setting up columns in a layout Changing the width of columns Working with objects on a layout Organizing data with panel controls and popovers Using the Inspector to format objects Using the Inspector to position objects Using tools to precisely position objects Selecting objects Working with fields on a layout Placing and removing fields on a layout Setting up checkbox sets and othe
Chapter 5 Sharing and exchanging data Sharing databases on a network Enabling file sharing and hosting files Opening shared files as a client Opening shared databases remotely using a URL Closing a hosted file Sharing files with FileMaker Go clients Uploading files to FileMaker Server Importing and exporting data Saving and sending data in other formats Sending email messages based on record data Supported import/export file formats Setting up recurring imports ODBC and JDBC Methods of importing data int
Chapter 7 Converting databases from FileMaker Pro 11 and earlier Conversion overview Solving basic conversion problems Index 154 154 155 156
Chapter 1 Introducing FileMaker Pro FileMaker® Pro is the leading workgroup database software for quickly creating and sharing solutions adapted to your business needs. Powerful features, broad platform support, and an easy-to-use interface make FileMaker Pro indispensable for anyone in business, government, and education who needs to effortlessly manage all their information on iPad, iPhone, Windows, OS X, and the web.
Chapter 1 | Introducing FileMaker Pro 9 1 Search for particular topics by entering keywords. 1 Get information about the currently displayed dialog box by pressing F1 (Windows) or Command-? (OS X). Some dialog boxes display a (Windows) or (OS X) button or a Learn More link, which you can also use for getting information about the dialog box. Getting Started tour You can explore FileMaker Pro through the interactive Getting Started tour.
Chapter 1 | Introducing FileMaker Pro 10 FileMaker Pro overview Here is an overview of the capabilities of FileMaker Pro. Creating simple or complex database solutions With FileMaker Pro you can create simple database solutions (database files) consisting of just one database table, such as for customer information, or you can create a complex database with relationships and multiple database tables.
Chapter 1 | Introducing FileMaker Pro 11 In a layout, you choose, arrange, and modify fields and field labels, create reports, add buttons to initiate scripts, add graphics and text, and specify printing options. Not all information needs to be stored in your FileMaker Pro database. For example, you can add a web viewer to display a web page on a layout. There are some restrictions for displaying web content in FileMaker Pro. Choose different layout types in the New Layout/Report assistant.
Chapter 1 | Introducing FileMaker Pro 12 You can search for and replace data across multiple fields, similar to the way you find and replace data in word processing applications. You can also save a found set of records as a snapshot link and send the link to another person. For more information, see “Finding records” on page 31, “Sorting records” on page 43, and “Finding and replacing data” on page 42.
Chapter 1 | Introducing FileMaker Pro 13 If your computer is connected to a network, you and other FileMaker Pro or FileMaker Go users can use the same FileMaker Pro database file simultaneously. FileMaker Pro Network sharing supports the sharing of files with up to 5 concurrent users. Note To support more users and web publishing technologies such as XML, PHP, and FileMaker WebDirect, FileMaker recommends the use of FileMaker Server.
Chapter 2 Using databases This chapter explains the basics of how to: 1 1 1 1 1 1 1 1 1 open, close, and save files create records in a database add and edit data in fields find records using different criteria omit records from the found set find and replace data sort data print data, scripts, table and field information, and the relationships graph use scripts See Help for detailed, comprehensive information and step-by-step procedures about using FileMaker Pro.
Chapter 2 | Using databases 15 B C Records Michelle Cannon 123 4th St. SW Edmonton Fields CAN N4V 1LN (717) 555-0011 Your address book is like a database An invoicing system is an example of a more complex database, with multiple related tables, multiple layouts, and calculated fields. You can also view a subset of your data; for example, view only invoices for a particular month.
Chapter 2 | Using databases 16 To enter data in a database table, you make a new record and enter values into the fields that belong to that record. Values can be typed into a field, imported from another application, or entered in a number of other ways. FileMaker Pro also allows you to access and view data that is stored in non-FileMaker Pro files.
Chapter 2 | Using databases 17 2. When the FileMaker Quick Start Screen appears, do one of the following. Do this To Click Recent Files in the box at the center of the Quick Start Screen Display a list of FileMaker Pro files that you have recently opened.
Chapter 2 | Using databases 18 Keep the following points in mind: 1 If Show recently opened files is selected in the General preferences, files you have recently accessed appear in the list of recently opened files (by choosing File menu Open Recent or by clicking Recent Files in the FileMaker Quick Start Screen). See Help for information about adding local or remote files to the Favorite Files list in the FileMaker Quick Start Screen.
Chapter 2 | Using databases 19 Opening multiple windows per file You can open more than one window per file. This allows you to view the same layout in separate windows, or simultaneously view different layouts in the same file. You can perform find or sort operations independently in the different windows. To open an additional window, choose Window menu > New Window. Another window appears. Initially, the window displays the same layout, sort order, and found set as the previously active window.
Chapter 2 | Using databases 20 Closing windows and files You can close FileMaker Pro windows and files as you would in most Windows and OS X applications. To close a window, do one of the following: 1 1 1 1 Windows: Double-click the document icon in the upper-left corner of the document window. Windows: Click the close box in the upper-right corner of the document window. OS X: Click the red close button in the upper-left corner of the document window. Choose File menu > Close.
Chapter 2 | Using databases 21 5. For Save a (Windows) or Type (OS X), choose one of the following options: Choose To Copy of current file Duplicate the entire file, including the tables, field definitions, layouts, scripts, page setup options, and data. Duplicating a file is useful before you make extensive changes to the file. Compacted copy (smaller) Compact the entire file into less disk space by reclaiming unused space in the file.
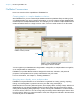
Chapter 2 | Using databases 22 About modes You work with data in FileMaker Pro in Browse, Find, Layout, or Preview mode. You can choose a mode from the View menu or from the mode pop-up menu at the bottom of the document window. Mode pop-up menu Use this mode To Browse mode Work with the data in a file. You can add, view, change, sort, omit (hide), and delete records. Browse mode is where you’ll do most of your work, such as data entry.
Chapter 2 | Using databases 23 The following illustration shows the same layout in three views.
Chapter 2 | Using databases 24 Selecting the current record In Browse mode, a table has one current (active or selected) record at a time for each window. For more information about moving through records, see “Moving through records” on page 24. In this view The current record is Form View The record that you’re displaying. To select another record and make it the current record, move to the other record. List View The record that has a different fill from the other records.
Chapter 2 | Using databases 25 To move Do this To the next record in the current table Click the right page of the book or choose Records menu > Go to Record > Next. To the previous record in the current table Click the left page of the book or choose Records menu > Go to Record > Previous. Quickly to a specific record 1 Click the current record number, type the record number you want, then press Enter (Windows) or Return (OS X).
Chapter 2 | Using databases 26 Adding and duplicating related records If you’re working with records in related tables, you can add records to a related table when you enter data in a record in the current table. Note You can only add related records from the current table if the relationship is defined to allow the creation of related records. If a related table is in a write-protected file, or if you don’t have access privileges to create records, FileMaker Pro will not add or duplicate records.
Chapter 2 | Using databases 27 Deleting records When you delete a record, you permanently discard the data in all the fields in that record. Important You can’t retrieve deleted data, and you can’t undo the action of deleting records. Before you delete records, consider making a backup copy of your file. If you’re working in a relational database and the option to delete related records is selected in the Edit Relationship dialog box, FileMaker Pro deletes related records when you delete a record.
Chapter 2 | Using databases 28 Entering and changing data in fields You can enter or import data up to the character limit for the field type. You can view and print only the data that fits within the field boundaries. Note For information about how FileMaker Pro uses system formats to display and sort dates, times, and numbers, see Help. To Click in the field in Browse mode, then Enter data in a text field Type the text.
Chapter 2 | Using databases 29 To Click in the field in Browse mode, then Insert an audio, video, image, PDF, or other type of file in a container field For information, see Help. Add data to value lists (fields formatted as radio or option buttons, checkboxes, lists, or menus) For information, see “Setting up checkbox sets and other controls on a layout” on page 91. Edit, format, or check the spelling of text in a field or edit dictionaries For information, see Help.
Chapter 2 | Using databases 30 To Do this Display a different background color for alternating records Right-click the left or right margin of a record, then choose a color from the Alternate Color shortcut menu. Restore the default display settings Right-click a column heading and choose Table View > Reset from the shortcut menu. Note Resetting Table View doesn’t delete the fields and records.
Chapter 2 | Using databases 31 Finding records To find particular records in your database, you can: 1 perform a quick find in Browse mode (see “Performing quick finds in Browse mode” on page 31) 1 make a find request in Find mode (see “Making find requests in Find mode” on page 32) Performing quick finds in Browse mode If a layout is enabled for quick find in Browse mode, you can use the search box in Browse mode to search for data across multiple fields on the layout.
Chapter 2 | Using databases 32 To configure and enable quick find If the selected layout doesn’t show the quick find badges for supported fields in Layout mode, use the following steps. 1. In Layout mode, choose View menu > Show > Quick Find. A small badge next to each field shows if the field has been enabled for quick find. If there is no quick find badge next to a field, the field is not searchable, either because it is not supported for quick find or because it is not set to be included in the search.
Chapter 2 | Using databases 33 To make a find request 1. In Find mode, from the Layout pop-up menu, select a layout that includes the fields that contain the data you want to search. If necessary, you can change layouts and enter criteria on more than one layout. 2. In the find request, select a text, number, date, time, timestamp, or calculation field to use for finding, and then type a value in the field. You can use the Insert Operators list in the layout bar to help you enter criteria.
Chapter 2 | Using databases 34 You can do one or more of the following during or after performing a find request: To Do this Cancel a find operation before it is finished and leave the previous found set unchanged Press Esc (Windows) or 2-period (OS X). Change or refine criteria after performing a find request See “Viewing, repeating, or changing the last find” on page 41. Narrow an existing found set See “Constraining (narrowing) a found set” on page 39.
Chapter 2 | Using databases 35 To find Type this in the field Examples Words with zero or more unknown or variable text characters in a row (zero or more characters) * for all unknown characters Jo*n finds Jon and John J*r finds Jr.
Chapter 2 | Using databases 36 Finding numbers, dates, times, and timestamps When you enter criteria in a find request, numbers, dates, times, and timestamps should be entered in the corresponding field types (or calculation fields returning the corresponding field type) to ensure correct behavior when finding them. See “About choosing a field type” on page 58. Important To avoid confusion when working with dates, always use four-digit years.
Chapter 2 | Using databases 37 Finding ranges of information To find values that are Use this operator Examples Less than a specified value < <40 <9/7/2014 >95129 >9/7/2014 >M Greater than or equal to a specified value >= or ≥ (OS X) >=100 >=9/7/2014 ≥8:00 ≥M Within the range you specify. A range is different based on the data type: 1 Numbers: least to greatest .. or ...
Chapter 2 | Using databases 38 To find timestamps Type this in the field That occur on a Monday in 2015 =Mon 2015 From the 10th through the 16th of November 2015 and from 3:00 PM to less than 6:00 PM (if the date format is MM/DD/YYYY) 11/{10..16}/2015 {3..5} PM Finding data in related fields You can enter find criteria in related fields that are displayed in a portal or directly on a layout.
Chapter 2 | Using databases 39 Finding duplicate values You can find all records for which one or more fields contain duplicate values. For example, you might want to find all records that aren’t unique, then examine them to decide which records to use or delete. To find all duplicate records, in Find mode, type ! in the field. Finding records that match multiple criteria You can narrow or broaden your search by using more than one criterion.
Chapter 2 | Using databases 40 Extending (broadening) a found set You can broaden a found set to expand your search to include additional applicable records without starting over. For example, after searching for customers in New York, you can broaden the search to also find customers in Hong Kong: 1. Perform a find to find customers in New York. FileMaker Pro displays the found set in Browse mode. 2. Click Find and type the criteria to broaden the search (type Hong Kong in the City field). 3.
Chapter 2 | Using databases 41 4. Click Omit. 5. Click Perform Find. Keep the following points in mind: 1 You can have omit criteria in more than one request. 1 FileMaker Pro works through the requests in the order you create them.
Chapter 2 | Using databases 42 Hiding records from a found set and viewing hidden records All records that are not in the found set are omitted, or hidden. You can omit additional records from the found set without doing a new find. Important Omitted records are temporarily excluded from the found set. They still exist in the database. To Do this Omit a specific record Display or select the record to omit, then choose Records menu > Omit.
Chapter 2 | Using databases 43 4. Click one of the buttons to perform the type of find/replace operation you want. Click To Find Next Search for and select the next occurrence of the Find what data. Replace & Find If there is selected data that matches the Find what data: Replace the Find what data with the Replace with data, search for and select the next occurrence. If there is no selected data that matches the Find what data: Search for and select the first occurrence of the Find what data.
Chapter 2 | Using databases 44 3. Click Sort. To cancel before sorting is finished, press Esc (Windows) or 2-period (OS X). Note You can sort records on one field without opening the Sort dialog box by using the field’s shortcut menu. For information about how FileMaker Pro uses system formats to sort and display dates, times, and numbers, see Help.
Chapter 2 | Using databases 45 Previewing data on a layout When you switch to Preview mode, you see the layout as it appears on the printed page. You can’t enter or edit information in fields in Preview mode.
Chapter 2 | Using databases 46 7. In the Print dialog box: 1 Windows: For Print, choose an option for the data you want to print. 1 OS X: Choose FileMaker Pro from the pop-up menu, then choose an option for the data you want to print. If you don’t see the options, click Show Details.
Chapter 2 | Using databases 47 Labels layouts and Envelopes layouts use merge fields, which are placeholder fields for displaying and printing only; you can’t enter data into merge fields. Merge fields expand and contract to fit the data in the field as needed, and close up space if the field is empty. Creating a layout for labels, vertical labels, or envelopes 1. In Layout mode, click New Layout/Report. The New Layout/Report assistant appears.
Chapter 2 | Using databases 48 Printing labels 1. To print the labels, load the labels into your printer according to the instructions that came with your labels and your printer. To print the envelope, load the envelope into your printer according to the instructions that came with your printer. 2. Choose File menu > Print, choose the printer and any additional options, and click Print.
Chapter 2 | Using databases 49 Printing the relationships graph You can print a graphical representation of your database by printing the relationships graph. 1. Choose File menu > Manage > Database, then click the Relationships tab. 2. Click to display page breaks in the relationships graph. 3. Click to display the Print Setup (Windows) or Page Setup (OS X) dialog box. 4. Change or accept the settings, then click OK. 5. Click Print. 6. In the Printing Options dialog box, choose an option.
Chapter 2 | Using databases 50 Backing up database files Routine backups are strongly recommended for any document stored on a computer. It is easier to restore a backed up database than it is to re-create it. How often you should back up depends on the amount of data you are adding to your databases, and how difficult it would be to re-create your files if they become corrupt. For very important files, it’s a good idea to routinely store backups at an offsite location.
Chapter 3 Creating databases This chapter explains the basics of how to: 1 1 1 1 1 plan a database define and modify fields define tables create layouts work with fields, objects, and parts on a layout Note See Help for detailed, comprehensive information and step-by-step procedures about using FileMaker Pro. Planning a database A well-designed database promotes consistent data entry and retrieval, and reduces the existence of duplicate data among the database tables.
Chapter 3 | Creating databases 52 4. After you’ve identified your categories of information, you are ready to organize your database. In database terminology, these categories of information are referred to as tables. Tables are used to group data containing a common element or purpose. For example, you might use one table to store names and addresses, while you use another table to store transaction details, such as date of sale, item number, unit price, and so on.
Chapter 3 | Creating databases 53 A Products table might have fields for a product identification number, the unit price for each product, and the quantity in stock. A Line Items table might have fields for product and invoice identification numbers, the name, unit price, quantity, and total price of each product sold. An Invoices table might have fields for an invoice identification number, order date, and salesperson.
Chapter 3 | Creating databases 54 8. For each table, decide which fields will store data, and which ones will be used from other (related) tables. Based on a table’s subject, you can see where it makes sense to store the data and where to use data from a related table. Other than match fields, all fields should appear only once in your database. Cross out occurrences of fields that don’t pertain to the table’s subject.
Chapter 3 | Creating databases 55 12. Consider who will use the database and whether you want to restrict access to it. When you create the database, assign access privileges as needed. For more information about accounts and privilege sets, see chapter 6, “Protecting databases.” 13. Decide what layouts you need, and plan a separate layout for each task. For example, create separate layouts for printing labels or envelopes.
Chapter 3 | Creating databases 56 3. Select a solution from the list (Windows) or the group of thumbnails (OS X), then click Choose. 4. Type a name for the file (choose a different folder, if needed), then click Save. Windows: For Save as type, select FileMaker Files. FileMaker Pro creates the file on your disk and opens the file. You can modify fields and layouts in Starter Solutions. For more information, see the remaining sections in this chapter. Creating a new file 1.
Chapter 3 | Creating databases 57 Creating and changing fields To define a new field in the database, you give it a name and select a field type. Then you select options that determine how the field interprets, enters, calculates, stores, and displays data. These characteristics make up the field definition. Product ID FB11 Product Name Focaccia Category Breads Flavor Plain Herb This field stores multiple values Unit Price $6.95 This field stores only numbers Discount $1.
Chapter 3 | Creating databases 58 About choosing a field type When you define a field, you select a field type based on the kind of information the field will contain. The field type determines what kind of data can be entered and what kinds of operations FileMaker Pro can perform with the data. FileMaker Pro uses the field type to interpret the data for tasks like sorting records and performing calculations.
Chapter 3 | Creating databases 59 Sales Report Salesperson Item Qty Extended Price David Michaels David Michaels David Michaels David Michaels FB3 FB4 FB1 FB5 1 1 2 3 Total $93.85 Sophie Tang Sophie Tang Sophie Tang FB6 FB7 FB2 2 5 2 $39.00 $77.50 $45.00 Total Grand Total $3.95 $17.50 $19.90 $52.50 $161.50 $255.
Chapter 3 | Creating databases 60 Display the Manage Database dialog box Search for fields Sort fields Fields appear here as you add them Click to add a field to the database Specify settings for position and labels of fields dragged to the layout 2. In the Field Picker dialog box, add, delete, or change fields. To Do this Add a field Click New Field. A placeholder Field is created in the fields list, with a field type assigned. With the field selected, type a new name for the field.
Chapter 3 | Creating databases 61 4. When you drag fields to the layout, by default the fields are placed vertically on the layout, with field labels to the left of the fields. To change these settings, click Drag Options before you drag the fields to the layout. 1 To change the position (horizontal or vertical) in which fields are placed on the layout, for Field Placement, click a choice. 1 To specify the position of field labels, for Labels, click a choice.
Chapter 3 | Creating databases 62 5. For Type, select a field type. Important Changing the field type can permanently and irretrievably erase data. See “About choosing a field type” on page 58. You can enter a description of the field in the Comment box. For more information about creating calculation fields, see “Creating calculation fields” on page 63. For more information about creating summary fields, see “Creating summary fields” on page 65.
Chapter 3 | Creating databases 63 Creating and changing fields in Table View 1. With the database open, in Browse mode, click Table View in the layout bar. 2. Create new fields or change existing fields. To Do this in Table View Create a field To create the first field, click Create Field in the first column heading. To create additional fields, click + in the column heading, or click in the right margin.
Chapter 3 | Creating databases 64 4. Build a formula for your calculation. Click where you want the item to appear in the formula box, then do the following. You can also type the formula into the box. To add a Do this Reference to a field In the field list, double-click a field name. To display field names from another table, choose a table from the table list. Mathematical or text operator In the keypad in the dialog box, click an operator.
Chapter 3 | Creating databases 65 To Do this Set the field type of the result Choose a data type for Calculation result is . Choose the correct type for the result you want. See “About choosing a field type” on page 58. Make a calculated field repeating Select Number of repetitions, then type the number of repetitions (up to 32,000). Prevent calculation if all referenced fields are empty Select Do not evaluate if all referenced fields are empty.
Chapter 3 | Creating databases 66 3. In the Options for Summary Field dialog box, select a summary type, then select the name of the field you want to group by. Select this type of summary To summarize values in a field in the found set of records by Total of Calculating the total of values in the field. Average of Calculating the average of values in the field. Count of Counting the number of records that contain a value for the field.
Chapter 3 | Creating databases 67 For this summary type Select To Standard Deviation of by population Calculate population standard deviation, where the formula is n-weighted. Fraction of Total of Subtotaled. In the list of fields that appears, select a field to group by. (When you return to Browse mode, sort by this field to calculate the value correctly.) Calculate a fraction of the total based only on a group of records. 5. Select an option, if applicable, for summarizing a repeating field.
Chapter 3 | Creating databases 68 Some field options help ensure the accuracy and consistency of your data. For example, if you type Frnc instead of France into the Country field, you won’t find that record when you later search for all customers from France. To be sure that all country names are entered correctly, you can define a value list containing the names, then select the Member of value list validation option for the Country field.
Chapter 3 | Creating databases 69 Click Auto-Enter Select options for entering default data in the field 6. Click OK to close the Options for Field dialog box, or click another tab to set additional field options. Defining field validation You can select field validation options to ensure that data is entered into the field correctly. FileMaker Pro displays a message if you enter data incorrectly.
Chapter 3 | Creating databases 70 To require that the entered value Select Is a time containing numeric values for hours and minutes between 00:00 and 23:59 (seconds are optional) Strict data type, then choose Time of Day from the list Is not blank Not empty Does not duplicate a value found in this field in other records Unique value Matches another value in the same field in any other record Existing value Matches a value in a specified value list Member of value list, then choose an existing
Chapter 3 | Creating databases 71 About indexing and storage options FileMaker Pro provides options for indexing fields and for storing the results of calculations. You can: 1 Create an index, which is a list of the values stored in a field. An index greatly speeds searches, but takes up space on your disk. You can index text, number, date, time, and timestamp fields. You can also index calculation fields if the results are text, numbers, dates, times, or timestamps.
Chapter 3 | Creating databases 72 The options in the Storage tab change for a container field. Select storage options for a container field Storage options for container fields For more information about setting field options, see Help. Creating database tables Use database tables to organize and group your data by a common characteristic or principle. Your database can contain as many tables as you need to organize your data.
Chapter 3 | Creating databases 73 3. In the Table Name box, type a name for the table, then click Create. The table can be renamed or deleted. Tables you add to a file are automatically displayed in the relationships graph. 4. Continue to define tables, or click the Fields tab to define fields. For information about relationships, tables, and the relationships graph, see chapter 4, “Working with related tables and files.
Chapter 3 | Creating databases 74 You create additional layouts by switching to Layout mode and using the New Layout/Report assistant, which guides you through creating a layout according to options you choose. Use the different layout types for various purposes, like displaying a data entry screen or printing a totaled sales report or mailing labels. You can customize each layout by using the design tools that are available in Layout mode.
Chapter 3 | Creating databases 75 To Do this Accept the settings in the panel but go back to the previous panel (available for labels, envelopes, and reports layouts) Click Back. Close the assistant without saving any of your choices Click Cancel. 6. When you have finished making your choices, click Finish to create the layout. 7. For layouts designed for computers or touch devices, add fields to the layout. See “Creating and changing fields” on page 57.
Chapter 3 | Creating databases 76 Printer Printer layouts are designed for printing data on labels (horizontal or vertical), envelopes, and in reports. The Printer layout choices are described below. The default theme for Printer layouts is Enlightened Print. Labels Use a Labels layout to arrange fields you select to print on one of the predefined standard label sizes. (FileMaker Pro includes the dimensions of a large number of standard label types.
Chapter 3 | Creating databases 77 Envelopes Use an Envelopes layout to print the fields you select, arranged to print on a standard “Number 10” business envelope. You can only print (or preview) data; you can't add information. (Use another layout type for data entry or finding data.) For more information about creating an Envelopes layout and printing on envelopes, see “Printing labels and envelopes” on page 46. Report The New Layout/Report assistant lets you define varied report formats.
Chapter 3 | Creating databases 78 Working with layout themes Use FileMaker Pro themes to enhance the appearance of a layout or report and to give all your layouts a consistent look. A theme affects characteristics of the layout, including the background color, field borders and fill, and text attributes in and outside of fields. A theme does not control the placement or behavior of fields or objects. You can change the theme of an existing layout in Layout mode. To change the theme of a layout: 1.
Chapter 3 | Creating databases 79 Setting up a layout to print records in columns You can set up a layout to print (or preview) records in columns, for example, for a directory of names and addresses. When you set up records to print in columns, all the field values (and labels, if specified) for one record are printed together in a block (much like on a label), then all the values for the next record are printed together, and so on.
Chapter 3 | Creating databases 80 6. Place or arrange fields and other layout objects so they are contained within the sample column on the left. Use merge fields or fields or objects with sliding enabled to fit more data into the width of a column. With either of these two features, fields can extend into the gray area of the second column, and blank space in fields is eliminated when you view or print data.
Chapter 3 | Creating databases 81 Working with objects on a layout An object is a discrete element—a field, text, a graphic object (such as an oval or imported picture), a button, a portal (for displaying rows of related records), a tab control or slide control, a popover button and its popover, a chart, or a web viewer—that you can select, move, resize, delete, copy, format, or otherwise change. Place objects on a layout to enhance its design.
Chapter 3 | Creating databases 82 1 To create a slide control, in Layout mode, choose Insert menu > Slide Control or click the Slide Control tool. Slide Control tool Slide panel Slide control Click a dot to display another slide panel Slide control in Browse mode 1 To create a popover, in Layout mode, choose Insert menu > Popover Button or click the Popover Button tool.
Chapter 3 | Creating databases 83 Using the Inspector to format objects In Layout mode, you can use the Inspector to view and modify the settings for objects. Each tab focuses on a different aspect of formatting. Hold your pointer over options in each tab to see a description of what they do. To open the Inspector: 1 Click Inspector in the layout bar. 1 Choose View menu > Inspector.
Chapter 3 | Creating databases 84 Using the Inspector to position objects Use the Inspector to precisely position or size objects on a layout. Or you can set objects to automatically resize or move horizontally or vertically when the FileMaker Pro window is resized. Horizontal settings also apply to Preview mode and printing when the page size is wider than the size of the layout being viewed or printed.
Chapter 3 | Creating databases 85 Allowing objects to resize or move on the layout When layout objects are set to resize, they maintain a constant distance from the object to which they are anchored. This allows objects to move, expand, or contract when the FileMaker Pro window is resized. Anchor points are either the layout margin or the container margin in which an object resides. By default, objects are anchored on both the top and left sides of the layout or page.
Chapter 3 | Creating databases 86 Grid Showing the grid displays a series of nonprinting intersecting horizontal and vertical lines. The grid aligns objects you create, resize, move, or position. Objects “snap to” the grid to help you create and edit objects more precisely. Gridlines adjust when you change the unit of measure. To show or hide the grid, do one of these: 1 In the Inspector, click the Position tab. In the Grid area, select or deselect Show grid. 1 Choose View menu > Grid > Show Grid.
Chapter 3 | Creating databases 87 Dynamic guides When you drag objects to move, resize, or position them on a layout, dynamic guides appear near or on the objects to help you create and edit them more precisely. Dynamic guides also “snap-to” the upper and lower boundaries and the centers of objects as you move, resize, or position them. Dynamic guides Dynamic guides also appear when you use the keyboard to move objects, but they do not “snapto” objects when you move them this way.
Chapter 3 | Creating databases 88 Selecting objects To work with an object on a layout, select it in Layout mode. You see small squares, or handles, surrounding the selected object. Handles surround a selected object Note If an object’s selection handles display as To select an object, click the selection tool pointer. Then do one of the following. , the object is locked. in the status toolbar.
Chapter 3 | Creating databases 89 Working with fields on a layout After you’ve added fields to a database, you can place the fields on a layout, remove fields you don’t want displayed, determine control settings for data entered in fields, and determine the format in which you want data displayed. Fields on a layout are objects, which you can select, move, resize, and reshape.
Chapter 3 | Creating databases 90 Placing a field on a layout 1. In Layout mode, choose the layout you want to work with from the Layout pop-up menu. 2. Do one of the following: 1 Drag a field from the Field tool in the status toolbar to the position you want it on the layout. As you drag the field onto the layout, you see a border and text baselines to help you align the field with other objects on the layout. Release the mouse button when the field is where you want it.
Chapter 3 | Creating databases 91 Removing a field from a layout In Layout mode, click the field to select it, then press Backspace or Delete, or choose Edit menu > Clear. Removing a field from a layout does not delete the field or its data from your database. Setting up checkbox sets and other controls on a layout You can format fields to display as drop-down lists, pop-up menus, checkboxes, radio buttons, and drop-down calendars.
Chapter 3 | Creating databases 92 5. Choose options for the value list, if desired. If you selected Drop-down list for the Control Style, you can select Include arrow to show and hide list if you want to format the field as a combo box. An arrow control appears in the edit box. Users click the arrow or press Esc to show or hide the drop-down list. To allow users to enter values other than those defined by the value list, select Allow editing of value list or Allow entry of other values.
Chapter 3 | Creating databases 93 Formatting field data on a layout Use FileMaker Pro field formats to control how data appears on a layout. The formats you specify don’t change the data as it’s stored in the database, and you can specify different formats each time you place a field on a layout (whether it’s on the same layout or a different layout). For example, if you enter –5123 into a number field, you can format it in one place to display as –$5,123.00 and in another place as <5123>.
Chapter 3 | Creating databases 94 3. Select the formats you want to use. Use the Text area to format the style, size, font, or color of the text or make text highlighted, bold, italic, or underlined. Use the Paragraph area to set paragraph alignment, indenting, and line spacing for fields. Use the Tabs section to position and align tab stops, and create a leader character to fill the width of the tab indention.
Chapter 3 | Creating databases 95 Specifying formats for fields containing numbers You can control how FileMaker Pro displays the values in number fields, calculation fields with numeric results, and summary fields. 1. In Layout mode, select one or more fields that display numeric values. 2. Click Inspector in the layout bar, then click Data. 3. In the Data Formatting area, click Number . 4.
Chapter 3 | Creating databases 96 4. Select the date format you want to use from the Format list, then select additional formats for the date field. Choose options for day, month, date, year, and separator characters Choose options for displaying Japanese dates Note To format dates using the current system format for dates, for Format, choose Short system date or Long system date. 5. Press Enter or Tab, or click outside the Inspector to apply the changes.
Chapter 3 | Creating databases 5. Click Number 97 in the Data Formatting area, then select the formatting options you want. Only two options affect the display of the seconds component: Fixed number of decimal digits and Decimal (to the right of Separators). The remaining options have no effect.
Chapter 3 | Creating databases 98 5. To format the seconds and fractional seconds component, in the Data Formatting area, click Number , then select the formatting options you want. Only two options affect the display of the seconds component: Fixed number of decimal digits and Decimal (to the right of Separators). The remaining options have no effect. 6. Press Enter or Tab, or click outside the Inspector to apply the changes.
Chapter 3 | Creating databases 99 Depending on how you want the text to print, you may want to change the page orientation of the layout. To do so, choose File menu > Print Setup (Windows) or Page Setup (OS X), and change the page orientation to landscape or portrait. For more information about formatting fields and text for vertical writing, see Help. Allowing or preventing entry into fields You can allow or prevent entry into a field.
Chapter 3 | Creating databases 100 The New Layout/Report assistant automatically creates the appropriate layout parts depending on the choices you make. You can add, change, or delete layout parts after you finish the assistant as needed. (See “Creating layouts and reports” on page 73.
Chapter 3 | Creating databases 101 To include summary data on a layout (for example, subtotals, grand totals, averages, counts, and so on), you place summary fields in summary layout parts (see “Creating summary fields” on page 65). Summary parts include grand summary and subsummary parts. 1 A grand summary part usually contains one or more summary fields that display summary information (like totals) about all records being browsed.
Chapter 3 | Creating databases 102 1 Use the Styles tab in the Inspector to view and apply defined styles.
Chapter 3 | Creating databases 103 1 Use the Appearance tab in the Inspector to create and modify styles and themes.
Chapter 3 | Creating databases 104 1 Use the Change Theme dialog box to apply default and custom themes to layouts in a file. Select a theme from a category You can import a theme from another FileMaker Pro file 1 Use the Manage Themes dialog box to see which themes are in use in a file, and to import themes from other files.
Chapter 3 | Creating databases 105 Creating and editing charts You can create various types of charts in FileMaker Pro to compare data graphically. Before you create a chart, think about the data comparison that you want to emphasize, then choose the FileMaker Pro chart type that will show the comparison clearly. Use To Column chart (vertical) or bar chart (horizontal) Compare increases to decreases, highest with lowest, how many, or how often. For example, show monthly sales for several products.
Chapter 3 | Creating databases 106 2. Sort the column containing data that you want to emphasize. For example, to emphasize your customers’ companies, right-click the Company column and choose Sort Ascending. 3. Choose the column containing the data that you want to compare. For example, to compare the number of customers in each company, right-click the Last Name column and choose Chart > Chart Last Name by Company.
Chapter 3 | Creating databases 107 5. Click Save as Layout, then Exit Layout. Chart in a layout in Browse mode Editing a chart 1. Choose the layout containing the chart from the Layout pop-up menu. 2. Switch to Layout mode and double-click the chart. 3. In the Chart Setup dialog box, change settings in the Chart inspector. 4. Click Done to close the Chart Setup dialog box. 5. Click Save Layout, then Exit Layout. For more information about creating and editing charts, see Help.
Chapter 4 Working with related tables and files This chapter explains the basics of how to: 1 plan a relational database 1 create and edit relationships 1 create and edit lookups FileMaker Pro uses related tables as the basis for relational databases and lookups. Relational databases allow you to work with data from other tables dynamically, so that when you change data in one place, your changes are reflected in all places where the related data appears.
Chapter 4 | Working with related tables and files 109 About relationships A relationship is a powerful method for organizing your data. Using a relationship, you can join data in one or more tables based on common field values, different field values, or a comparison of values in two or more fields.
Chapter 4 | Working with related tables and files 110 For example, a database for a bakery might have these tables: a Products table, which stores information about bakery products and their current prices; a Customers table, which stores customer information such as customer names and contact information; an Invoices table, which keeps a record of each order; and a LineItems table, which stores sales data for each line of the invoice, including the item being sold and the price at which it is sold.
Chapter 4 | Working with related tables and files 111 Relational database terminology Before you begin working with relational databases and lookups, you should understand the following terms. These terms are explained in the sections that follow. Term Description Current table For relational databases, the table that you are currently working in. For lookups, the table that the data is copied to. External table A table outside of the current file, in another file.
Chapter 4 | Working with related tables and files 112 About the relationships graph When you work with tables in the relationships graph, you organize your view of your data. Tables shown in the relationships graph can be located in the current FileMaker Pro file, in an external FileMaker Pro file, or in an external ODBC data source. Each table occurrence in the relationships graph represents a separate view into your data.
Chapter 4 | Working with related tables and files 113 Single-criteria relationships In a single-criteria relationship, data in one field is matched to data in another field. For example, a record in either table is related to any record in the other table when the values TextFieldA and TextFieldB are the same. Match field Match field Use a single-criteria relationship when you want to relate two tables based on a single common value, such as a serial number or an ID number.
Chapter 4 | Working with related tables and files Match field 114 Match field Because the relationship is defined to allow the creation of related records in the Contacts table, the Customer ID number from a Customers record will be automatically inserted in the Customer ID field in the Contacts table in each new related record. This allows many records in the Contacts table to be related to a single record in the Customers table. You can then add a portal to the Contacts table on the Customer layout.
Chapter 4 | Working with related tables and files 115 Match fields Match fields In this relationship, both Customer ID and Event Date are match fields to the Catering Line Items table. A record in the Customers table with a Customer ID value of 1000 and a Event Date value of 10/10/2014 will only match those records in the Catering Line Items table where both fields Customer ID and Event Date have values of 1000 and 10/10/2014, respectively.
Chapter 4 | Working with related tables and files 116 Relational operator Matches these records ≥ Values in the left match field are greater than or equal to values in the right match field x All records in the left table are matched to all records in the right table, regardless of the values in the match fields Match field Match field Greater than relational operator In this example, the Promotion Date fields in the Sales Promotions table and the Customers table are match fields.
Chapter 4 | Working with related tables and files 117 For example: If fields Contain values These related records are returned from Table F Starting Date E 11/01/2014 Ending Date E 12/01/2014 11/14/2014 11/27/2014 Another example: If fields Contain values These related records are returned from Table F Starting Date E 12/01/2014 Ending Date E 01/01/2015 12/02/2014 12/15/2014 12/17/2014 12/26/2014 Self-joining relationships A self-join is a relationship in which both match fields are define
Chapter 4 | Working with related tables and files 118 By default, the relationships graph displays all of the tables in your current database file. You can add tables from other FileMaker Pro files or external ODBC data sources, add more than one occurrence of the same table to the graph, or remove tables from the graph using the buttons at the bottom of the graph. Note When the table is from an external ODBC data source, the name of the table is typeset in italics in the relationships graph.
Chapter 4 | Working with related tables and files 119 Changing relationships After you have created a relationship, you can add or change match fields, change relational operators, and set options for creating, deleting, and sorting related records. To change a relationship: 1. With the database open, choose File menu > Manage > Database. 2. In the Manage Database dialog box, click the Relationships tab. 3.
Chapter 4 | Working with related tables and files 120 5. Select options for the relationship. To Select Add a related record (to the related table) whenever you enter data into a related field in a record of the current table. (See “Adding and duplicating records” on page 25.) Allow creation of related records in this table via this relationship.
Chapter 4 | Working with related tables and files 121 3. In the Specify Calculation dialog box, define a calculation that determines which portal records will be displayed. For example, if you are working in an Invoices layout, in a portal that shows product records from a LineItems table, and want to display just the products with quantities greater than 1, use the formula If(LineItems::Quantity < 1; 0; 1). 4. Click OK.
Chapter 4 | Working with related tables and files 122 4. If your database contains more than one table, select the appropriate table from the Table list. 5. Select a text, number, date, time, timestamp, or container field from the list of existing fields, or define a new one. 6. Click Options (or double-click the field name). 7. In the Options for Field dialog box, click the Auto-Enter tab, then select Looked-up value. 8.
Chapter 4 | Working with related tables and files 123 Editing lookups To edit a lookup: 1. With the database open, choose File menu > Manage > Database. 2. Click the Fields tab. 3. If your database contains more than one table, select the appropriate table from the Table list. 4. Double-click the lookup target field. 5. In the Options for Field dialog box, click the Auto-Enter tab. 6. Be sure Looked-up value is selected and click Specify. To stop or suspend using a lookup, clear Looked-up value. 7.
Chapter 5 Sharing and exchanging data This chapter explains the basics of how you can share FileMaker Pro databases: 1 FileMaker Network sharing: You can share FileMaker Pro databases on your network, which allows multiple FileMaker Pro and FileMaker Go users to access and use the same database file simultaneously. 1 Importing and exporting data: You can exchange information between FileMaker Pro and other applications by importing and exporting data.
Chapter 5 | Sharing and exchanging data 125 The first person to open a shared file is the host. Any user who opens a shared file after the host is a client. The host opens the file Clients open connections to the shared file Once a shared file is open, the host and clients have access to the same information, and all changes to the file appear in each user’s window. Modifications to the data made by any user are saved in the shared file. The shared file is saved on the disk where the file resides.
Chapter 5 | Sharing and exchanging data 126 3. In the FileMaker Network Settings dialog box, for Network Sharing, click On. In the TCP/IP Address box, you see the TCP/IP address of your system. Click to enable network sharing Select level of network access for the selected file(s) 4. Select the file(s) to be hosted from the list of Currently open files. 5. Set the level of network access for the file(s). To Select Provide access to all FileMaker Pro and FileMaker Go users on your network All users.
Chapter 5 | Sharing and exchanging data 127 Opening shared files as a client FileMaker Pro databases shared via TCP/IP can be opened remotely using the list of local hosts, the IP address of the host machine, or the DNS name of the host machine (if one has been defined). To open a shared file as a client: 1. Choose File menu > Open Remote. 2. In the Open Remote File dialog box, select View for a list of hosts.
Chapter 5 | Sharing and exchanging data 128 Limitations on changes to shared files Although it is possible for multiple users to make changes in the same shared file at the same time, there are limits to the types of simultaneous changes that are permitted. The following table describes the types of changes you can and cannot make to shared files. Database change Limitation Data in layouts and records Two people can’t edit the same record at the same time.
Chapter 5 | Sharing and exchanging data 129 2. Enter the URL of the host machine into the browser’s address area using the format: fmp://[[account:password@]netaddress]/databasename Optional parameters are indicated by square brackets (“[ ]”). 3. Press Enter (Windows) or Return (OS X). Examples fmp://My%20Addresses fmp://192.168.10.0/My%20Addresses.fmp12 fmp://[2001:0DB8:85A3:08D3:1319:8A2E:0370:7334]/My%20Addresses.fmp12 fmp://MyAccount:MyPassword@192.168.10.0/My%20Addresses.
Chapter 5 | Sharing and exchanging data 130 Importing and exporting data You can exchange information between FileMaker Pro and other applications by importing and exporting data.
Chapter 5 | Sharing and exchanging data 131 1 When you set up recurring imports, FileMaker Pro creates a new table for the imported data and a new layout to display the data. You can customize the layout in Layout mode later, if you wish. 1 To set up recurring imports, you must open a file with an account that is assigned the Full Access privilege set. For information about privilege sets, see “Creating accounts” on page 145. To set up recurring imports: 1.
Chapter 5 | Sharing and exchanging data 132 ODBC and JDBC You can exchange FileMaker Pro data with ODBC- and JDBC-compliant applications. For example, you can chart FileMaker Pro data in Microsoft Excel. What do you want to do? How do you do it? See Use FileMaker Pro as a data source/share FileMaker Pro data 1. ODBC and JDBC 2. SQL queries FileMaker ODBC and JDBC Guide and FileMaker SQL Reference Use FileMaker Pro as an ODBC client/access ODBC data 1. Interactively via the relationships graph 2.
Chapter 5 | Sharing and exchanging data 133 About updating matching records You can update matching records and fields in your target file with data from another file. For example, you might have a copy of a database on your desktop computer and another copy on your laptop computer. You can update the file in your office with the changes you make on the road. You determine which records in the source file update which records in the target file by choosing one or more match fields in each file.
Chapter 5 | Sharing and exchanging data 134 5. Choose File menu > Import Records > File, and choose the name of the file that contains the data you want to import (the source file). 6. In the Import Field Mapping dialog box, if necessary, select a table from the Source list. 7. Accept the table shown in the Target list, or select New Table to create a table with the same schema as the source table. 8. Select the type of import to perform. See “Methods of importing data into an existing file” on page 132.
Chapter 5 | Sharing and exchanging data 135 5. If you’re converting a Microsoft Excel spreadsheet and the Specify Excel Data dialog box appears, choose a worksheet or named range from the workbook file, then click OK. 6. In the Create a New File Named dialog box, type a name for the new file, choose a location, then click Save. FileMaker Pro converts the data to a FileMaker Pro file and displays the file. For more information about importing data, see Help.
Chapter 5 | Sharing and exchanging data 136 Working with external data sources You can define data sources in a FileMaker Pro file to access data from: 1 other FileMaker Pro files 1 SQL databases that use ODBC technology for sharing information When you define data sources in FileMaker Pro files, current data from external databases is displayed in your files. You can use FileMaker Pro to add, edit, delete, search, and sort data in the external files.
Chapter 6 Protecting databases This chapter describes the basics of how to restrict what users can see and do in a FileMaker Pro file.
Chapter 6 | Protecting databases 138 The privileges that you set up apply to a single file only and all database tables within that file. If your database solution consists of multiple files that you want to protect, you may want to combine all of these files into one multi-table file. Then you can define privileges in only a single file to manage access to the entire database solution.
Chapter 6 | Protecting databases 139 Extended privileges Extended privileges determine the data sharing options that are permitted by a privilege set, such as whether a privilege set permits users to open a shared file or view a database in a web browser. The following table lists the default extended privileges that are available.
Chapter 6 | Protecting databases 140 About the predefined accounts Each database file contains two predefined accounts: Admin and Guest. Admin account The Admin account is assigned the Full Access privilege set, which permits access to everything in a file. The Admin account is not assigned a password. In files for which privileges are not set up, the file options are set up to automatically log in to the file using the Admin account. The Admin account is fully editable.
Chapter 6 | Protecting databases 141 The following table summarizes the properties of these privilege sets.
Chapter 6 | Protecting databases 142 1 If you need to share a database file with others and provide varying levels of file access to different users, you need to plan the security for the file.
Chapter 6 | Protecting databases 143 Password-protecting a file If you have a non-shared database file on your computer and you want to prevent others from opening it, you can password-protect the file. After password-protecting a file, you will be prompted to enter an account name and password every time you open the file. Anyone who does not know this account information will not be able to open the file. To password-protect a file: 1.
Chapter 6 | Protecting databases 144 You can create as many accounts as you need. You can create individual accounts for each user, or a smaller number of accounts that users can share. Viewing accounts and privilege sets The Manage Security dialog box displays a list of all the accounts and privilege sets for a file. To view the accounts and privilege sets for a file: 1. Open the database file. 2. Choose File menu > Manage > Security. You see the accounts defined for this file. 3.
Chapter 6 | Protecting databases 145 Creating accounts You can create accounts for every individual who accesses a file, or create fewer accounts that are shared among many individuals, such as a “Marketing” account and a “Sales” account. You must assign a privilege set to each new account. To create an account: 1. Choose File menu > Manage > Security. 2. In the Accounts tab, click New. 3. In the Edit Account dialog box, for Account is authenticated via, choose FileMaker.
Chapter 6 | Protecting databases 146 8. For Description, enter a description of the account (optional). 9. Click OK. 10. In the Manage Security dialog box, click OK. 11. In the dialog box that appears, enter an account name and password that is assigned the Full Access privilege set, and click OK.
Chapter 6 | Protecting databases 147 Creating privilege sets You can assign each privilege set to one or more accounts. To create a privilege set: 1. Follow the steps above to display the privilege sets for a file. 2. Click New. The Edit Privilege Set dialog box appears. By default, each privilege set option is set to its most restrictive setting. 3. Enter a name and optional description for the privilege set. 4. Define the privileges for the privilege set. 5. Click OK.
Chapter 6 | Protecting databases 148 Viewing extended privileges Extended privileges determine the data sharing options that are permitted by a privilege set for a file. For example, if the file is shared, the Access via FileMaker Network extended privilege determines if the privilege set allows opening the shared file as a client. The Access via FileMaker WebDirect extended privilege determines whether the privilege set allows accessing the database from a web browser.
Chapter 6 | Protecting databases 149 To authorize access to a file: 1. Open the file that you want to protect. 2. Choose File menu > Manage > Security, then click the File Access tab. 3. To protect this file against unwanted access from other files, select Require full access privileges to create references to this file. 4. If any files that reference the protected file are currently open, you see an alert for each file, asking if you want to authorize the file. Click Yes. 5.
Chapter 6 | Protecting databases 150 Security measures Be sure that your database files, host computers, workstations, and the networks that access them are safe from theft and corruption.
Chapter 6 | Protecting databases 151 Establishing network security Databases shared on an intranet or the Internet use the TCP/IP protocol. You may also use the TCP/IP protocol when you share databases peer-to-peer, or with FileMaker Server. Though TCP/IP is good for moving data and allowing clients to connect to your data, it was not designed with security as a primary objective.
Chapter 6 | Protecting databases 152 1 Plan for redundancy. If the power goes off, a universal power supply (UPS) should sustain power for at least 15 minutes, enabling you to safely close all files. If the power can’t be restored in a timely fashion, consider using a generator to supply power to servers. Also consider power sources for routers and firewalls.
Chapter 6 | Protecting databases 153 This situation also applies to files that FileMaker Server uses as backup targets. If the backup file is being scanned by antivirus software when a scheduled backup occurs, the destination file might be locked. This causes the backup process to fail, which may result in data loss. This same data loss issue applies when an open, non-shared FileMaker Pro database file is scanned by antivirus software.
Chapter 7 Converting databases from FileMaker Pro 11 and earlier You must convert files created in FileMaker Pro 11 and earlier to the FileMaker Pro 12 format in order to use them with FileMaker Pro 13. When you convert a file, FileMaker Pro creates a Conversion.log file, so you can view the conversion status and any problems that may have occurred during the conversion process. Keep the following points in mind: 1 You can only convert files created in FileMaker Pro version 7.x, 8.x, 9.x, 10.x, or 11.
Chapter 7 | Converting databases from FileMaker Pro 11 and earlier 155 1 Convert multiple files all at the same time to convert all the files in a relational database. There are several ways to select the files that you want to convert; you can drag and drop the files (or a folder containing the files) onto the FileMaker Pro 13 application icon, or you can select multiple files in the FileMaker Pro Open dialog box.
Index Symbols – 57 ^ 57 _ 57 , 57 ; 57 : 57 :: 57 ! 39 ? 36 ...
Boolean values described 36, 58, 70 finding 36 formatting 95 Break fields 101 Browse mode creating charts in 105 described 22 finding data in 31 Browser, web, working with published database in 136 Browsing records 22 Bubble charts 105 Buttons, including in tab order 27 C Calculation fields creating 63 described 58 formulas 63 stored and unstored results 71 Calculations See also Calculation fields formatting 95 related fields field references to 64 summarizing data 120 Calendars, displaying in fields
Databases creating 55 described 14 planning 51 preference for creating new 56 printing 45 protecting 137 publishing on web 136 Databases, relational.
Fields adding in Table View 63 adding to a layout 89 creating and changing 57 creating in Manage Database dialog box 61 creating in Table View 63 defining 57 deleting definition 62 deleting from a layout 91 described 15 displaying 10, 73 empty or non-empty, finding 38 entry options 67, 91 formatting 93 formatting data 93 global 71 hiding or showing in Table View 63 indexing 71 maximum characters in 28 merge 92 naming 60, 61 options 62 placing on a layout 89 removing from a layout 91 restricting data en
Finding records See also Find requests, Quick finds adding new request 39 all records 34 Boolean numbers 36 described 31 duplicate records 39 empty or non-empty fields 38 exact values 35 excluding records 40 invalid values 36 logical AND searches 39 logical OR searches 39 multiple criteria 39 omitting records 40 order of requests 41 partial or variable text 34 quick finds in Browse mode 31 ranges of information 37 related fields and records 38 saving and sending as snapshot link 12, 32 showing all reco
K Key fields. See Match fields L Labels field 90 part 99 printing 47 vertical 76 Labels (mailing), printing 46 Labels layouts, described 76 Layout background, setting styles for 101 Layout bar 19, 22 Layout folders, managing 74 Layout mode changing default when creating new database 56 creating charts in 105 described 22 Layout objects.
M O Macros.
Planning databases 51 file security 141 relational databases 51 Pointer tool. See Selection tool Pointers to files.
Related records See also Records; Relational databases adding 26, 120 copying 26 deleting 27, 120 described 111 displaying in portals 92 duplicating 26 finding and omitting 38 placing in portals 92 sorting 120 summarizing data 120 Related tables described 111 planning 51 Relational databases described 15, 108 match fields described 111 planning 112 planning 51, 117 portals 111 related tables described 111 planning 51 terminology 111 Relational operators 111, 115, 119 Relationships See also Relational d
Solutions, database See also Databases; Files described 10 Sorting records described 35, 43 in Table View 30 related 120 Sound files 58 Source file (relationships), described 111 Source table (relationships), described 111 Stacked bar charts 105 Stacked column charts 105 Standard Deviation of, for summary fields 66 Starter Solutions. See Templates Status toolbar 22, 81 Stopping lookups 123 Storage options for container fields 68 Stored results 71 Strict data type 69 Strings, text.
Times finding 36 formatting 96 invalid 36 Timestamp fields described 58 entering and editing values in 28 four-digit years 28 Timestamps, formatting 97 Title headers and footers, described 100 Today’s date, finding 36 Tools Field tool 90 Field/Control tool 90 Popover Button tool 82 selection tool 88 Slide Control tool 82 status toolbar 22 Tab Control tool 81 Total of, for summary fields 66 Triggers, script 12, 49 True result 36, 58, 70, 95 Type-ahead feature 91 U Unauthorized users.