
Network Install Setup Guide
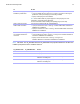
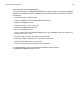
Table Of Contents
- About this guide
- Finding the license key
- Installing FileMaker Pro in Windows
- Choosing an installation method (Windows)
- About installing Bonjour (Windows)
- About installing the Microsoft .NET Framework
- Installing FileMaker Pro using a networked volume (Windows)
- Installing from the command line (Windows)
- Setting up silent assisted installations (Windows)
- Saving the license key in the (*msi) installer (Windows)
- Installing FileMaker Pro in OS X
- About the personalization file

Network Install Setup Guide 11
5. Double-click Terminal from the list of utilities.
6. Type cd “<path to script>”, then press Return.
7. Type sudo chmod +x ./AppleRemoteDesktopDeployment.sh, then press Return.
When prompted to provide a password, enter an Administrator password.
8. Type ./AppleRemoteDesktopDeployment.sh “<path to installer folder>”, then
press Return.
The script creates a personalized .pkg file in the installer folder that you can use with Apple
Remote Desktop.
About the personalization file
An assisted installation eases installation of FileMaker Pro or FileMaker Pro Advanced in a
multiple computer environment. You enter information required by the installer in a personalization
file (such as a generic user name, organization name, license key, and installation options), then
make the file available on your network, and FileMaker
Pro installs without user intervention.
The personalization file, Assisted Install.txt, is used by the FileMaker installers to install
FileMaker
Pro or FileMaker Pro Advanced on computers in your organization. Users can perform
an assisted installation in Windows or in OS
X, but the Assisted Install.txt files are platform-
specific and can not be interchanged.
Note Prior to FileMaker Pro 7, the personalization file was named FileMaker Pro x.pdf. This is
not an Adobe PDF file. It is a plain text file that conforms to the Microsoft Package Definition File
format. This file still exists and is required for mass deployment of FileMaker
Pro via the Microsoft
System Center Configuration Manager (SCCM). You should not edit this file unless you are using
SCCM for installation. In that case, after creating the installer package, open the
FileMaker
Pro x.pdf properties. In the General tab, for Command line, type Setup.exe
/S/v/qn, click OK, then perform the installation.
Setting personalization properties
This section explains the properties and variables in the personalization file, Assisted Install.txt.
Note Property names (AI_*) must be capitalized. Variable settings are not case-sensitive, except
for organization names. (See the description for AI_ORGANIZATION.)
To Do this
Enter a user name for all
installations
Type a name after AI_USERNAME=
If you leave this variable blank, the installer defaults to the name that was used to
register Windows (Windows) or the account user name (OS
X).
Enter a company name for all
installations
Type a name after AI_ORGANIZATION=
If you purchased a Volume License or Site License, type the organization name
exactly as it appears on your license agreement (“Proof of License”). The
organization name must be capitalized the same way it appears in your
agreement.
Windows: If you leave this variable blank, the installer defaults to the name that
was used to register Windows.