
Development Guide


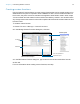

Table Of Contents
- Chapter 1 Introducing FileMaker Pro Advanced
- Chapter 2 Creating database solutions
- Chapter 3 Customizing database solutions
- Chapter 4 Debugging and analyzing files
- Appendix A Feature comparison of the runtime application with FileMaker Pro
- Index
Chapter 2 | Creating database solutions 11
Binding the solution
To bind database files into a runtime database solution:
1. Follow the procedures in “Using the Developer Utilities” on page 8.
2. In the Specify Solution Options dialog box, select Create Runtime solution application(s).
3. To name your runtime application:
1 For Runtime Name, type a name. The name is used for the runtime application filename and
for the name of the folder that contains the runtime database solution files.
1 For Extension, type a one- to five-character filename extension. The extension is used to
associate the solution files with the runtime applications.
For more information about naming runtime solutions, see Help.
4. For Bindkey, type a key between 1 and 24 characters long.
The binding key links the runtime application to the database files and ensures that the bound
files will only open in the appropriate runtime application. The binding key is case-sensitive. For
more information on setting the binding key, see Help.
Important Binding installs system files pertaining to each platform. If your solution will be used
in Windows, bind it using the Developer Utilities for Windows. If your solution will be used on
Mac
OS X, bind it using the Developer Utilities for Mac OS X. If you’re creating a solution to be
used on both Windows and the Mac
OS X, create two separate runtime solutions by binding the
original solution files twice: once using FileMaker Developer Utilities for Windows, and again
using FileMaker Developer Utilities for Mac
OS X. Use the same binding key on both platforms.
5. To add a company logo or other custom image to the closing splash screen, click Specify,
select the closing image, and click Select.
The image should be at least 32 x 175 pixels (72 dpi) or higher, otherwise it will be distorted
when displayed. The supported image formats are JPEG and GIF.
6. For Delay, set the number of seconds that you want the splash screen to display.
You can preview the effect that your custom splash screen will have by clicking the Preview
button.
7. Once you have specified options, click OK.
8. To be able to quickly repeat the process, click Save Settings, and choose a location for your
settings file.
For more information about saving and reusing Developer Utilities settings, see Help.
9. Click Create.
The Developer Utilities copy all of the runtime files to a new folder created inside the Project
Folder and named after the runtime solution.