
User manual
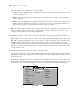
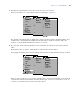

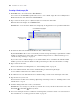


Table Of Contents
- Chapter 1 Introducing FileMaker Pro
- Chapter 2 Using databases
- About database fields and records
- Opening files
- Opening multiple windows per file
- Closing windows and files
- Saving files
- About modes
- Viewing records
- Adding and duplicating records
- Deleting records
- Entering data
- Working with data in Table View
- Finding records
- Performing quick finds in Browse mode
- Making find requests in Find mode
- Finding text and characters
- Finding numbers, dates, times, and timestamps
- Finding ranges of information
- Finding data in related fields
- Finding empty or non-empty fields
- Finding duplicate values
- Finding records that match multiple criteria
- Finding records except those matching criteria
- Viewing, repeating, or changing the last find
- Saving find requests
- Deleting and reverting requests
- Hiding records from a found set and viewing hidden records
- Finding and replacing data
- Sorting records
- Previewing and printing databases
- Automating tasks with scripts
- Backing up database files
- Setting preferences
- Chapter 3 Creating databases
- Planning a database
- Creating a FileMaker Pro file
- Creating and changing fields
- Setting options for fields
- Creating database tables
- Creating layouts and reports
- Setting up a layout to print records in columns
- Working with objects on a layout
- Working with fields on a layout
- Working with parts on a layout
- Displaying data in charts
- Chapter 4 Working with related tables and files
- Chapter 5 Sharing and exchanging data
- Sharing databases on a network
- Importing and exporting data
- Saving and sending data in other formats
- Sending email messages based on record data
- Supported import/export file formats
- Setting up recurring imports
- ODBC and JDBC
- Methods of importing data into an existing file
- About adding records
- About updating existing records
- About updating matching records
- About the importing process
- Converting a data file to a new FileMaker Pro file
- About the exporting process
- Working with external data sources
- Publishing databases on the web
- Chapter 6 Protecting databases
- Protecting databases with accounts and privilege sets
- Creating accounts and privilege sets
- Viewing extended privileges
- Authorizing access to files
- Security measures
- Enhancing physical security
- Enhancing operating system security
- Establishing network security
- Backing up databases and other important files
- Installing, running, and upgrading antivirus software
- Chapter 7 Converting databases from FileMaker Pro 6 and earlier
- Index
Chapter 3
|
Creating databases 57
The previous steps create a simple, one-table file. In Table View, you can only create and make changes to
fields in local files. However, you can create simple and complex files by choosing File menu
> Manage >
Database and working in the Manage Database dialog box. For more information, see
“Creating and
changing fields in the Manage Database dialog box” on page 59.
Keep these points in mind:
1 By default, choosing File menu > New Database displays an empty database in Table View. To change
the default setting and open the Manage Database dialog box whenever you create a new database,
choose Edit
menu > Preferences (Windows) or FileMaker Pro menu > Preferences (Mac OS). In the
Preferences dialog box, click the General tab, then select Use Manage Database dialog to create files.
(Note that this option does not apply when you create a database using the Quick Start Screen. When you
create a database using the Quick Start Screen, Table View is the default.)
1 To prevent records from being sorted by a field when you click the column heading in Table View,
deselect Sort data when selecting column in the Table View Properties dialog box. For more information,
see Help.
1 You can prevent new fields that you create from being automatically placed on the current layout by
deselecting Add newly defined fields to current layout in the Preferences dialog box. For more
information, see Help.
About naming fields
Follow these guidelines when naming fields:
1 Field names must be unique. They can contain up to 100 characters.
1 Use descriptive names that clearly identify the contents of the field. Avoid abbreviations, acronyms, or
other terms that may cause confusion.
1 Don’t use any of the following symbols or words in the field name:
1 , (comma) + – * / ^ & = ≠ > < ≥ ≤ ( ) [ ] } " ; (semicolon) : (colon) :: (relational indicator) $ (variable
indicator)
1 AND, OR, XOR, NOT, or the name of any FileMaker Pro function
1 Don’t begin a field name to be used in a calculation formula with a space, period (.), or number.
1 Use _ (underscore) in place of a space to avoid restrictions in ODBC (Open Database Connectivity) or
JDBC (Java Database Connectivity), exporting, web publishing, and other operations.
1 If you’re exchanging data with another application, check the field naming restrictions in the file formats
supported by the other application.
1 If you’re using ODBC or JDBC to share FileMaker Pro data, avoid using SQL keywords in field names.