
Tutorial
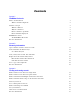

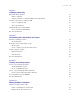

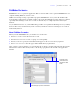

Table Of Contents
- Contents
- Lesson 1 FileMaker Pro basics
- Lesson 2 Browsing information
- Lesson 3 Finding and sorting records
- Find records based on criteria in a single field
- Find records based on criteria in separate fields
- Find records that match multiple criteria in the same field
- Find records that match a range of criteria in the same field
- Narrow your search
- Save a find request for later use
- Find records using a Saved Find
- Sort your found set
- Add a new record in List View
- For more information
- Lesson 4 Creating a database and entering records
- Lesson 5 Customizing what you see
- Lesson 6 Creating lists, mailing labels, and form letters
- Lesson 7 Simplifying data entry
- Lesson 8 Automating tasks with buttons and scripts
- Lesson 9 Creating and running reports
- Lesson 10 Making databases relational
- Lesson 11 Sharing and exchanging data
- Lesson 12 Protecting data in FileMaker Pro
- Lesson 13 Keeping your data safe

Lesson 1
|
FileMaker Pro basics 9
FileMaker Pro basics
FileMaker Pro is a cross-platform application. Files created on a Mac can be opened in FileMaker Pro on a
computer running Windows, and vice versa.
Unlike most word processing or spreadsheet programs, FileMaker Pro saves your work automatically.
Consequently, it’s important to carefully consider your actions when making sweeping changes to your files,
especially when deleting records. Once records are deleted, they are completely removed from your
database.
As you will learn in lesson 13, you should back up your files on a regular basis. Backups can save you many
hours of unnecessary work and worry in the event that your files become lost or damaged, or records are
inadvertently deleted.
About FileMaker Pro modes
When you work in FileMaker Pro, you work in one of four modes.
1 Use Browse mode to enter data and view records.
1 Use Find mode to locate a record or a group of records quickly.
1 Use Layout mode to specify how information will appear on the screen or when you print it.
1 Use Preview mode to see what the pages will look like when you print them.
After you have opened a database, you can switch from one mode to another using either the View menu,
buttons in the status toolbar and layout bar, or the mode pop-up menu at the bottom of the application
window.
Use the mode pop-up menu to switch modes
Use buttons in the
status toolbar and
layout bar to switch
modes