
Specifications


Page 25
S6162-BS-MMC-010/12489
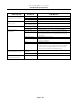
Troubleshooting Chart
TROUBLE CAUSE REMEDY
Check for correct control voltage - 120V.
Check power supply, check secondary voltage on
transformer and check wiring and wiring
diagram.
Close lint door.
Clean out lint compartment daily. Check back
draft damper for foreign object lint accumulation
or other causes that may prevent damper from
opening. Check duct work for lint build-up.
Check installation sheet to ensure that duct
work amd make-up air openings are adequately
sized. Check exhaust outlet. If a screen has
been improperly installed on the outlet, it may be
clogged with lint or frozen over in winter. Never
install a screen on the exhaust outlet. Vacuum
within dryer drops .09 inches of water column, or
less, for normal operation of dryer, vacuum
reading (in inches of water column) should range
between .15 and .3 inches. Vacuum reading can
be made with a vacuum U-gauge by removing a
sheet metal screw in the front panel of dryer,
and inserting the rubber tube of the vacuum
gauge into screw opening.
See air switch adjustment sheet in service
manual.
Replace air switch.
Replace fuse.
Replace contactor.
Replace elements.
Replace thermostat.
Replace thermostat.
Replace timer.
Incorrect voltage.
No voltage.
Lint door open.
Air switch not
operating (elec.
only)
Air switch out of
adjustment (elec.
only).
Air switch defective
(elec. only).
Line fuse or heater
circuit fuse blown
to unit.
Replace electric
contactor.
Replace electric
elements.
Defective
thermostat.
Defective safety
overload
thermostat.
Defective timer.
Dryer runs, but no heat.