This document is exclusive property of Cisco Systems, Inc. Permission is granted to print and copy this document for noncommercial distribution and exclusive use by instructors in the CCNA 2: Routers and Routing Basics course as part of an official Cisco Networking Academy Program.
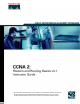
I. Welcome Welcome to the CCNA 2 version 3.1 Instructor Guide. Cisco Worldwide Education (WWE) has developed this guide to provide a helpful resource for instructors. This introduction will emphasize four themes: • Student-centered, instructor-facilitated model • One size does not fit all • Hands-on, skills-based learning • Global community of educators Student-Centered, Instructor-Facilitated The CCNA curriculum has not been designed as a standalone e-learning or distance-learning course.
One Size Does Not Fit All The Cisco Networking Academy Program serves hundreds of thousands of students in almost 150 countries. Students range from early teens to mature adults and from advanced middle school students to undergraduate engineering students. One curriculum cannot fit the needs of all students. WWE relies on local instructors to make the program work and to help their students achieve the learning goals of the program.
• Standard and extended access-list configuration and placement • show, debug, ping, trace, and telnet commands to verify and troubleshoot Global Community WWE instructors are members of a global community of educators. There are over 10,000 instructors that teach the same eight CCNA and CCNP courses in the program.
II. Course Overview Target Audience The target audience is anyone who desires a practical and technical introduction to the field of networking. This includes high school, community college, and lifelong-learning students who are interested in careers as network technicians, network engineers, network administrators, and network help-desk staff.
Students must successfully complete the CCNA 2 course before they can achieve CCNA certification.
• Connect router Fast Ethernet, serial WAN, and console ports • Perform, save, and test an initial configuration on a router • Configure additional administrative functionality on a router • Use embedded data-link layer functionality to perform network neighbor discovery and analysis from the router console • Use embedded Layer 3 through Layer 7 protocols to establish, test, suspend, or disconnect connectivity to remote devices from the router console • Identify the stages of the router boot-up s
The following changes have taken place since CCNA version 2.
III. Teaching Guide for Each TI Nomenclature The CCNA curriculum uses the following hierarchy: • Course • Module • Learning objective (LO) • Target indicator (TI) For example, 3.2.5 references Module 3, LO 2, and TI 5. The following terms are commonly used to describe the curriculum, instructional materials, and assessments in WWE and Cisco documentation: • Certification-level claims High-level statements about what a CCNA-certified person should know and be able to do.
• Module Logical groupings that comprise a course. Modules contain multiple lessons or LOs. Modules are also referred to as chapters. • Learning objective (LO) A statement that establishes a measurable behavioral outcome. LOs are used to organize content and to indicate how the acquisition of skills and knowledge will be measured. LOs are also referred to as terminal objectives or RLOs.
Module 1: WANs and Routers Overview When teaching Module 1, show the students how router configuration relates to the Internet, which is a global internetwork made possible by routers. Students will learn the difference between WANs and LANs, and will identify WAN connections, encapsulations, and protocols. Module 1 Caution WANs will be taught in detail in CCNA 4. In CCNA 2, it is important to teach students the fundamental basics of WANs and roles that routers play in the WAN connection.
1.1 WANs Essential labs: None Optional labs: None Core TIs: All Optional TIs: none Course-level claim: Students can identify the important characteristics of common WAN configurations and technologies, differentiate between these and common LAN technologies, and describe the role of a router in a WAN. Certification-level claim: Students can evaluate the important characteristics of WANs and implement simple WAN protocols. Hands-on skills: none 1.1.
• Memory • Interfaces However, the main purpose of a router is to route, not to compute. The main components of the router are as follows: • RAM • NVRAM • Flash • ROM • Interfaces The following topics should be covered in this TI: • Discuss the similarities of computers and routers such as the software they use. • Explain the components of the router and what each component contains. • Open a router and let the students examine the inside. Point out the main components.
1.1.4 Role of Routers in a WAN There are several encapsulations associated with serial lines: • HDLC • Frame Relay • PPP • SDLC • SLIP • LAPB Some of the most common WAN technologies are as follows: • POTS • ISDN • X.25 • Frame Relay • ATM • T1, T3, E1, and E3 • DSL • SONET Ask students to briefly explain each of the WAN technologies and discuss the differences between technologies and encapsulations. They will be covered in detail in CCNA 4.
Each student should build a complete topology and then take it apart and let the next student do the lab. These labs are a review of the cabling labs in CCNA 1. This may be one of the last opportunities students have to cable a network, so do not miss this opportunity to make sure students complete the CCNA 2 Lab setup. This is a good place to introduce troubleshooting and the Layer 1 issues that occur in CCNA 2. It is also a fairly simple and fun activity. 1.2 Routers Essential Labs: 1.2.5, 1.2.6, and 1.
Ask students the following questions: • What are the different types of RAM used by a router? • Can the RAM be upgraded in a router? 1.2.3 Router external connections The three basic types of connections on a router are LAN interfaces, WAN interfaces, and management ports. LAN interfaces allow the router segment network boundaries within a LAN and reduce broadcast traffic within a LAN.
Students may not be familiar with the term out-of-band. Out-of-band refers to the fact that the management control communications use a different path or channel than the data communications. Ask students the following questions: • What type of terminal emulation must the PC or terminal support? • What are the steps to connect the PC to a router? 1.2.6 Connecting Router LAN interfaces In most LAN environments, an Ethernet or FastEthernet interface is used to connect the router to the LAN.
Module 1 Summary Before students move on to Module 2, they must be able to cable the lab setup, identify all external relevant ports, and identify internal router components. Online assessment options include the end-of-module online quiz in the curriculum and the online Module 1 exam. Consider introducing formative assessments, where the instructor supervises the students as they work on the router setup.
Module 2: Introduction to Routers Overview Consider the prior knowledge of students when teaching Module 2. Some students may be familiar with command-line interfaces (CLIs). Students who have only used GUIs may not know how to use CLIs to interact with a computer. Students should experiment with CLIs to learn how to interact with a router. Module 2 Caution Students need to know what the IOS is and what it does. They also need to know the difference between the configuration file and the IOS.
2.1 Operating Cisco IOS Software Essential Labs: None Optional Labs: None Core TIs: All Optional TIs: none Course-Level Claim: Students can describe the purpose and fundamental operation of the router IOS. Certification-Level Claim: Students can establish communication between a terminal device and the router IOS and use it for system analysis, configuration, and repairs. Hands-on skills: none 2.1.
Students should be able to identify the router prompts. The user mode prompt is Router>. The privileged mode prompt is Router#. 2.1.4 Cisco IOS software features Cisco IOS devices have three operating environments: • ROM monitor • Boot ROM • Cisco IOS ROM monitor is used to recover from system failures and recover a lost password. Boot ROM is used to modify the Cisco IOS image in flash. There is a limited subset of features in this mode. Normal operation of a router requires the full Cisco IOS image.
2.2 Starting a Router Essential Labs: 2.2.1, 2.2.4, and 2.2.9 Optional Labs: None Core TIs: All Optional TIs: none Course-Level Claim: Students can describe the purpose and fundamental operation of the router IOS Certification-Level Claim: Students can establish communication between a terminal device and the router IOS and use it for system analysis, configuration, and repair Hands-on skills: none 2.2.
If a router does not boot up correctly, issue the show version command to examine the configuration register to see if it is booting. Remind the students that the router is a special purpose computer. It has a boot sequence that is similar to a standard computer. The router must load the IOS from one of several sources. The router must also obtain a configuration file. If a configuration file is not available, the router will enter setup mode, which prompts the user for a basic router configuration.
To demonstrate the help feature, instruct students to set the clock without telling them which commands to use. The question mark (?) will guide students through the process. 2.2.7 Enhanced editing commands Enhanced editing commands are on by default. To disable enhanced editing mode, the terminal no editing command can be used at the privileged mode prompt. The editing command set provides a horizontal scrolling feature for commands that extend beyond a single line.
The syntax of IOS commands can be complex. The feature used to recall commands can help students save time when they program or troubleshoot a router. 2.2.9 Troubleshooting command line errors This troubleshooting lab allows students to log into the router and access various modes. Demonstrate the use of the question mark (?) as a helpful tool for students who do not know which command to enter.
Module 2 Summary Before students move on to Module 3, they must be able to interact with the router through a HyperTerminal session and the CLI. Online assessment options include the end-of-module online quiz in the curriculum and the online Module 2 exam. Make sure students know how to access the command-line prompt. Formative assessments related to lab work are relevant to Module 2.
Module 3: Configuring a Router Overview When teaching Module 3, emphasize the empowerment that students will gain from the ability to configure routers and the importance of familiarity with the IOS through extensive practice. There are many tools available to teach IOS: • The curriculum text and graphics are used to introduce command syntax and context. • The online command references are integrated. • CiscoPedia is the IOS command reference in the form of a Windows help file.
27 - 238 • Configure an interface description • Configure a message-of-the-day banner • Configure host tables • Understand the importance of backups and documentation CCNA 2: Routers and Routing Basics v3.1 Instructor Guide – Module 3 Copyright © 2004, Cisco Systems, Inc.
3.1 Configure a Router Essential Labs: 3.1.2, 3.1.3, 3.1.4, 3.1.5, 3.1.6, and 3.1.7 Optional Labs: None Core TIs: All Optional TIs: none Course-Level Claim: Students can perform, save, and test an initial configuration on a router. Certification Level Claim: Students can perform an initial configuration on a router. Hands-on skills: none 3.1.1 CLI command modes The students need to understand that the router does not know what routing to do until it is configured.
be changed does not need to be specified in the command. Another advantage is that only the parameters, or objects of the mode, i.e., the interface, or routing protocol, can be modified by the command. This helps prevent accidental configuration of the wrong object. There are shortcuts to show students at a later time: • config t for configure terminal • int fa0/0 for interface fastethernet 0/0 Students commonly enter the correct command at the incorrect prompt.
Discuss the differences between the various passwords. Students need to understand when each password is used. If students ask if user ids and passwords can be used instead of just passwords, the answer is that they can, but that is beyond the scope of this course. Ask students the following questions: • What is the command to set the enable password? • What is the command to set the telnet password? • What is the command to set the console password? 3.1.
Ask students the following questions: • Which command will show the configuration file in NVRAM? • Which command will show the configuration file in RAM? 3.1.5 Configuring a serial interface A serial interface can be configured from the console or through a virtual terminal line. By default, Cisco routers are DTE devices but they can be configured as DCE devices. To configure a serial interface follow these steps: 1. Enter global configuration mode. 2. Enter interface mode. 3.
• Remove the startup configuration file with the erase startup-config command. • Restart the router and enter setup mode. To save the configuration variables to the startup configuration file in NVRAM, enter the following command at the privileged EXEC prompt: Router#copy running-config startup-config Students must understand that any changes that are made to the configuration will occur immediately. These changes are made to the running configuration.
3.2 Finishing the Configuration Essential Labs: 3.2.3, 3.2.5, 3.2.7, and 3.2.9 Optional Labs: None Core TIs: All Optional TIs: none Course-Level Claim: Students can configure additional administrative functionality on a router Certification-Level Claim: Students can configure a router for additional administrative functionality. Hands-on skills: none 3.2.1 Importance of configuration standards This section introduces the importance of configuration standards.
associate did not have or follow standards, then the next associate will need to analyze how the device is supposed to be connected or configured. For example, if the headquarters router always has the lowest address in a subnet configured and the remote office uses the next address up, then there is no question about what the interface addresses should be. The interface description should provide information about the configuration, connection, and use of the interface. 3.2.
Ask students the following questions: • Which configuration mode is used to enter the description? • What are the commands to add a description to an interface? 3.2.4 Login banners Students must realize that a login banner can be seen by anyone. This login banner should be a warning that users should not attempt to log in unless they are authorized. A message such as “This is a secure system, authorized access only!” instructs unwanted intruders to beware.
Ask students the following questions: • What is a host name is associated with? • Can each unique IP address have a host name associated with it? 3.2.7 Configuring host tables This is a simple process. Students need to understand that the host table provides local host resolution. 3.2.8 Configuration backup and documentation The configuration of network devices determines the behavior of a network.
capturing text in the router. If the file needs to be copied back to the router, it can be pasted into the router. Ask students the following questions: 37 - 238 • What is the command used to copy RAM to NVRAM? • What is the command used to copy NVRAM to RAM? CCNA 2: Routers and Routing Basics v3.1 Instructor Guide – Module 3 Copyright © 2004, Cisco Systems, Inc.
Module 3 Summary Before students begin Module 4, they must be able to perform a basic router configuration in a limited amount of time and without assistance. Basic configuration includes hostnames, passwords, interfaces, and the ability to verify their work with show commands. Online assessment options include the end-of-module online quiz in the curriculum and the online Module 3 exam. Formative assessments can also be conducted as students work on the routers to monitor how well a lab is performed.
Module 4: Learning about Other Devices Overview Module 4 will introduce students to the Cisco Discovery Protocol (CDP). CDP is enabled by default on all Cisco devices. CDP allows devices such as Cisco routers to obtain information about directly connected routers, switches, and bridges. CDP functions at Layer 2 in the OSI model. It operates independently of Layer 3, which means that devices can gather information about other directly connected devices regardless of network layer protocol issues.
• Troubleshoot remote terminal connections 4.1 Discovering and Connecting to Neighbors Essential Labs: 4.1.4 and 4.1.6 Optional Labs: None Core TIs: All Optional TIs: none Course-Level Claim: Students can use embedded data-link layer functionality to perform network neighbor discovery and analysis from the router console. Hands-on skills: none 4.1.1 Introduction to CDP CDP is a Cisco proprietary protocol that is used for Layer 2 troubleshooting and network documentation.
4.1.2 Information obtained with CDP CDP is used to collect information about directly-connected devices. The types of information it collects are referred to as Type Length Values (TLVs). This TI includes a table that defines each TLV. Certain types of information are only included as a part of CDPv2. This information is noted in the table.
4.1.3 Implementation, monitoring, and maintenance of CDP CDP implemented by default on all interfaces that support it. The following table lists variations of the CDP command and their functions. These commands should be used in privileged EXEC mode. The table is located in this section of the curriculum. Although not noted in the curriculum, many of these commands can be executed in user mode.
If students have limited or no experience with the use of Telnet to move from device to device, this concept and skill should be reviewed. If students do not understand this capability, it will be difficult to understand the procedure described in this RIO. Demonstrate this capability if necessary. Refer to the figure to show students how telnet is used to map a network. Allow students to practice use of this command. Instruct students to map their router setup or a setup performed by another group. 4.1.
Command Purpose clear cdp table Deletes information about neighbors from the CDP table clear cdp counters Reset traffic counters to zero show cdp traffic Displays CD counters such as the number of packets sent and received and checksum errors show debugging Displays information about the types of debugging that are enabled for the router debug cdp adjacency Displays CDP neighbor information debug cdp events Displays CDP events debug cdp ip Displays CDP IP information debug cdp packets Displ
4.2 Getting Information about Remote Devices Essential Labs: 4.2.2, 4.2.3, 4.2.4, 4.2.5a, 4.2.5b, and 4.2.6 Optional Labs: None Core TIs: All Optional TIs: none Course-Level Claim: Students can perform simple LAN troubleshooting. Certification-Level Claim: Students can troubleshoot a device that is part of a working network. Hands-on skills: none 4.2.1 Telnet Telnet provides network administrators with remote connection capability.
4.2.3 Disconnecting and suspending Telnet sessions Network administrators may need to establish multiple Telnet sessions. The keystroke CtrlShift-6 and then the letter X can be used to suspend a current Telnet session. The suspend feature can be used to establish an additional Telnet session to another device. The show sessions command displays a numbered list of current Telnet sessions like the following example. Conn Host 1 lab-a * 2 lab-e Address 192.168.10.1 192.168.10.
The show sessions command output is as follows: Stanly_Lab#show sessions Conn Host Address 1 lab-b 192.168.10.1 2 lab-d 192.168.10.1 * 3 lab-e 192.168.10.1 Byte Idle 4 5 0 0 0 0 Conn Name lab-b lab-d lab-e 4.2.5 Alternative connectivity tests Connectivity can be tested with several other commands such as ping, traceroute, and show ip route. The ping command uses ICMP to send an echo request to a destination and then awaits an echo reply from that destination.
The procedure to use the ping command is as follows: • ping IP address or name of destination • Press Enter The procedure to use the trace command is as follows: • trace IP address or name of destination • Press Enter Demonstrate a successful ping. LAB-B#ping lab-c Type escape sequence to abort. Sending 5, 100-byte ICMP Echoes to 199.6.13.2, timeout is 2 seconds: !!!!! Success rate is 100 percent (5/5), round-trip min/avg/max = 32/35/36 ms Demonstrate an unsuccessful ping.
Show a routing table. LAB-C#show ip route Codes: C - connected, S - static, I - IGRP, R - RIP, M - mobile, B – BGP, D - EIGRP, EX - EIGRP external, O - OSPF, IA - OSPF inter area, E1 - OSPF external type 1, E2 - OSPF external type 2, E – EGP, i - IS-IS, L1 - IS-IS level-1, L2 - IS-IS level-2, * - candidate default, U - per-user static route Gateway of last resort is not set C C R R R C R R 204.204.7.0/24 is directly connected, Serial0 223.8.151.0/24 is directly connected, Ethernet0 201.100.11.
Module 4 Summary Students must master CDP and network troubleshooting commands before they move on to Module 5 Online assessment options include the end-of-module online quiz in the curriculum and the online Module 4 exam. Students should be familiar with the equipment that is in the room with them. If they need to see how it is connected, they can look at it.
Module 5: Managing Cisco IOS Software Overview When teaching Module 5, emphasize the importance of the router boot sequence. The router boot sequence verifies the proper operation of the router hardware, identifies the correct IOS and configuration file, and shows the location of each. This process must be understood to properly configure and operate all Cisco routers.
5.1 Router Boot Sequence and Verification Essential Labs: 5.1.3 and 5.1.5 Optional Labs: None Core TIs: All Optional TIs: none Course-Level Claim: Students can Identify the stages of the router boot-up sequence and show how the configuration-register and boot system commands modify that sequence. Certification-Level Claim: Students can describe the components of network devices. Hands-on skills: none 5.1.
It is important to realize that these boot system commands must be saved in NVRAM to be executed at the next start-up. If no boot system commands are saved in NVRAM, the router will use the default fallback process, flash, TFTP, and finally ROM. Review the figure in this section to explain the process that is followed to load the IOS. Make sure students realize that network problems can affect the process when the IOS is loaded from a TFTP server.
If the router does not boot properly, the show version command can be used to identify the configuration register setting. The boot field indicates where the router is configured to boot from and the config-register command is used to make any necessary changes.
5.2.1 IOS file system overview A router or switch requires software to operate. The following are two basic types of essential software: • The operating system • The config file The operating system that is used in almost all Cisco devices is the Cisco IOS. The IOS is the software that allows the hardware to function as a router or a switch. The software a router or switch uses is referred to as the configuration, or config file.
5.2.3 Managing configuration files using TFTP The active configuration uses RAM and the default location for the startup configuration is NVRAM. Students must understand the differences between RAM, ROM, NVRAM, and flash. If the configuration is lost, there should be backup copies available. The backup configuration can be stored on a TFTP server. The copy running-config tftp command can be used to do this.
After the configuration has been displayed, students should select Transfer > Capture Text > Stop to stop the capture. After the capture is completed, the configuration file needs to be edited to remove text that is not required to configure a router. Then it can be pasted back into the router if needed. The configuration file can be edited from a text editor such as Notepad.
Discuss the difference between running configuration and startup-configuration. This concept is very important. Also stress the benefits of comments in the configuration. These comments can explain the function of the various commands. Make sure that the students know that these comment lines begin with an exclamation point (!) and that these lines are not stored in the router. Some features of HyperTerminal do not work well with the version of HyperTerminal that comes with Windows XP.
The default console speed of 9600 bps can be used or it can be changed to 115200 bps. This will speed up the download. The console speed can be changed with the confreg command. To restore the IOS image from the PC, students should use the xmodem command. The format of the command is xmodem –c image_file_name. The -c instructs the Xmodem process to use CRC to check for errors during the download. The router then sends a warning message that the bootflash will be erased.
Discuss the following alternatives with the students: • NVRAM • TFTP server • ROM Make sure the boot commands are reviewed. Stress the importance of familiarity with the bootup procedures. 60 - 238 CCNA 2: Routers and Routing Basics v3.1 Instructor Guide – Module 5 Copyright © 2004, Cisco Systems, Inc.
Module 5 Summary Students must be able to manage configuration files and verify the file system with show commands before they begin Module 6. Online assessment options include the end-of-module online quiz in the curriculum and the online Module 5 exam.
Module 6: Routing and Routing Protocols Overview When teaching Module 6, remind students that routing refers to the directions that are given to move packets from one network to another. These directions, which are also known as routes, can be dynamically given to the router by another router, or they can be statically assigned to the router by an administrator. Make sure students understand static routing.
6.1 Introduction to Static Routing Essential Labs: 6.1.6 Optional Labs: None Core TIs: All Optional TIs: none Course-Level Claim: Students can identify, configure, and verify the use of static and default routes. Certification-Level Claim: Students can evaluate the characteristics of routing protocols. Hands-on skills: none 6.1.1 Introduction to routing Routing is the process that a router uses to forward packets toward the destination network.
From Rt1 either of the following commands will work. Rt1(config)#ip route 192.168.2.0 255.255.255.0 192.168.1.2 This command should be interpreted as “To reach the network 192.168.2.0 that has a subnet mask of 255.255.255.0, the next hop in the path is 192.168.1.2”. or Rt1(config)#ip route 192.168.2.0 255.255.255.0 s0 This should be interpreted as “To reach the network 192.168.2.0 that has a subnet mask of 255.255.255.0, send the packet out interface serial 0/0”.
6.1.3 Configuring static routes Use the following steps to configure static routes: 1. Determine all desired destination networks, their subnet masks, and their gateways. A gateway can be either a local interface or a next hop address that leads to the desired destination. 2. Enter global configuration mode. 3. Type the ip route command with the address and subnet mask of the destination followed by their corresponding gateway from Step 1. An administrative distance is optional. 4.
6.1.4 Configuring default route forwarding Default routes are used to route packets with destinations that do not match any of the other routes in the routing table. A default route is actually a special static route that uses the following format: ip route 0.0.0.0 0.0.0.0 [next-hop-address | outgoing interface] Use the following steps to configure default routes: 1. Enter global configuration mode. 2. Type the ip route command with 0.0.0.0 for the destination network address and 0.0.0.
interface Serial0/0 ip address 192.168.1.1 255.255.255.0 no ip directed-broadcast no fair-queue clockrate 56000 ! interface FastEthernet0/0 ip address 192.168.0.1 255.255.255.0 no ip directed-broadcast no keepalive ! ip classless ip route 192.168.2.0 255.255.255.0 Serial0 The show ip route command is used to make sure that the static route is present in the routing table. The output of show ip route is as follows.
Here are the outputs of the show interface, ping, and traceroute commands. Rt1#show interfaces s0 Serial0/0 is up, line protocol is up Hardware is PowerQUICC Serial Internet address is 192.168.1.
6.2 Dynamic Routing Overview Essential Labs: None Optional Labs: None Core TIs: All Optional TIs: none Course-Level Claim: Students can evaluate the characteristics of routing protocols. Certification-Level Claim: Students can evaluate the characteristics of routing protocols. Hands-on skills: none 6.2.1 Introduction to routing protocols A routing protocol is a type of communication that is used between routers.
At this point, students do not have to understand the details of an autonomous system. They just need to understand the basic concepts of an autonomous system. Students do not have enough experience to understand policy-based routing. 6.2.3 Purpose of a routing protocol and autonomous systems The goal of a routing protocol is to fill the routing table with known networks or destinations and the best route to reach these destinations.
network topology information. This is measured in hop counts, or the number of routers in the path to a destination network. Distance vector algorithms do not allow a router to know the exact topology of an internetwork. The router only uses hop count to determine the best path. Distance vector algorithms require each router to send its entire routing table to each of its neighbors. This creates network traffic and there is a limit to the number of hops a distance vector routing protocol will use.
Certification-Level Claim: Students can evaluate the characteristics of routing protocols. Hands-on skills: none 6.3.1 Path determination Path determination occurs at the network layer, or Layer 3, for traffic that goes through a network cloud. The path determination function enables a router to evaluate the available paths to a destination and to establish the preferred way to handle a packet.
6.3.4 IGP versus EGP Interior routing protocols are designed to be used in a network that is under the control of a single organization. The protocols used in CCNA 2 will be IGPs. The protocols RIP, IGRP, EIGRP, and OSPF are all IGPs. Exterior routing protocols are designed for use between two different autonomous systems. An example of an EGP protocol is Border Gateway Protocol (BGP). BGP is the routing protocol used on the Internet.
Module 6 Summary Before students begin Module 7, they must be able to configure static routes and use the show ip route, ping, and traceroute commands to perform basic network testing. Online assessment options include the end-of-module online quiz in the curriculum and the online Module 6 exam. Formative evaluations of students as they work on the routers may be valuable in this module.
Module 7: Distance Vector Routing Protocols Overview When teaching module 7, emphasize both skills development and conceptual understanding of the routing protocols RIP and IGRP. Students must master the basic routing skills and concepts from this module to be successful in CCNA 3.
7.1. Distance Vector Routing Essential Labs: None Optional Labs: None Core TIs: All Optional TIs: none Course-Level Claim: Students can identify, analyze, and show how to rectify inherent problems associated with distance vector routing protocols. Certification-Level Claim: Students can troubleshoot and configure routing protocols based on user requirements. Hands-on skills: none 7.1.
• When Network 1 fails, Router E sends an update to Router A. Router A stops routing packets to Network 1, but Routers B, C, and D continue to route packets because they have not yet been informed of the failure. When Router A sends out its update, Routers B and D stop routing to Network 1. However, Router C has not received an update. Router C still tries to reach Network 1 through Router B. • Now Router C sends a periodic update to Router D, which indicates a path to Network 1 through Router B.
7.1.3 Defining a maximum count The previous section described a situation in which slow convergence created the impression that a fictitious path to a network existed, which leads to a routing loop. Routing loops have a packet that circles a network, uses up bandwidth, and never reaches its destination. Distance vector algorithms are designed to prevent these loops by defining a maximum hop count. This value is known as a routing metric.
Figure [1]: Routing Update Figure [2]: Split Horizon Split horizon is another mechanism to help prevent routing loops. Split horizon does not allow the originator of network information to receive updates about the network from another router. This prevents the originator of correct information from being influenced by the incorrect information of another router. Use the figure in this section for reference.
7.1.5 Route poisoning Route poisoning is another process used by routers to prevent routing loops. Briefly review the fact that routing loops are typically the result of slow convergence. The loops are interrupted when maximum hop counts are defined so that packets that are caught in loops are eventually dropped. Route poisoning is when the distance or hop count of a route is changed to 16, or 1 higher than the maximum number allowed, which makes it unreachable from the perspective of the routers.
7.1.7 Preventing routing loops with holddown timers Holddown timers are used to prevent update messages from reinstating inaccessible routes. When a router receives an update that indicates that a network is unreachable, it starts a holddown timer. While the hold-down timer is running, the router will not accept any updates about the inaccessible route unless the update comes from the originator of the triggered update or from a router reporting a better metric to the inaccessible network.
7.2.1 RIP routing process RIP is a distance-vector routing protocol that uses hop count as the metric for path selection. By default, the maximum hop count for RIP is 15 and routing updates are broadcast every 30 seconds. If RIP routes are received that would increase the metric to a number higher than 15 hops, the network is considered unreachable and the route is discarded.
7.2.3 Using the ip classless command The ip classless command allows packets that are bound for an unknown subnet to be routed out the same interface as other known subnets in the same range of addresses. IP classless only affects the operation of the forwarding processes in IOS. It does not affect the way the routing table is built. When the no ip classless command is used, a packet bound for an unknown subnet will be dropped even if a route to a subnet in the same address range exists.
command. The RIP version can also be changed with the version [1 | 2] router configuration command. Other variations of this command may be placed on the interface to specify which version of packets to send and receive. 7.2.5 Verifying RIP configuration The show ip protocol and the show ip route commands can be used to verify the configuration of RIP. The show ip protocol command displays information about all of the IP routing protocols that are used on the router.
219.17.100.0 in 1 hops 199.6.13.0 in 1 hops 210.93.105.0 in 3 hops Other commands that can be used to troubleshoot RIP update issues include the following: • show ip rip database • show ip protocols • show ip route • debug ip rip • show ip interface brief 7.2.7 Preventing routing updates through an interface The passive interface command prevents routing updates from being sent out a particular interface. In the graphic, Router Z interface Fa0/0 is not allowed to send router updates to Router A.
This does not consider the bandwidth of each link. So while load balancing may allow packets to travel multiple paths to reach a destination, huge bandwidth differences among equal-cost paths could actually slow throughput. 7.2.9 Load balancing across multiple paths A router may have multiple paths to a given destination network. If these paths have different metrics the router will use the route with the best metric to forward packets.
7.3.1 IGRP features IGRP is a Cisco proprietary distance-vector interior gateway routing protocol. Distance vector routing protocols mathematically compare routes to determine the best path. IGRP was designed to take advantage of the simplicity of RIP and adds other metrics for best path selection and better scalability. The metrics available with IGRP are bandwidth, delay, load, reliability, and maximum transmission unit (MTU).
The lower the metric is, the better the route. Make sure that students understand that the default metrics for IGRP are bandwidth and delay. The other metrics can be used but are not used by default. Allow the students to configure IGRP on a mesh network and adjust the metrics to see how the routing table is changed. Students should also be instructed to trace the path to a network before and after the metric changes to verify the different path selection. 7.3.
The debug ip igrp events command can be used to verify that the timers affect routing updates. Have the students configure IGRP on the lab topology. 7.3.5 Configuring IGRP To enable IGRP routing use the router igrp as-number global configuration command. To disable IGRP routing use the no router igrp as-number command.
the networks advertised, timer values, and other routing protocol-specific information. The show ip route command displays the routing table and lists the next hop to all known networks, how the route was learned, the metric, and other route specific information. The show run command can be used to verify the running configuration. Have the students verify proper operation of IGRP on the lab topology. 7.3.
Module 7 Summary Before students begin Module 8, they must be able to configure and troubleshoot RIP and IGRP by themselves. Online assessment options include the end-of-module online quiz in the curriculum and the online Module 7 exam. Formative skill assessments such as timed competitions to see who can get hands-on or e-Lab routing to work the fastest should be used. The emphasis of any assessment should be on the ability to demonstrate mastery.
92 - 238 • How to migrate RIP to IGRP • How to verify IGRP configuration • How to troubleshoot IGRP CCNA 2: Routers and Routing Basics v3.1 Instructor Guide – Module 7 Copyright © 2004, Cisco Systems, Inc.
Module 8: TCP/IP Suite Error and Control Messages Overview The main goal of Module 8 is for students to learn how the IP protocol uses the ICMP protocol to provide control messages to hosts on a network. IP does not have the facilities to send error messages. It uses ICMP to send, receive, and process error and control messages. Module 8 Caution Error and control messaging is an important aspect of TCP/IP.
8.1 Overview of TCP/IP Error Message Essential Labs: None Optional Labs: None Core TIs: 8.1.1, 8.1.2, 8.1.4, 8.1.5, 8.1.6, and 8.1.8 Optional TIs: 8.1.3, 8.1.7, and 8.1.9 Course-Level Claim: Students can describe the operation of ICMP and identify the reasons, types, and format of associated error and control messages. Hands-on skills: none 8.1.1 ICMP IP is considered a “best effort” or unreliable method for the delivery of network data.
8.1.4 Unreachable networks Network communications depend on certain basic conditions: • The sending and receiving devices must have the TCP/IP protocol configured. • This includes a correct IP address and subnet mask. • A default gateway must be set if data will go outside the LAN. • Devices must be place to route the data. • The router must be configured correctly and the correct routing protocol must be used. If these conditions are not met, communication cannot occur.
8.1.7 Echo messages ICMP message formats have three fields: • Type • Code • Checksum The type field indicates the type of ICMP message that is sent. The code field includes additional information that is specific to the message type. The checksum field is used to verify the integrity of the data. Create an example to help students understand this format. This is an important concept to help the student understand causes of ICMP "destination unreachable" messages. 8.1.
8.2 TCP/IP Suite Control Messages Essential Labs: None Optional Labs: None Core TIs: None Optional TIs: All Course Level Claim: Students can describe the operation of ICMP and identify the reasons, types, and format of associated error and control messages. Hands-on skills: none 8.2.1 Introduction to control messages ICMP is an integral part of the TCP/IP protocol suite.
• The route for the redirect is not another ICMP redirect or a default route. • The router is configured to send redirects. Make sure students understand default gateways. Instruct students to look at the router lab setup and visually determine the default gateway of the host attached to it. 8.2.3 Clock synchronization and transit time estimation Networks that connect to each other over vast distances choose their own method of clock synchronization.
process begins when the host sends a multicast router solicitation message to all routers with the address 224.0.0.2. If a router solicitation message is sent to a router that does not support the discovery process, the solicitation will go unanswered. However, if it is supported, a router advertisement is sent in return. 8.2.7 Router solicitation message A host will generate an ICMP router solicitation message in response to a missing default gateway. This message is sent multicast.
Module 8 Summary Before students begin Module 9, they should know where to look for many of the error messages they may encounter. Online assessment options include the end-of-module online quiz in the curriculum and the online Module 8 exam. This is a very descriptive module so vocabulary or scenario-based quizzes may be the preferred form of assessment.
Module 9: Basic Router Troubleshooting Overview When teaching Module 9, emphasize the fact that the ability to interpret a routing table is of fundamental importance to networking professionals. This module is dedicated to routing tables and troubleshooting tools such as the show ip route command. Module 9 Caution Students need to understand how to use these commands and interpret their output. This module is usually very interesting to students.
9.1 Examining the Routing Table Essential Labs: 9.1.1, 9.1.2, and 9.1.8 Optional Labs: None Core TIs: All Optional TIs: none Course-Level Claim: Students can configure, verify, analyze, and troubleshoot simple distance vector routing protocols. Certification-Level Claim: Students can troubleshoot and configure routing protocols based on user requirements. Hands-on skills: none 9.1.
An administrator can use two different commands to configure default routes: • ip route 0.0.0.0 0.0.0.0 [next-hop-ip-address | exit-interface] • ip default-network The ip default-network command establishes a default route in networks with dynamic routing protocols. Discuss the important concept of the gateway of last resort and the two commands used to configure default routes.
Explain administrative distances to the students. The administrative distance represents the trustworthiness of the source of a route. The Cisco IOS is designed to trust directly connected routes more than any other source. Directly connected routes have the lowest administrative distance of zero. The IOS also trusts routes that are configured by a network administrator, which are static routes. These have an administrative distance of one.
9.1.9 Observing multiple paths to destination Some routing protocols support multiple paths to the same destination. Multipath algorithms permit traffic over multiple lines, provide better throughput, and are more reliable. Discuss with the students their ideas on why it would be better to have multiple paths through the network. Discuss redundancy and reasons why all networks are not redundant. 9.2 Network Testing Essential Labs: 9.2.
9.2.3 Testing by OSI layers Testing should begin with Layer 1 of the OSI model and work to Layer 7 if necessary. The ping command is used at Layer 3. The telnet command is used at Layer 7. Both of these commands will be discussed in detail in a later section. It is important for the students to understand which types of errors occur at the different layers of the OSI model. This is a good opportunity to group students together to practice for an exam or earn extra credit through competitive activities.
9.3 Troubleshooting Router Issues Overview Essential Labs: 9.3.4, 9.3.5, and 9.3.7 Optional Labs: None Core TIs: All Optional TIs: none Course-Level Claim: Students can use the commands incorporated within IOS to analyze and rectify network problems. Certification-Level Claim: Students can perform simple WAN troubleshooting. Hands-on skills: none 9.3.1 Troubleshooting Layer 1 using show interfaces The Cisco IOS contains many troubleshooting commands. The show commands are widely used.
This is an important concept for the students to understand to help in the troubleshooting process. Two important facts for the students to learn are that CDP is Cisco proprietary, which means that it only works between Cisco devices, and that CDP only works between directly connected devices. 9.3.4 Troubleshooting using traceroute The traceroute command is used to discover the routes that packets take when they travel to their destination.
the troubleshooting process. Students need to realize that there is a lot of output that will be completely unfamiliar to them. The two main reasons for them to use this command are to discover the cable type connected to the serial interface and to see the clock rate on the interface with the DCE cable. 9.3.7 Introduction to debug The debug command is used to display dynamic data and events. The debug command output gives more insight into the current events of the router.
Module 9 Summary Before students begin Module 10, they must be able to read and interpret a routing table and must have mastered a range of IOS commands for troubleshooting. Online assessment options include the end-of-module online quiz in the curriculum and the online Module 9 exam. Paper activities and hands-on router challenges should be used to give students troubleshooting practice.
Module 10: Intermediate TCP/IP Overview Module 10 is a good place to have the student compare IP and TCP. It is essential for the students to understand that IP is connectionless and unreliable, while TCP is connectionoriented and reliable. In this section, the students will gain an understanding of the transport layer ports that allows for the full communications process between two hosts.
10.1 TCP Operation Essential Labs: 10.1.6 Optional Labs: None Core TIs: 10.1.6 Optional TIs: 10.1.1 – 10.1.5, and 10.1.7 Course-Level Claim: Students can describe the operation of the major transport layer protocols and the interaction and transportation of application layer data. Certification-Level Claim: Students can evaluate the TCP/IP communication process and its associated protocols. Hands-on skills: none 10.1.
3. The source host responds with a simple acknowledgement of y + 1 to indicate that it received the previous ACK. This finalizes the connection process. The three-way handshake is an important concept for the student to understand. A relevant TI from CCNA 2 v2.1.4 is 9.1.6. 10.1.3 Denial of service attacks Denial of service (DoS) attacks are designed to deny services to legitimate hosts that attempt to establish connections. DoS attacks are commonly used by hackers to halt system responses.
10.1.5 Sequencing numbers Since TCP breaks data into segments, the receiver must reassemble the data segments once all of the data is received. TCP issues a sequence to the data segments so that the receiver can properly reassemble the bytes into their original form. Emphasize that this is important because data may arrive out of order to the destination. The sequence numbers indicate the correct order in which to put the bytes back together. Also mention that UDP does not use sequencing numbers.
UDP is often used for applications and services such as real-time audio and video. These applications require less overhead. They also do not need to be resequenced since packets that arrive late or out of order have no value. 10.2 Overview of Transport Layer Ports Essential Labs: 10.2.5 Optional Labs: None Core TIs: 10.2.5 Optional TIs: 10.2.1 – 10.2.4, and 10.2.
10.2.2 Ports for services Services that are used on hosts must have a port numbers assigned so communication can occur. Some ports are reserved in both TCP and UDP. These are considered well-known ports. Students must know these port numbers. Explain to the student that a question mark (?) can be used in the router to display the port numbers. However, students must learn the most common port numbers.
10.2.5 Example of multiple sessions between hosts Port numbers are used to track multiple sessions that occur between hosts. The port number combined with the network address forms a socket. A pair of sockets, one for the source and one for the destination, forms a unique connection. For example, a host could have a Telnet connection on port 23 and surf the net on port 80 at the same time.
Module 10 Summary Before students begin Module 11, they must be able to compare and contrast the roles of MAC addresses, IP addresses, and port numbers. Online assessment options include the end-of-module online quiz in the curriculum and the online Module 10 exam.
Module 11: Access Control List (ACLs) Overview When teaching Module 11, emphasize the importance of access control lists (ACLs). Network administrators must establish a way to deny unwanted access to a network and allow internal users to access necessary services. Security tools such as passwords, callback equipment, and physical security devices are helpful. However, they often lack the flexibility of basic traffic filtering and the controls most administrators prefer.
11.1.1 Introduction to ACLs ACLs are lists of conditions that are applied to traffic that travels across a router interface. These lists tell the router what types of packets to accept or deny. ACLs can be created for all routed network protocols. ACLs filter network traffic and determine if routed packets are forwarded or blocked at the router interfaces. The ACL parameters that can be defined include source and destination addresses, protocols, and upper-layer port numbers.
If all the ACL statements are unmatched, an implicit "deny any" statement is placed at the end of the list by default. Even though the "deny any" is not visible, it will deny any packets that are not matched in the ACL. An exercise to use with the students is to look at each line of an ACL and ask the students what each line accomplishes. ACL statements are processed from the top down, one line at a time until a match is made. Remind students that at the end of each ACL is an implied deny all.
A.B.C.D Wildcard bits log Log matches against this entry rt1(config)#access-list 1 permit 192.168.0.1 0.0.0.0 ? log Log matches against this entry Give students a list of rules for access lists to help them understand this concept. Emphasize the following points: • Use one access list for each protocol and for each direction. • Place standard access lists closest to the destination. • Place extended access lists closest to the source.
11.1.4 The function of a wildcard mask A wildcard mask is paired with an IP address. The binary numbers one and zero in the mask are used to identify how the corresponding IP address bits should be handled. Wildcard masks are used for different purposes and follow different rules than subnet masks. Wildcard masks are designed to filter individual or multiple IP addresses to permit or deny access to resources based on the addresses.
To test an ACL, the students will need to know what traffic will be permitted, denied, and the path. Have students test for connectivity, apply the ACL, and then check the ACL to see if it works. The show running-config command should be used sparsely. Since lab configurations are relatively simple, the problems can usually be found rapidly with this command. However, students can become too dependent on it.
11.2.2 Extended ACLs Extended ACLs are used more often than standard ACLs because they provide a greater range of control. Extended ACLs check the source and destination packet addresses and also check for protocols and port numbers. This provides greater flexibility to define what the ACL will filter. Packets can be permitted or denied access based on where the packet originated and its destination or protocol types and port addresses. For a single ACL, multiple statements may be configured.
precedence Match packets with given precedence value psh Match on the PSH bit range Match only packets in the range of port numbers rst Match on the RST bit syn Match on the SYN bit time-range Specify a time-range tos Match packets with given TOS value urg Match on the URG bit Next enter eq, gt or any of the above. The eq, gt and lt define ranges of port numbers. The students need to know the standard port numbers and if they use TCP or UDP. At the end of every ACL is the implied deny all statement.
Then enter extended or standard: rt1(config)#ip access-list extended ? <100-199> Extended IP access-list number WORD Access-list name The name used is named_ACL: rt1(config)#ip access-list extended named_ACL rt1(config-ext-nacl)# rt1(config-ext-nacl)#? Ext Access List configuration commands: default Set a command to its defaults deny Specify packets to reject dynamic Specify a DYNAMIC list of PERMITs or DENYs evaluate Evaluate an access list exit Exit from access-list configuration mode no Negate a command
11.2.6 Restricting virtual terminal access Standard and extended access lists apply to packets that travel through a router. They are not designed to block packets that originate within the router. By default, an outbound Telnet extended access list does not prevent router initiated Telnet sessions. This type of ACL controls which users can telnet into a remote router. To test this in the labs, have students configure routers and telnet into a remote router to test connectivity.
Module 11 Summary Before students take the final exam, they should have mastered the configuration and placement of standard and extended IP access-lists. Online assessment options include the end-of-module online quiz in the curriculum and the online Module 11 exam. Formative assessments such as short paper quizzes that instruct students to write out an access list in response to a scenario may help students achieve mastery.
IV. Case Study Overview and Objectives This case study allows students to complete a network design, implementation, and troubleshooting project using the skills gained in CCNA 2. Students will use the skills that have already been developed to use, make, and connect the proper cabling to the appropriate devices. It is crucial to read and understand the scenarios to make sure that all requirements are fulfilled.
Scenario and Phase 1: Project Description A company has several people responsible for maintaining various sections of the internetwork infrastructure. Many technicians have done an excellent job with the small portion for which they are responsible. One of the other network associates who was responsible for a larger portion of the infrastructure suddenly left the company. This left redesign and implementation on this portion of the internetwork unfinished.
Phase 2: IP Addressing Now that the basic plan is in place, the team leader assigns the technician to develop a prototype for the new internetwork. Use the network address assigned along with the subnetting requirements, to subnet the network. From the IP addressing scheme, assign IP addresses to the appropriate interfaces on all routers and computers in the internetwork. Use the diagram below as a guide. Obtain approval of this phase of development from the team leader before proceeding to Phase 3.
Phase 3: Basic Router and Workstation Configuration After the team leader inspects the prototype cabling, the technician is assigned to create a basic configuration on the router and workstations. Use the diagram and planning sheets to create a basic configuration for the router. The checklist below will help keep track of the configuration process.
Boaz Center Eva * Host Table contains all routers and servers Message of the Day Serial 0/0 description Serial 0/1 description Fa 0/0 description Fa 0/1 description Instructor approval _____________________________ Date __________________ 134 - 238 CCNA 2: Routers and Routing Basics v3.1 Instructor Guide – Case Study Copyright © 2004, Cisco Systems, Inc.
Phase 4: Access Control Lists While testing the network, the team leader discovers that security has not been planned for the network. If the network configuration were installed as designed, any network user would be able to access all network devices and workstations. The team leader asks the technician to add access control lists (ACLs) to the routers. The team leader has some suggestions for developing the security. Before the ACLs are added, backup the current router configuration.
Phase 5: Documenting the Network In order to support the network properly, documentation is required. Create documentation that is logically organized to make troubleshooting simpler.
Case Study Deliverables The key lesson of this case study is the importance of thorough and clear documentation. There should be two types of documentation completed. General Documentation: • A complete narrative of the project should be typed using word processing software. Since the scenarios break up the entire task into pieces, take care to address each scenario task so that any layperson could understand that particular task.
138 - 238 • show ip interface • show version • show hosts • show startup-config • show ip access-list CCNA 2: Routers and Routing Basics v3.1 Instructor Guide – Case Study Copyright © 2004, Cisco Systems, Inc.
Case Study – Instructor Notes Phase 1: Project Description This phase of the case study can begin early in the semester, as students should be familiar with subnetting. The entire case study should be discussed in class so that all students understand that the purpose of this study is not only to practice configuration and troubleshooting, but also to learn how to document their work. The following are some good web sites that will help the students’ understanding of documentation: http://www.ittoolkit.
• The concept of reserved address space for routers, servers, and hosts • The reasons for developing an IP address scheme to allow for future growth Phase 3: Basic Router and Workstation Configuration This Phase should be completed after students feel comfortable with basic router configuration, sometime after Module 7. Students should be somewhat familiar with router configuration, and understand the basic requirements.
Case Study – Instructor Sample Outputs Phase 5: Documenting the Network – Sample outputs Boaz (2500) Configuration Management documentation – Boaz (2500) Boaz#show cdp neighbors Capability Codes: R - Router, T - Trans Bridge, B - Source Route Bridge S - Switch, H - Host, I - IGMP Device ID Centre Local Intrfce Ser 0 120 Holdtme Capability Platform Port ID R 2500 Ser 0 Boaz#show ip route Codes: C - connected, S - static, I - IGRP, R - RIP, M - mobile, B BGP D - EIGRP, EX - EIGRP external, O - OSPF, IA - O
Boaz#show ip interface brief Interface IP-Address OK? Method Status Protocol Ethernet0 172.16.96.1 YES manual up up Serial0 172.16.64.2 YES manual up up Serial1 unassigned YES unset administratively down down Boaz#show version Cisco Internetwork Operating System Software IOS (tm) 3000 Software (IGS-J-L), Version 11.1(5), RELEASE SOFTWARE (fc1) Copyright (c) 1986-1996 by Cisco Systems, Inc.
Boaz#show startup-config Using 1090 out of 32762 bytes ! version 11.1 service slave-log service udp-small-servers service tcp-small-servers ! hostname Boaz ! enable secret 5 $1$5EE4$v86z7o8zMLehnIWA0T7LB/ ! ! interface Ethernet0 description Boaz LAN workgroup interface ip address 172.16.96.1 255.255.224.0 ip access-group 101 in no keepalive ! interface Serial0 description Boaz WAN interface to Centre ip address 172.16.64.2 255.255.224.
Security Management documentation – Boaz (2500) Boaz#show ip interface Ethernet0 is up, line protocol is up Internet address is 172.16.96.1/19 Broadcast address is 255.255.255.
deny deny Boaz# 145 - 238 tcp 172.16.96.0 0.0.31.255 any eq telnet icmp 172.16.96.0 0.0.31.255 any (8 matches) CCNA 2: Routers and Routing Basics v3.1 Instructor Guide – Case Study Copyright © 2004, Cisco Systems, Inc.
Phase 5: Documenting the Network – Sample outputs Centre (2500) Configuration Management documentation Centre#show cdp neighbors Capability Codes: R - Router, T - Trans Bridge, B - Source Route Bridge S - Switch, H - Host, I - IGMP Device ID Boaz Eva Local Intrfce Ser 0 153 Ser 1 140 Holdtme Capability Platform Port ID R 2500 Ser 0 R 2500 Ser 1 Centre#show ip route Codes: C - connected, S - static, I - IGRP, R - RIP, M - mobile, B BGP D - EIGRP, EX - EIGRP external, O - OSPF, IA - OSPF inter area E1 - OS
Centre#show version Cisco Internetwork Operating System Software IOS (tm) 3000 Software (IGS-J-L), Version 11.1(5), RELEASE SOFTWARE (fc1) Copyright (c) 1986-1996 by Cisco Systems, Inc. Compiled Mon 05-Aug-96 11:48 by mkamson Image text-base: 0x0303794C, data-base: 0x00001000 ROM: System Bootstrap, Version 11.0(10c)XB2, PLATFORM SPECIFIC RELEASE SOFTWARE (fc1) ROM: 3000 Bootstrap Software (IGS-BOOT-R), Version 11.
no ip address shutdown ! interface Serial0 description Centre WAN interface to Boaz ip address 172.16.64.1 255.255.224.0 no fair-queue clockrate 56000 ! interface Serial1 description Centre WAN interface to Eva ip address 172.16.128.1 255.255.224.0 clockrate 56000 ! router igrp 11 network 172.16.0.0 ! ip host Centre 172.16.64.1 172.16.128.1 172.16.32.1 ip host Boaz 172.16.64.2 172.16.96.1 ip host Eva 172.16.128.2 172.16.160.1 no ip classless ! banner motd ^CThis is a SECURE SYSTEM.
Security Management documentation – Centre (2500) Centre#show ip interface Ethernet0 is up, line protocol is up Internet address is 172.16.32.1/19 Broadcast address is 255.255.255.
Helper address is not set Directed broadcast forwarding is enabled Outgoing access list is not set Inbound access list is not set Proxy ARP is enabled Security level is default Split horizon is enabled ICMP redirects are always sent ICMP unreachables are always sent ICMP mask replies are never sent IP fast switching is enabled IP fast switching on the same interface is enabled IP multicast fast switching is enabled Router Discovery is disabled IP output packet accounting is disabled IP access violation acco
Phase 5: Documenting the Network – Sample outputs Eva (2500) Configuration Management documentation – Eva (2500) Eva#show cdp neighbors Capability Codes: R - Router, T - Trans Bridge, B - Source Route Bridge S - Switch, H - Host, I - IGMP Device ID Centre Local Intrfce Ser 1 147 Holdtme Capability Platform Port ID R 2500 Ser 1 Eva#show ip route Codes: C - connected, S - static, I - IGRP, R - RIP, M - mobile, B BGP D - EIGRP, EX - EIGRP external, O - OSPF, IA - OSPF inter area E1 - OSPF external type 1, E
Image text-base: 0x0303794C, data-base: 0x00001000 ROM: System Bootstrap, Version 11.0(10c), SOFTWARE ROM: 3000 Bootstrap Software (IGS-BOOT-R), Version 11.0(10c), RELEASE SOFTWARE (fc1) Eva uptime is 5 hours, 4 minutes System restarted by reload System image file is "flash:igs-j-l.111-5", booted via flash Cisco 2500 (68030) processor (revision N) with 6144K/2048K bytes of memory. Processor board ID 06147980, with hardware revision 00000000 Bridging software.
Eva#show startup-config Using 1156 out of 32762 bytes ! version 11.1 service slave-log service udp-small-servers service tcp-small-servers ! hostname Eva ! enable secret 5 $1$ejwr$qcHMWf3GAiWytPceeWK1y0 ! ip subnet-zero ! interface Ethernet0 description Eva LAN workgroup interface ip address 172.16.160.1 255.255.224.0 ip access-group 103 in ! interface Serial0 no ip address shutdown no fair-queue ! interface Serial1 description Eva WAN interface to Centre ip address 172.16.128.2 255.255.224.
Security Management documentation – Eva (2500) Eva#show ip interface Ethernet0 is up, line protocol is down Internet address is 172.16.160.1/19 Broadcast address is 255.255.255.
permit ip 172.16.160.0 0.0.31.255 172.16.160.0 0.0.31.255 (225 matches) deny tcp 172.16.160.0 0.0.31.255 any eq telnet deny icmp 172.16.160.0 0.0.31.255 any (20 matches) Eva# 155 - 238 CCNA 2: Routers and Routing Basics v3.1 Instructor Guide – Case Study Copyright © 2004, Cisco Systems, Inc.
V. Appendices: A) Cisco Online Tools and Utilities B) Instructional Best Practices 156 - 238 CCNA 2: Routers and Routing Basics v3.1 Instructor Guide – Appendices Copyright © 2004, Cisco Systems, Inc.
Appendix A: Cisco Online Tools and Utilities Cisco Systems offer a wide range of online documents and tools to assist in the configuration, troubleshooting, and optimization of routers and switches. These resources can be found on the Cisco Technical Assistance Center (TAC) website at http://www.cisco.com/tac. To learn more about the Cisco TAC website visit http://www.cisco.com/public/news_training/tac_overview.html. This document introduces ten valuable resources that are available to users at cisco.com.
1 Output Interpreter Output Interpreter is a Web-based application that provides a troubleshooting analysis and a course of action for a router, switch, or PIX device. Output Interpreter uses a collection of show command output to perform the analysis. Users paste the output of one or more supported commands into Output Interpreter to receive a report that includes errors, warnings, and relevant troubleshooting information.
2 Error Message Decoder Explanations for console error message strings are listed in the Cisco Software System Messages guide. http://www.cisco.com/cgi-bin/Support/Errordecoder/home.pl 159 - 238 CCNA 2: Routers and Routing Basics v3.1 Instructor Guide – Appendix A Copyright © 2004, Cisco Systems, Inc.
3 Software Bug Toolkit The Software Bug Toolkit is a Web-based resource that is used to search for software bugs based on version and feature sets. The toolkit can be used to determine why a feature does not work. http://www.cisco.com/cgi-bin/Support/Bugtool/launch_bugtool.pl 160 - 238 CCNA 2: Routers and Routing Basics v3.1 Instructor Guide – Appendix A Copyright © 2004, Cisco Systems, Inc.
4 IP Subnet Calculator IP Subnet Calculator is a Web-based resource that is used to calculate the subnet mask based on several variables. This tool can be used to verify network settings. http://www.cisco.com/cgi-bin/Support/IpSubnet/home.pl 161 - 238 CCNA 2: Routers and Routing Basics v3.1 Instructor Guide – Appendix A Copyright © 2004, Cisco Systems, Inc.
5 Password Recovery Procedures This Web page is the source for Cisco password recovery procedures. The password recovery procedure for every Cisco device can be found here. http://www.cisco.com/warp/public/474/ 162 - 238 CCNA 2: Routers and Routing Basics v3.1 Instructor Guide – Appendix A Copyright © 2004, Cisco Systems, Inc.
6 TAC Case Collection The TAC Case Collection, is an evolution of the Troubleshooting Assistant tool. It allows users to interactively identify and troubleshoot common problems that involve hardware, configuration, and performance issues. These solutions, which are provided directly by TAC engineers, help resolve networking problems. http://www.cisco.com/kobayashi/support/tac/tsa/launch_tsa.html 163 - 238 CCNA 2: Routers and Routing Basics v3.
7 Software Advisor The Software Advisor helps users choose the appropriate software for network devices. Users can match software features to Cisco IOS and CatOS releases, compare IOS releases, or find out which software releases support their hardware. http://www.cisco.com/cgi-bin/Support/CompNav/Index.pl 164 - 238 CCNA 2: Routers and Routing Basics v3.1 Instructor Guide – Appendix A Copyright © 2004, Cisco Systems, Inc.
8 Feature Navigator II Cisco Feature Navigator II is a Web-based application that allows users to quickly find the right Cisco IOS Software release for the features they want to run on their networks. Users can search by feature, search by release, or compare two different releases. http://tools.cisco.com/ITDIT/CFN/jsp/index.jsp 165 - 238 CCNA 2: Routers and Routing Basics v3.1 Instructor Guide – Appendix A Copyright © 2004, Cisco Systems, Inc.
9 TAC Advanced Search TAC Advanced Search can be used to access the same resources used by TAC. Users can search the entire TAC database for technical documents published by the Cisco TAC, for TAC technical support tools, for documents that are located on http://www.cisco.com/, or for entries in the Networking Professionals Connection discussion forums. http://www.cisco.com/kobayashi/support/tac/s_tac.shtml 166 - 238 CCNA 2: Routers and Routing Basics v3.
Appendix B: Instructional Best Practices B.1 Definition of Best Practices B.1.1 What is meant by best practices? Figure 1: Best Practices Since the early 1980s, schools have explored the use of technology as an effective tool for teaching and learning in the classroom. Current research supports certain practices and strategies that help teachers maximize student learning.
Web Links International Society for Technology in Education: http://www.iste.org/ Southeast Center for Teaching Quality: http://www.teachingquality.org/ Milken Family Foundation: http://www.mff.org/edtech/ North Central Regional Educational Laboratory: http://www.ncrel.org/ Alabama Best Practices Center: http://www.bestpracticescenter.org/index.asp Mid-Continent Research for Education and Learning: http://www.mcrel.org/ B.1.
• Planning and designing learning environments and experiences • Teaching, learning, and curriculum • Assessment and evaluation • Productivity and professional practice • Social, ethical, legal, and human issues The ISTE has also developed the National Educational Technology Standards for Administrators (NETS•A). Administrators must be prepared to lead the way to systemic reform. Based upon a U.S.
Web Links National Council for Teachers of English: http://www.ncte.org/standards/standards.shtml Council for Teachers of Math: http://www.nctm.org/ National Science Teachers Association: http://www.nsta.org/ American Association for the Advancement of Science: http://www.aaas.org/ The National Academy of Science: http://www.nas.edu/ National Research Council (NRC): http://www.nrc-cnrc.gc.ca/ 170 - 238 CCNA 2: Routers and Routing Basics v3.
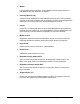
B.1.4 TIMSS report Figure 1: TIMSS Report Participating Countries The Third International Mathematics and Science Study (TIMSS) indicate how U.S. students perform academically in comparison to students in other countries. The curriculum focuses on trends in math and science achievement. The study completed in 1995 discovers that fourth grade students in the United States scored above the international average.
Web Links Third International Math and Science Study: http://isc.bc.edu/timss1999benchmark.html TIMSS International Study Center: http://timss.bc.edu/ B.1.5 Student-centered learning Figure 1: Learner Model: Academy Student Figure 1 illustrates the Cisco Networking Academy learner model. The model is designed to maximize student performance. Instructors are encouraged to strengthen and enhance the online curriculum and labs.
Students will also assign roles and identify jobs that need to be completed for the benefit of the group. This allows students to tap into their current knowledge, and journey into new levels of comprehension through a continuous cycle of inquiry and exploration. Students who work individually will go through the same process without any team direction and input. These students will make their own decisions about the relevancy of information.
• Bodily/Kinesthetic intelligence gives students a strong connection to new content through the movement and manipulation of body and external objects. Activities help students create cognitive connections for easy recall and comprehension. • Musical/Rhythmic intelligence centers around melody, tune, pitch, rhythm, and patterns found in types of music or cadence. For some students, music presents an environment that fluctuates from peaceful to highly energetic.
B.1.7 Inquiry-based learning Figure 1: Inquiry Based Learning When people uncover uncertain, curious, or interesting phenomena in life, questions naturally arise that encourage quests for answers. Inquiry is a natural process that begins as soon as a child starts to experiment with language. As questions are asked, the answers often lead to more questions. This begins a cycle of inquiry for learning. In education, instructors refer to this process as "inquiry-based learning" or "problem-based learning".
Web Links Big Rocks and Powerful Kingdoms Personal Learning in Science and Social Studies: http://www.ascd.org/readingroom/classlead/9911/2nov99.html Using the Internet to Promote Inquiry-based Learning: http://www.biopoint.com/msla/links.html Project Based Learning: What is it?: http://www.4teachers.org/projectbased/ B.1.
• Be sensitive to background noise in the lab. Turn radios, cell phones, and televisions off during work times. If background noise is unavoidable with online learning, instruct hearing impaired students to use ear phones to keep extraneous noise to a minimum. • Get close to the students when speaking. • Stress the importance of only one person talking at a time during group work. • Initiate conversations with students by specifically calling their names.
B.1.9 Learning disabilities Figure 1: Learning Disabilities Instructors will probably have a few students with learning disabilities in their classes. The following list summarizes some approaches to teaching students with learning disabilities. Many of these suggestions also apply to students without learning disabilities: 178 - 238 • Engage the students with lesson starters that illicit emotion and feelings. This introduction to learning instructs the brain to pay attention.
• Use visual advance organizers to introduce new concepts, analyze, and synthesize levels of comprehension. Organizers prepare the brain for the arrival of new content. This technique builds upon existing knowledge to facilitate the acquisition of new knowledge. • Use humor, which is a powerful stimulant to the brain. The mind easily latches onto the silly and unimaginable. • Use movement and action.
B.2 Lab-Centric Instruction B.2.1 CCNA labs The CCNA curriculum teaches students how to plan, design, install, operate, and troubleshoot TCP/IP, Ethernet, routed, and switched networks with some remote connectivity. The CCNA curriculum consists of four courses: • Networking Basics • Routers and Routing Basics • Switching Basics and Intermediate Routing • WAN Technologies The curriculum is lab intensive. Approximately 50 percent of all class time is spent on lab exercises.
The required lab equipment for CCNA 4 includes workstations, hubs, switches, and routers. Optional WAN simulation equipment is also recommended. Students acquire lab skills in the following WAN technology areas: • PPP • ISDN • Frame Relay Students also must pass a comprehensive lab-skills exam as part of this course. Standard and premium lab bundles are available. A variety of optional bundles are also available. The student-to-equipment ratio should be as low as possible.
B.2.2 CCNP labs Figure 1: CCNP Labs The CCNP curriculum teaches students how to plan, design, install, operate, and troubleshoot enterprise-level TCP/IP, Ethernet, routed, and switched networks with substantial remote access. The CCNP curriculum consists of four courses: • Advanced Routing • Remote Access • Multilayer Switching • Network Troubleshooting The curriculum is lab intensive. Approximately 50 percent of all class time spent on lab exercises.
• Implement advanced IP address management techniques • Configure and test the EIGRP, OSPF, and BGP routing protocols, which help make most enterprise Intranets and the Internet possible The required lab equipment for CCNP 2 includes workstations, routers, switches, and a WAN simulator. CCNP 2 students acquire lab skills such as the following: • WAN design • Dial-up, point-to-point, ISDN, Frame Relay, and X.
B.2.3 NETLAB Figure 1: NETLAB Many educators are interested in remote access to shared lab equipment to give students more access to hands-on experiences. Remote access technologies can be used in courses such as the CCNA, CCNP, and sponsored curriculum to help lower student-to-equipment ratios in distance-learning situations. These technologies are currently fully implemented only for the CCNA courses.
Students will usually access the equipment in the evening or on the weekends from their homes or another location with Internet access. Some instructors may choose to implement use of the NETLAB system within the classroom. This is especially useful when students are just beginning to learn new configuration tasks. Instructors can use the instructor-led lab features of NETLAB to lead the class through a lab.
B.2.4 Simulations Figure 1: Simulations Research indicates that learning is more extensive when content is interactive and provides instant feedback. The Academy curriculum contains a variety of interactive Flash activities. One class of these activities is simulation. Examples of simulations are content items, such as, command-line interfaces (CLIs), graphical user interfaces (GUIs), and programming language development environments. Figure 1 shows a simulation activity from the UNIX curriculum.
• Simulation – The third level is called simulation. This is the most open-ended environment. This level is not scripted. Therefore, it supports a wide variety of hardware and software behavior. For command-line interfaces such as IOS or UNIX, many commands can be issued in any order. The best example of this third level simulation environment is eSIM, which is available and free to all CCNA and CCNP students.
Figure 2: Sponsored Curriculum Labs Figure 3: Sponsored Curriculum Labs 188 - 238 CCNA 2: Routers and Routing Basics v3.1 Instructor Guide – Appendix B Copyright © 2004, Cisco Systems, Inc.
The six sponsored curricula also require dedicated labs and a variety of hardware and software. They are summarized in the following sections: IT Essentials: PC Hardware and Software IT Essentials PC Hardware and Software, which is sponsored by Hewlett-Packard Company, presents an in-depth exposure to computer hardware and operating systems. Students learn the functionality of hardware and software components and the suggested best practices for maintenance and safety issues.
• Laboratory safety • On-the-job safety • Working effectively in group environments Fundamentals of UNIX Fundamentals of UNIX, which is sponsored by Sun Microsystems, provides students with the following: • Ability to use UNIX operating system commands • Hands-on experience with basic Sun Microsystems SolarisTM operating environment commands • Introduction to the Common Desktop Environment (CDE), which is the graphical interface between different environments This class is intended for new users
longer delivery model or some pre-selection and screening of students. About half of the course time is spent on the instructor-facilitated online multimedia material and the rest is spent on lab exercises. Web Links Instructor Community: New Courses: http://cisco.netacad.net/cnacs/prot-doc/new_courses.html 191 - 238 CCNA 2: Routers and Routing Basics v3.1 Instructor Guide – Appendix B Copyright © 2004, Cisco Systems, Inc.
B.2.6 Emerging technologies Figure 1: PIX Firewall PhotoZoom Figure 2: IP Phone 192 - 238 CCNA 2: Routers and Routing Basics v3.1 Instructor Guide – Appendix B Copyright © 2004, Cisco Systems, Inc.
Figure 3: Wireless LAN In the future, new technologies such as network security, IP telephony, and wireless LANs may be the basis for Academy courses. Each of these courses will have an associated lab bundle, which will allow for the successful implementation of the labs. The goal of these course will be to train professionals who can implement network security , IP telephony , wireless LANs , and other networking technologies. Web Links Network security issues: http://cisco.
B.2.7 Troubleshooting Figure 1: Steps in the Problem-Solving Model Troubleshooting is a form of educational inquiry that is necessary in most Academy courses, even if it is not formally taught. There are literally over a hundred approaches to troubleshooting. Figure shows one approach. This is the preferred method for Cisco courses. Instructors may use their own preferred method. Troubleshooting and debugging skills are necessary for students who seek further education and employment in the IT industry.
• Provide opportunities for students to practice diagnosis and repair Web Links Teaching Methods Web Resources: http://www.mhhe.com/socscience/education/methods/resources.html The Universal Troubleshooting Process (UTP): http://www.troubleshooters.com/tuni.htm Journal of Technology Education: http://scholar.lib.vt.edu/ejournals/JTE/v2n2/html/deluca.html 195 - 238 CCNA 2: Routers and Routing Basics v3.1 Instructor Guide – Appendix B Copyright © 2004, Cisco Systems, Inc.
B.3 Project-based Instruction B.3.1 Challenges and projects Figure 1: Challenges and Projects NetDay challenges are problem-based labs or projects that are advocated by AAAS Project 2061, which is a science education reform project. Unlike step-by-step labs, these exercises encourage students to develop their own solutions to various problems or challenges. The challenges vary in content and duration ranges from 50 minutes to 3 weeks. These challenges consist of two basic parts.
A NetDay occurs when a community volunteers time to wire a school. It is a popular type of community project that involves students, parents, network administrators, and others who work together to get students connected to the Internet. Academy students participate in numerous NetDays. Another example of a community project was developed by the Cisco Academy of South West Ohio (CASWO). This Academy and its students provided technical support for the annual Ohio SchoolNet Technology Conference.
B.3.2 Design activities Figure 1: Dartmouth Problem-Solving Cycle Design is an iterative process that starts with brainstorming. From there, it proceeds through research and problem-solving matrices and design specification tests. Multiple repetitions of this process are required until an adequate solution to a problem is achieved. Any Academy curriculum with projects or design activities allows instructors to introduce elements of the Dartmouth Problem-Solving and Design Method.
students will be able to use the lessons learned from failed problem-solving attempts to save time when they try to solve new problems. Chapter 5, Research, Documentation, and Testing, is a good resource for students to learn how to conduct site surveys, keep work logs, produce engineering reports, and create portfolios. Web Links Dartmouth Problem-Solving and Design Method: http://thayer.dartmouth.edu/teps/index.html 199 - 238 CCNA 2: Routers and Routing Basics v3.
B.3.3 Brainstorming Figure 1: Cluster Diagram Brainstorming techniques can be useful for teaching IT curriculum. These techniques can be applied to areas such as introductions to new topics and integral parts of design work, Figure 1 shows some responses to the question, "What does the word 'network' mean?" There are four simple rules for this brainstorming activity: • The wildest possible ideas are accepted. • There will be no censorship of ideas. • The instructor wants a high quantity of responses.
SCAMPER involves a series of questions related to a new process or concept.
B.3.4 Case studies Figure 1: Case Studies Case study teaching methods have become more important in many professions such as law, medicine, and business. Case studies that are specified in the course or instructor-developed can be used to integrate many concepts throughout the Academy curricula. Figure 1 shows a case study from the CCNP curriculum. The International Travel Agency is a fictitious business for which a CCNP certified individual might be asked to provide network services.
Web Links Use of Master Classroom Technology to Implement a Case Study Approach to Learning: http://www.mtsu.edu/~itconf/papers96/MASTER.HTM Case Study Teaching in Science: A Bibliography: http://ublib.buffalo.edu/libraries/projects/cases/article2.htm 203 - 238 CCNA 2: Routers and Routing Basics v3.1 Instructor Guide – Appendix B Copyright © 2004, Cisco Systems, Inc.
B.3.5 Web research Figure 1: Cisco.com The Internet has a tremendous amount of resources for people who want to understand or install networks. Students can also research products, answer questions, or perform extension activities. Academy students are encouraged to use the links built into the Instructors Guide or their favorite websites. The online documentation for Cisco Systems, Sun Microsystems, HP, Panduit, and other sponsors is particularly important.
B.4 Instructional Strategies B.4.1 Instructor-led classrooms Figure 1: Instructor-Led Classrooms The instructor-led style of instruction is currently the most commonly used approach. Academy instructors must communicate information to students based on required competencies and performance objectives. Instructor-led environments allow instructors to cover specified subject matter with a large group or small group of students at the same time.
Studies have found that relatively short, engaging lectures that include demonstrations are excellent adjuncts to the online curriculum and lab activities. 206 - 238 CCNA 2: Routers and Routing Basics v3.1 Instructor Guide – Appendix B Copyright © 2004, Cisco Systems, Inc.
B.4.2 Self-paced instruction Academy courses implement self-paced instruction and learning strategies. In self-paced instruction, students learn new content at a speed of comprehension that best fits their learning style. The content is presented in modules, which are chunks of information that fit together into a comprehensive whole. Modules are effective because they allow students to acquire new knowledge in manageable pieces. This method of teaching and learning is used in online environments.
B.4.3 Cooperative/collaborative work Cooperative work occurs when students work in groups for extended periods of time. Students work together for the benefit of all group members. Research shows that cooperative learning environments stimulate cognitive activities in the areas of higher-order thinking, problem solving, and collaboration. Students who work in cooperative group situations reach objectives and goals with better accuracy than if they work individually on a task.
The student roles within the group may be formal and assigned, or informal and unassigned. A formal or assigned role may be a leader, a speaker, a note taker, a summarizer, or a timekeeper. In informal groups, roles may be unassigned but naturally assumed by members of the group. Some group activities will not require the group members to assume any specific roles. Teams A team usually has a specified purpose and consists of three to ten members.
• Student-led discussions • Demonstrations • Presentations Web Links Teaching Strategies: Group Work and Cooperative Learning: http://www.crlt.umich.edu/tstrategies/tsgwcl.html Enhancing Student Thinking through Collaborative Learning. ERIC Digest: http://www.ericfacility.net/ericdigests/ed422586.html 210 - 238 CCNA 2: Routers and Routing Basics v3.1 Instructor Guide – Appendix B Copyright © 2004, Cisco Systems, Inc.
B.4.4 Jigsaws Figure 1: Jigsaw Puzzle The teaching and learning strategy known as the expert jigsaw was configured by Elliot Aronson in the late 1970s. This strategy asks students to explore new information within the dynamics of a group setting. Cooperative group skills are a prerequisite for this type of learning. Students are divided into three groups, which are called home groups. Each group is assigned a number or a name. The content to be learned is broken into three sections.
B.4.5 Ask the right questions Figure 1: Ask the Right Questions In classrooms and labs across the United States, students are typically given questions that test their low-level and high-level cognitive abilities. Instructors who ask low-level questions expect students to respond with basic recall of facts and comprehension based on information they heard in a lecture or read from the curriculum.
second to beyond 3 seconds, the following significant improvements in classroom dynamics occurred: • Longer responses by students • More participation by more students with more confidence • Increase in student-to-student interactions • More questions asked • Improvements on complex assessments • Better classroom management Instructors who use question and answer techniques to teach networking should increase the wait time to see if student learning improves.
B.4.6 PMI Figure 1: PMI Many of the best instructional strategies help students think about their thought processes, or engage in metacognition. Other strategies encourage students to use knowledge in new and innovative ways. There are many strategies that are currently implemented in classrooms. This section will discuss three methods that are linked to easily-understood instruction, which encourages higher student achievement. The first method is called Plus, Minus, Interesting (PMI).
B.4.7 Graphic organizers Figure 1: Cluster Diagram Figure 2: Problem-Solving Matrix 215 - 238 CCNA 2: Routers and Routing Basics v3.1 Instructor Guide – Appendix B Copyright © 2004, Cisco Systems, Inc.
Figure 3: Flowchart Figure 4: Block Diagrams 216 - 238 CCNA 2: Routers and Routing Basics v3.1 Instructor Guide – Appendix B Copyright © 2004, Cisco Systems, Inc.
Figure 5: Extended Star Topology in a Multi-Building Campus Figure 6: Main Building First Floor 217 - 238 CCNA 2: Routers and Routing Basics v3.1 Instructor Guide – Appendix B Copyright © 2004, Cisco Systems, Inc.
Figure 7: Digital Signal Figure 8: Spectrum Diagram of a Voltage versus Frequency Graph 218 - 238 CCNA 2: Routers and Routing Basics v3.1 Instructor Guide – Appendix B Copyright © 2004, Cisco Systems, Inc.
Figure 9: Data Encapsulation Figure 10: Ethernet and IEEE 802.3 Frame Format 219 - 238 CCNA 2: Routers and Routing Basics v3.1 Instructor Guide – Appendix B Copyright © 2004, Cisco Systems, Inc.
Figure 11: Local Area Networks and Devices Figure 12: Wide Area Networks and Devices Advanced organizers can be used to tap into the prior knowledge of students. There are many forms of advanced organizers such as exposition, narratives, and graphics. Graphic organizers are shown in Figures through . These methods were publicized by a psychologist named David Ausubel in the late 1960s.
Cluster diagrams help students generate and organize thoughts. When students brainstorm, a question or concept is put in the center of a cluster and all of their ideas are added to the cluster. Similar ideas are grouped together. Cluster diagrams are also used as concept maps or to present course material to students. They can also be used to assess how well students understand a concept. Problem-solving matrices are a standard part of design documentation.
• Collision • AC • DC • RFI • EMI • Encoding • Transmission errors Web Links David Ausubel: Advance Organizers http://chd.gse.gmu.edu/immersion/knowledgebase/strategies/cognitivism/AdvancedOrganizers .htm 222 - 238 CCNA 2: Routers and Routing Basics v3.1 Instructor Guide – Appendix B Copyright © 2004, Cisco Systems, Inc.
B.4.8 Setting goals Students perform well when they have a plan and access to the necessary resources. The research on goal setting and its impact on learning is impressive. There are certain truths for students who set personal achievement goals. When students set personal achievement goals, they can identify and connect to a greater purpose to reach their goals. Students identify how a goal fits into their future plans through reflection, problem solving, and decision-making.
B.4.9 Kinesthetic activities Figure 1: Kinesthetic Activities Figure 2: Kinesthetic Activities 224 - 238 CCNA 2: Routers and Routing Basics v3.1 Instructor Guide – Appendix B Copyright © 2004, Cisco Systems, Inc.
A kinesthetic activity refers to the movement of the body to act out or communicate something. The kinesthetic activities in this section demonstrate the networking process. These exercises are also known as role-playing activities or skits. They help students understand complex and normally invisible processes. Kinesthetic activities can be a helpful way to introduce basic IT concepts. Most IT courses require knowledge of binary arithmetic. Figures and show an activity that can be done with eight students.
B.5 Assessment Strategies B.5.1 Review strategies Most lessons contain review questions that pertain to content from the previous lesson. Strategies for the use of review questions can be selected from the following list: • Individual students answer review questions on their computers. • Pairs of students discuss and answer review questions on their computers. • Pairs or small groups of students discuss and answer review questions before each student completes the review.
B.5.2 Journals and reflection An effective evaluation practice for students is to write in journals and reflect on academic experiences. Students can document their individual learning process and highlight important concepts. A learning log asks students to document their learning steps and indicate what is clear, what confuses them, and what they would like to learn more about. This provides important information about how students interact with, and process, new content.
• Progress Throughout the year, students should review their reflections and acknowledge the growth in their comprehension. Prior to a reporting period, students should write a brief paper that explains their growth in knowledge and the skills they acquired in the preceding weeks.
Web Links Student Reflection Questions: http://pblmm.k12.ca.us/PBLGuide/PlanAssess/StReflectionQuestions.html 229 - 238 CCNA 2: Routers and Routing Basics v3.1 Instructor Guide – Appendix B Copyright © 2004, Cisco Systems, Inc.
B.5.3 Rubrics Figure 1: Grading Rubric Sample Another good instructional practice is the use of rubrics as a form of assessment. A rubric allows criteria to be established for outcomes that are acquired through individual or group projects. Levels of success and quality are identified at different levels of a predetermined scale. Quantitative data can be associated with each level of performance.
Rubrics that are developed by both students and teachers can help students organize and prepare for learning through advance knowledge of their assessment expectations. It also allows students to contribute to the development of the grading scale for their performance labs or activities. Web Links RUBISTAR: http://rubistar.4teachers.org/ Rubrics and Assessments: http://home.socal.rr.com/exworthy/rubric.htm 231 - 238 CCNA 2: Routers and Routing Basics v3.
B.5.4 Portfolio A portfolio is an example of authentic assessment. As students complete major presentations or networking projects, they save them in a portfolio. A portfolio of accomplishments must be presented before many companies will hire an individual. Portfolios show growth over time and include student reflections on different periods of learning. Academy students might keep a portfolio of their experience in building a network and examples of configurations they created for different scenarios.
B.5.5 Oral exams Figure 1: Oral Exams Figure 2: Oral Exams 233 - 238 CCNA 2: Routers and Routing Basics v3.1 Instructor Guide – Appendix B Copyright © 2004, Cisco Systems, Inc.
Well-planned oral examinations can be powerful learning experiences for students. Careful preparation can minimize the intimidation that is felt by some students. The models for oral exams are usually based on job interviews and graduate school oral exams. A method that works particularly well for groups of diverse students, is to give teams of students the exam questions, answers, and rubrics prior to the exam session. Establish scheduled exam times, which can be after school if necessary.
B.5.6 Lab exams Figure 1: Lab Exams Lab exams are also known as skills exams. These exams give students an opportunity to demonstrate their knowledge of cable and router configuration. Students use cables and routers to assemble a network in a lab. Their performance task is to connect cables and routers so every router can successfully communicate with the other routers. The number of routers to connect will vary based on equipment access.
Web Links Certification Magazine: http://www.certmag.com/issues/aug01/feature_long.cfm CCIE: http://www.cisco.com/warp/public/625/ccie/ 236 - 238 CCNA 2: Routers and Routing Basics v3.1 Instructor Guide – Appendix B Copyright © 2004, Cisco Systems, Inc.
B.5.7 Six lenses Figure 1: Six Lenses In any learning endeavor, certain lenses are indispensable to ensure a high quality experience for students. There are six different perspectives that are supported in the Academy courses: • Equity • Curriculum • Teaching • Learning • Assessment • Technology It is important to ask questions about these factors in all Academy curriculums.
As instructors work through this orientation they are encouraged to revisit these essential questions. In this section, Cisco presented some useful content, tools, and perspectives. Ultimately, instructors should decide what teaching methods are best for their students. 238 - 238 CCNA 2: Routers and Routing Basics v3.1 Instructor Guide – Appendix B Copyright © 2004, Cisco Systems, Inc.